Having issues with ParentVUE? Review our Frequently Asked Questions About ParentVUE
Online Registration Guide
What is ParentVUE?
Synergy has replaced SchoolMAX as the student information system for Prince George's County Public Schools. Families will now use the Synergy ParentVUE portal, in place of the Family Portal, to access important information about their students.
ParentVUE is the portal that allows parents and guardians to view information about their student, including classroom assignments and scores, attendance, transcripts, graduation status and more. In ParentVUE, families can also update their phone numbers and emergency contact information and access the Online Registration (OLR) Application.
What is Online Registration (OLR)?
What is Online Registration?
Online Registration (OLR) is the Synergy module that allows parents and guardians to register their student in a school within Prince George’s County Public Schools. You can enroll a new student, or request an approved transfer for an existing student to another school.
NOTE: To use OLR, you must first have a ParentVUE account. See the Synergy ParentVUE Guide for more information.
NOTE: The enrollment request cannot be approved until all required documentation has been received by the school either electronically or delivered in hard copy to the school.
Accessing Online Registration (OLR)
Accessing Online Registration (OLR)
- Log in to ParentVUE
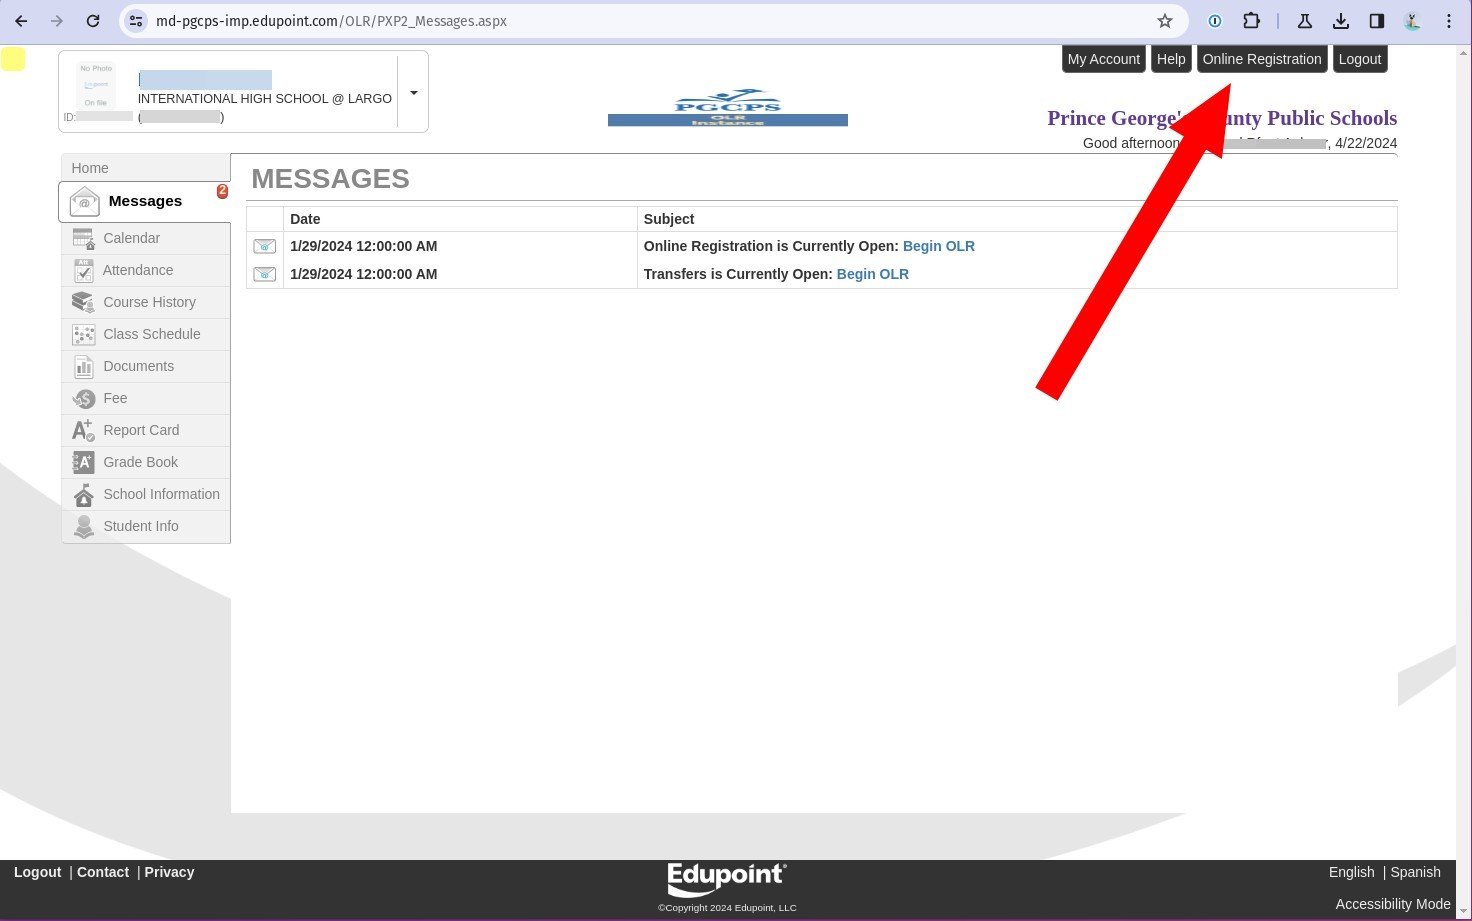
- Click the Online Registration button in the top right corner of the page.
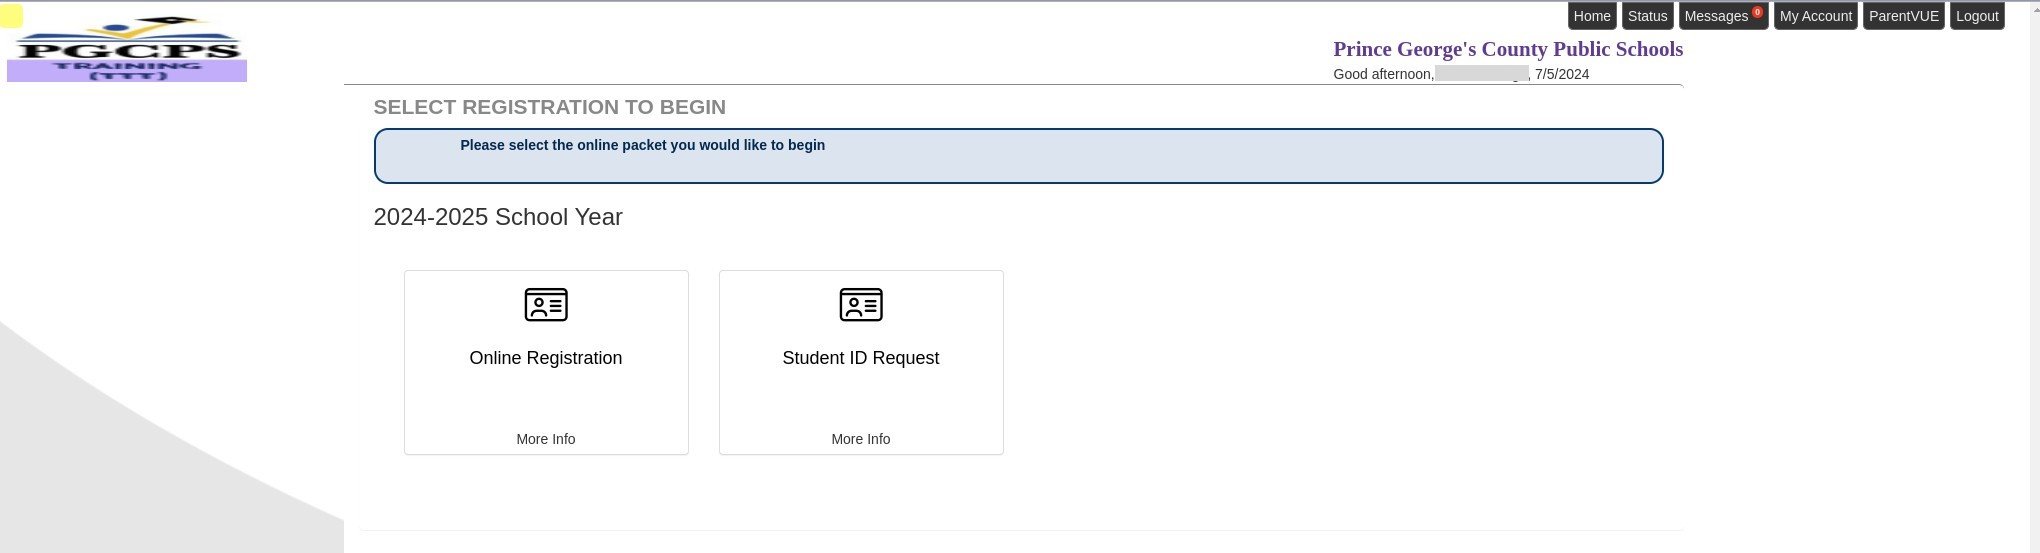
- From the main online registration (OLR) page, you can:
- Enroll a new student
- Request a student ID without enrolling them
Enrolling a New Student
- Select Online Registration
- Family
- Parent/Guardian Information
- Emergency Contact Information
- Students
- Documents
- Review/Submit
- Check Enrollment Request Status
- Student Transfer Requests
Note - The tabs on the left coincide with the tabs in the ParentVUE online registration (OLR) portal.
To enroll a new student who does not currently attend a school in PGCPS log in to ParentVUE and follow the provided steps.
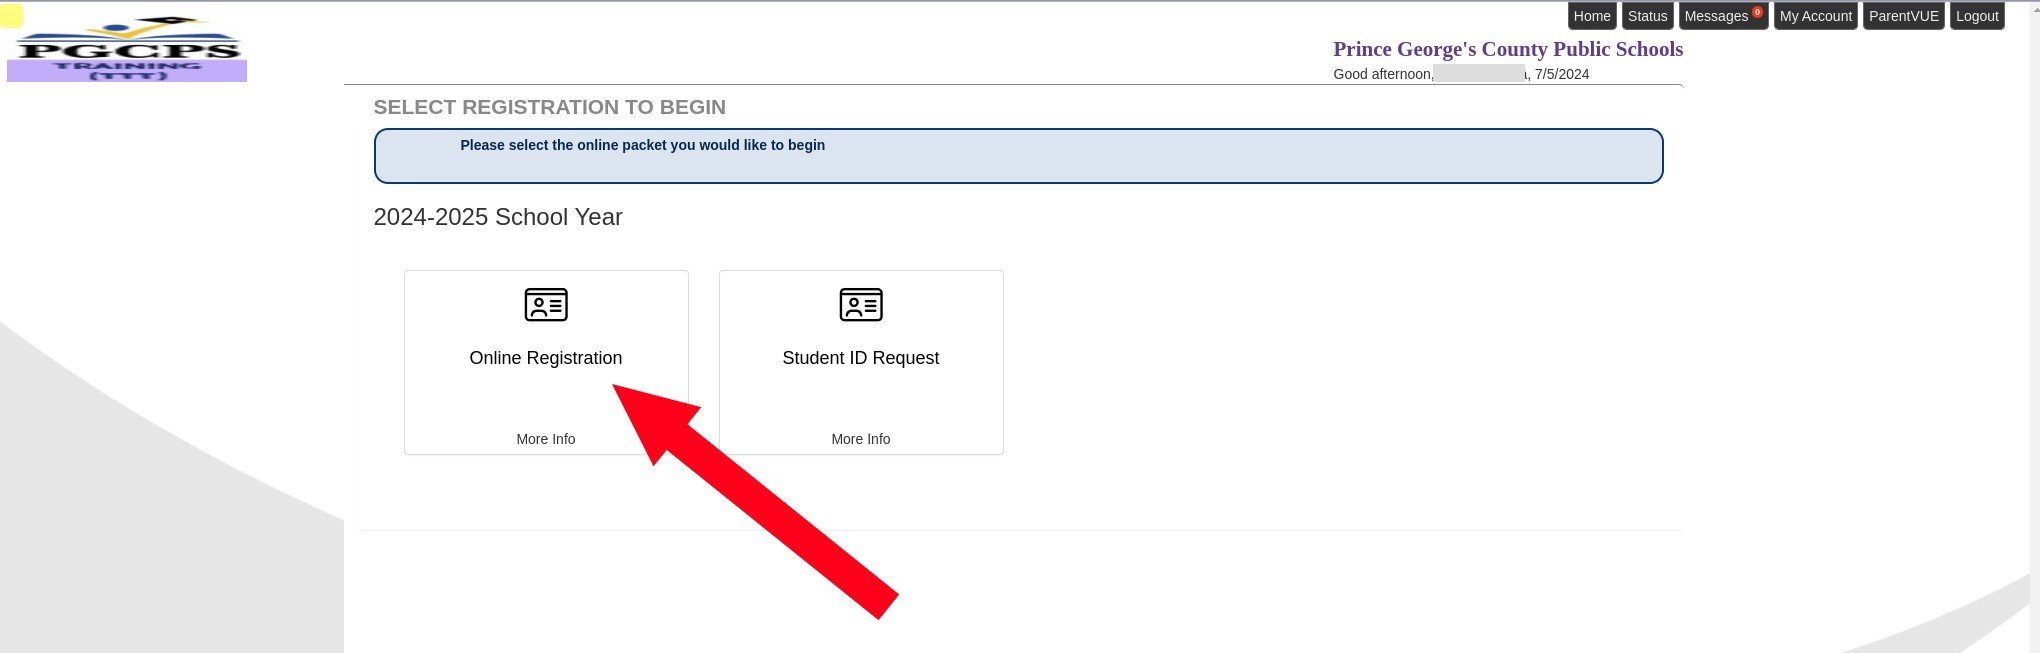
1. Click Online Registration
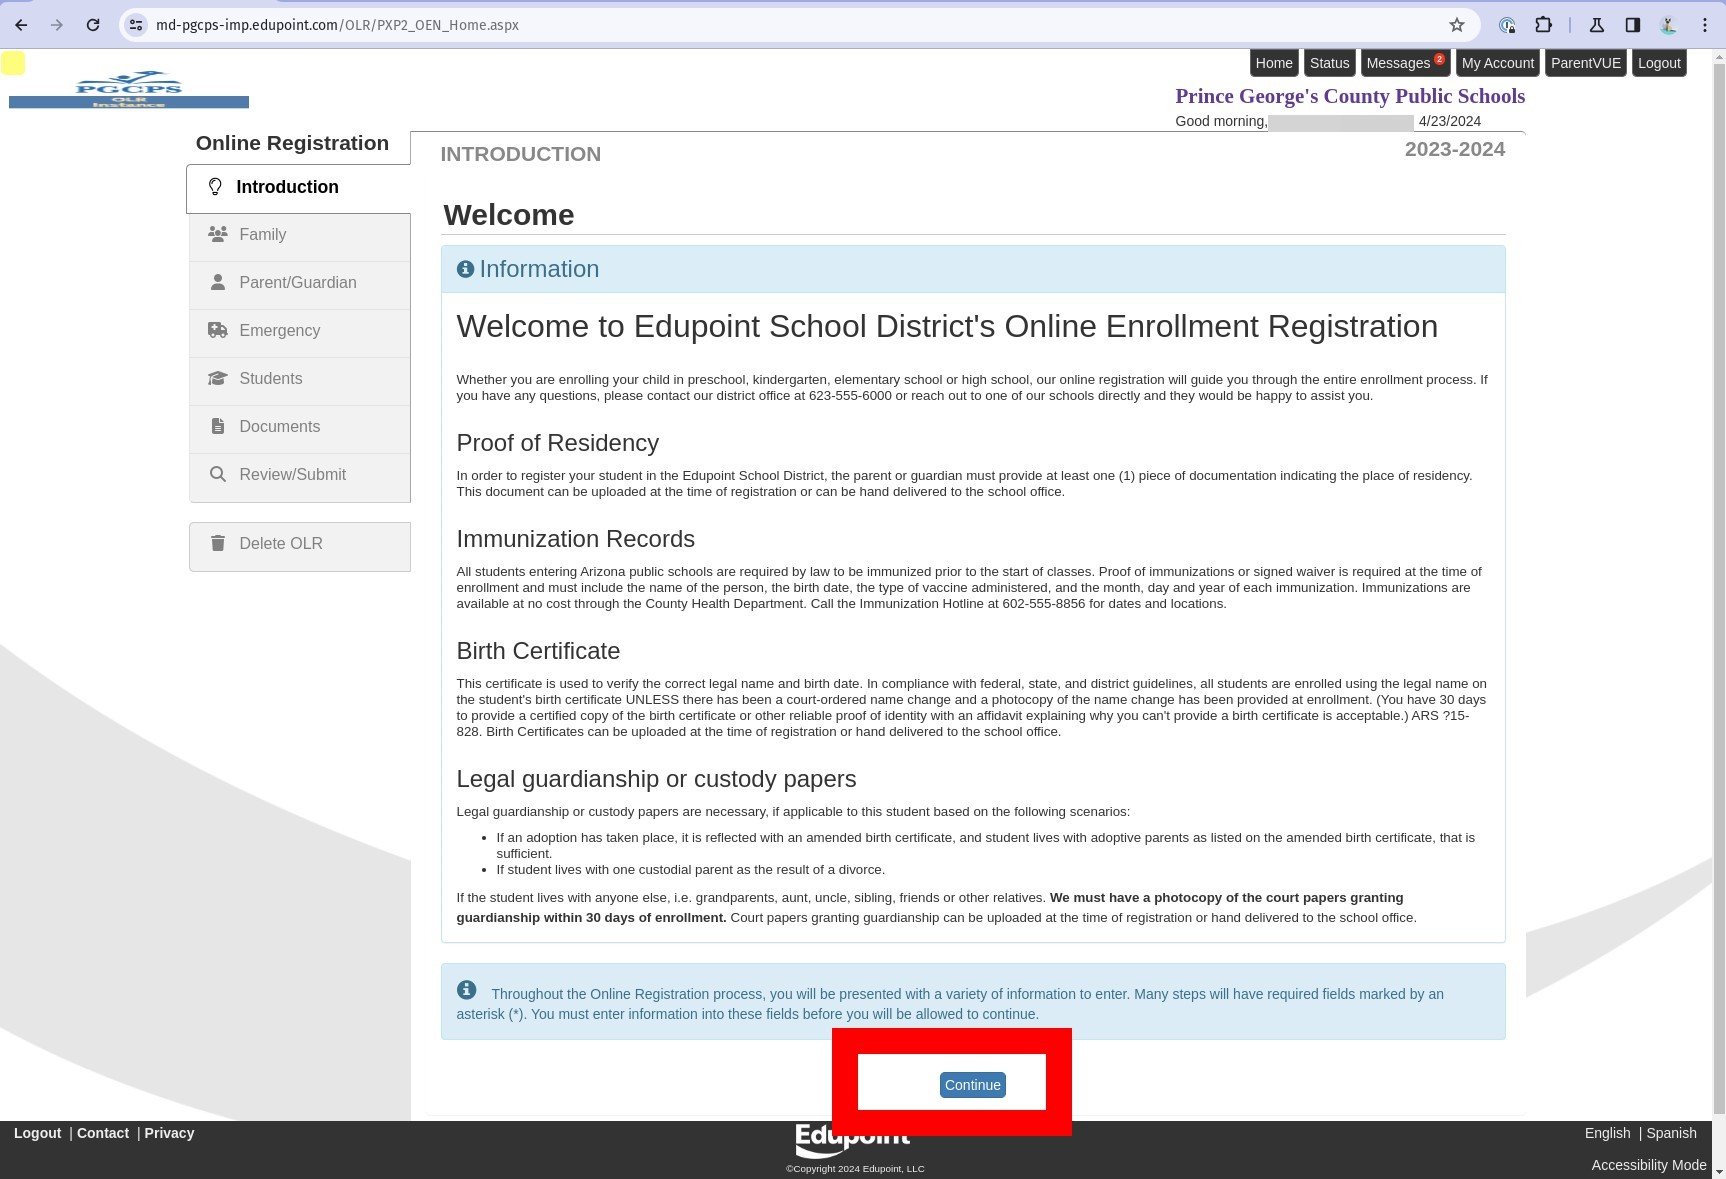
2. Read through the introduction.
3. Click Continue.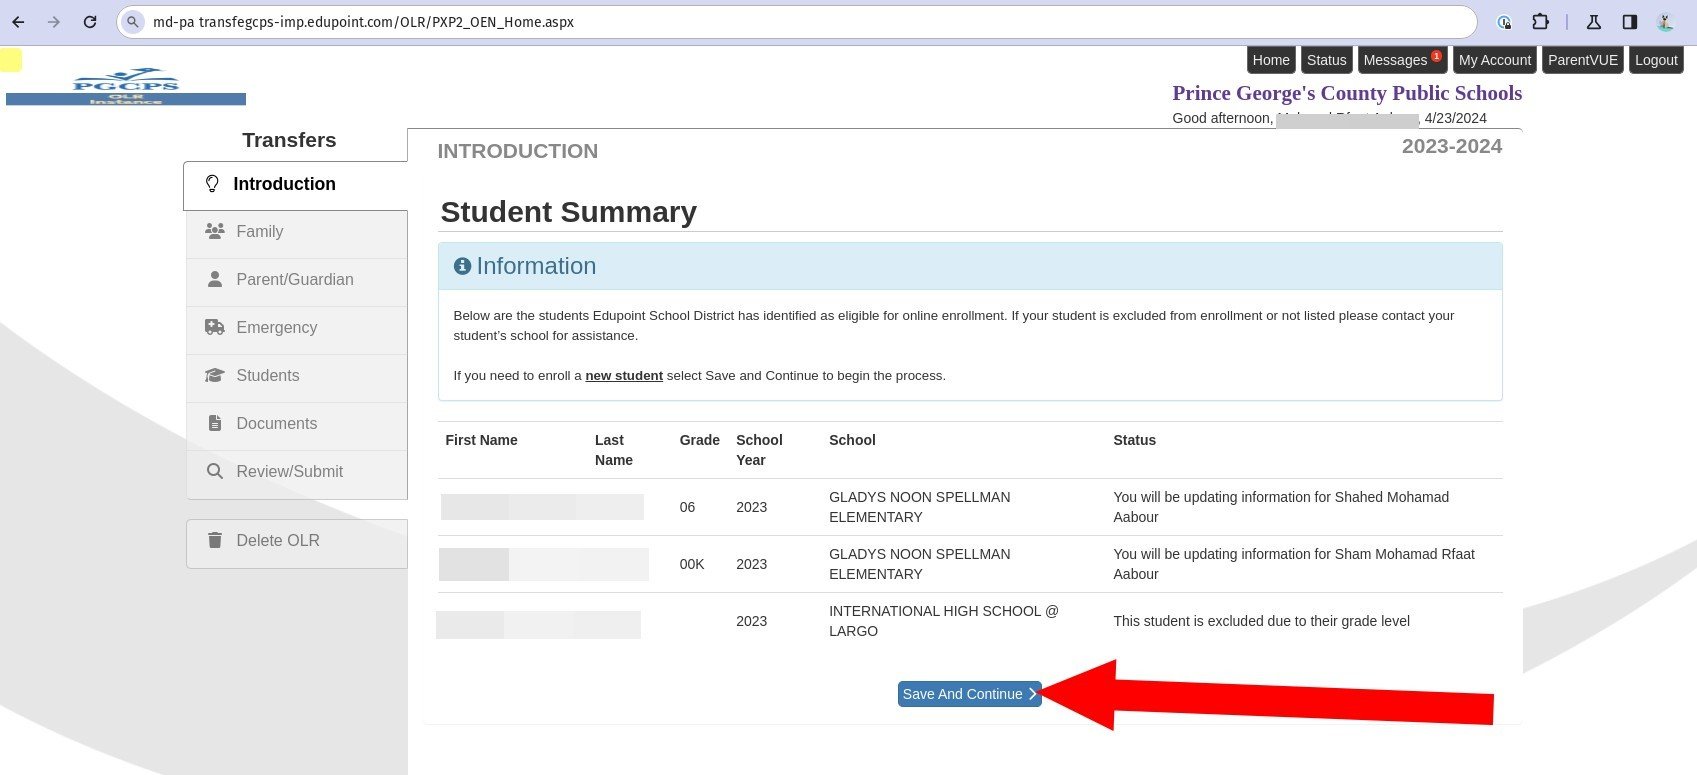
4. If you already have students in the school system, you see them listed on this page. If you don’t have students enrolled in the school system, that section is If you do not see a student that you expected to see, first verify that you correctly followed the steps when activating your ParentVUE account, as described in the “Existing Parents and Guardians” section of the Synergy ParentVUE Guide. If you activated your account using the correct steps, and you still don’t see your student, contact the ParentVUE admin at your student’s school.
5. Click Save and Continue.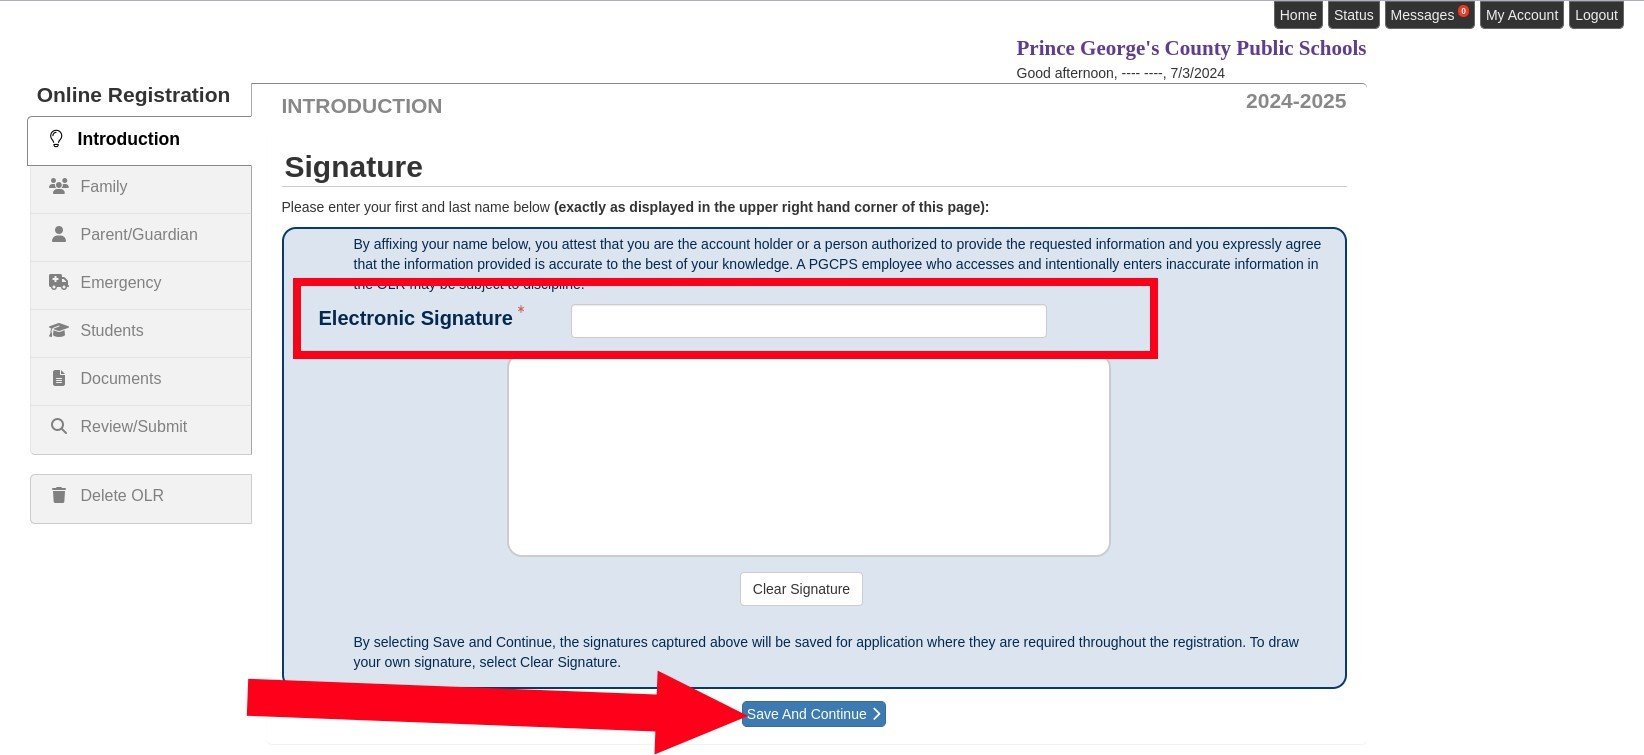
6. Before you begin entering information about the student, you must provide your full legal name in the Electronic Signature text box, which indicates that you agree to the following:
"By affixing your name below, you attest that you are the account holder or a person authorized to provide the requested information and you expressly agree that the information provided is accurate to the best of your knowledge. A PGCPS employee who accesses and intentionally enters inaccurate information in the OLR may be subject to discipline."
NOTE: The signature must match the name on the account.
7. Click Save and Continue.
Enter Family Information
Home Address

8. If you are new to the system, you must enter the first line of the home address in the Home Address search box, then select it from the If the address does not exist in the system, or it is not displayed correctly, you can enter it manually, but it will need to be verified by the Pupil Accounting and School Boundaries office after you submit the enrollment request. If you already have a home address in the system, verify it is up to date. If you need to make changes to an existing address, you can select the Check here if your address has changed checkbox, and search for the current address.
9. Click Save and Continue.
Mailing Address
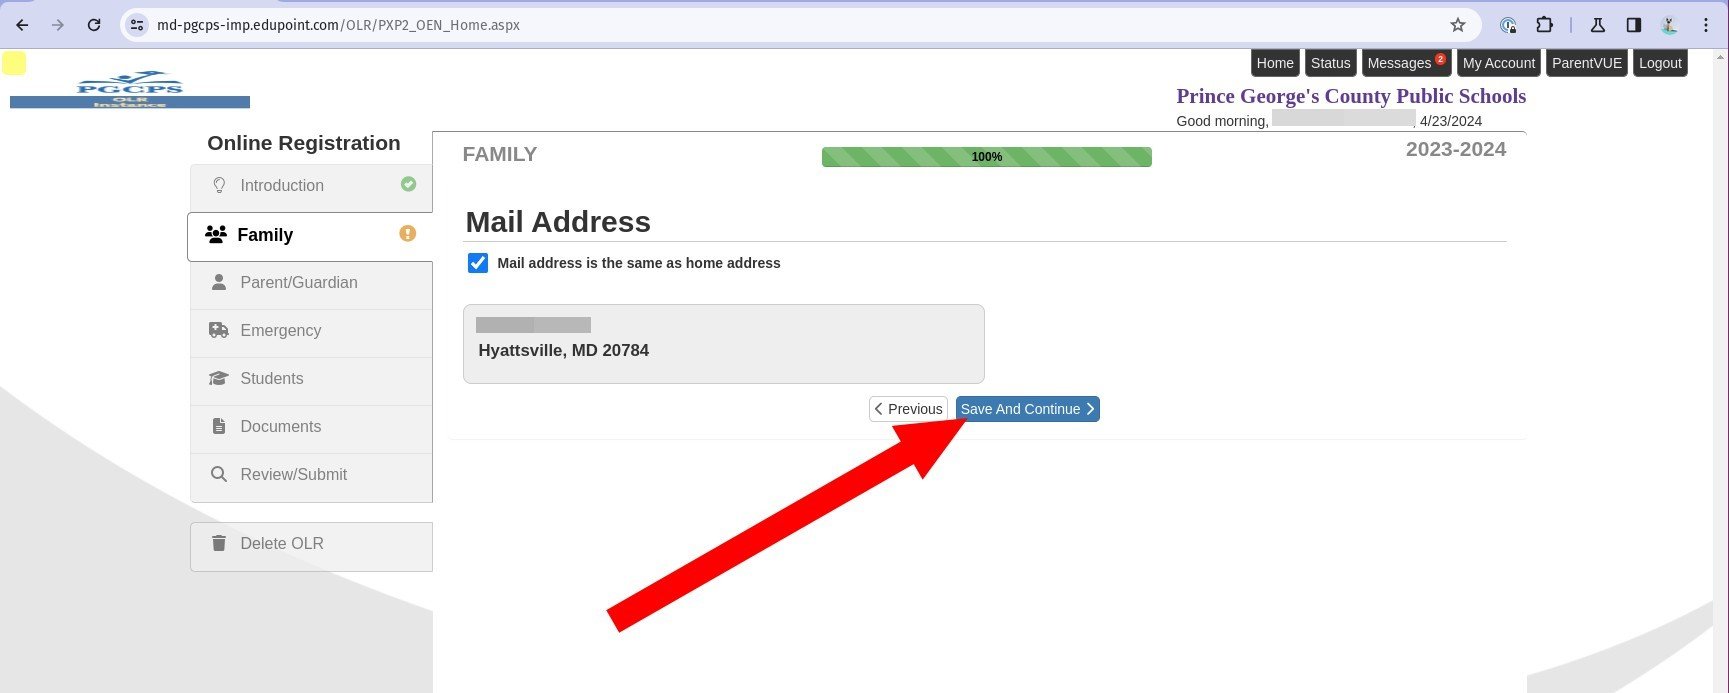
10. Confirm that the mailing address is If you need to change it from the home address, clear the checkbox and you will be prompted to enter a different address.
11. Click Save and Continue.
Enter Parent/Guardian Information
Demographics
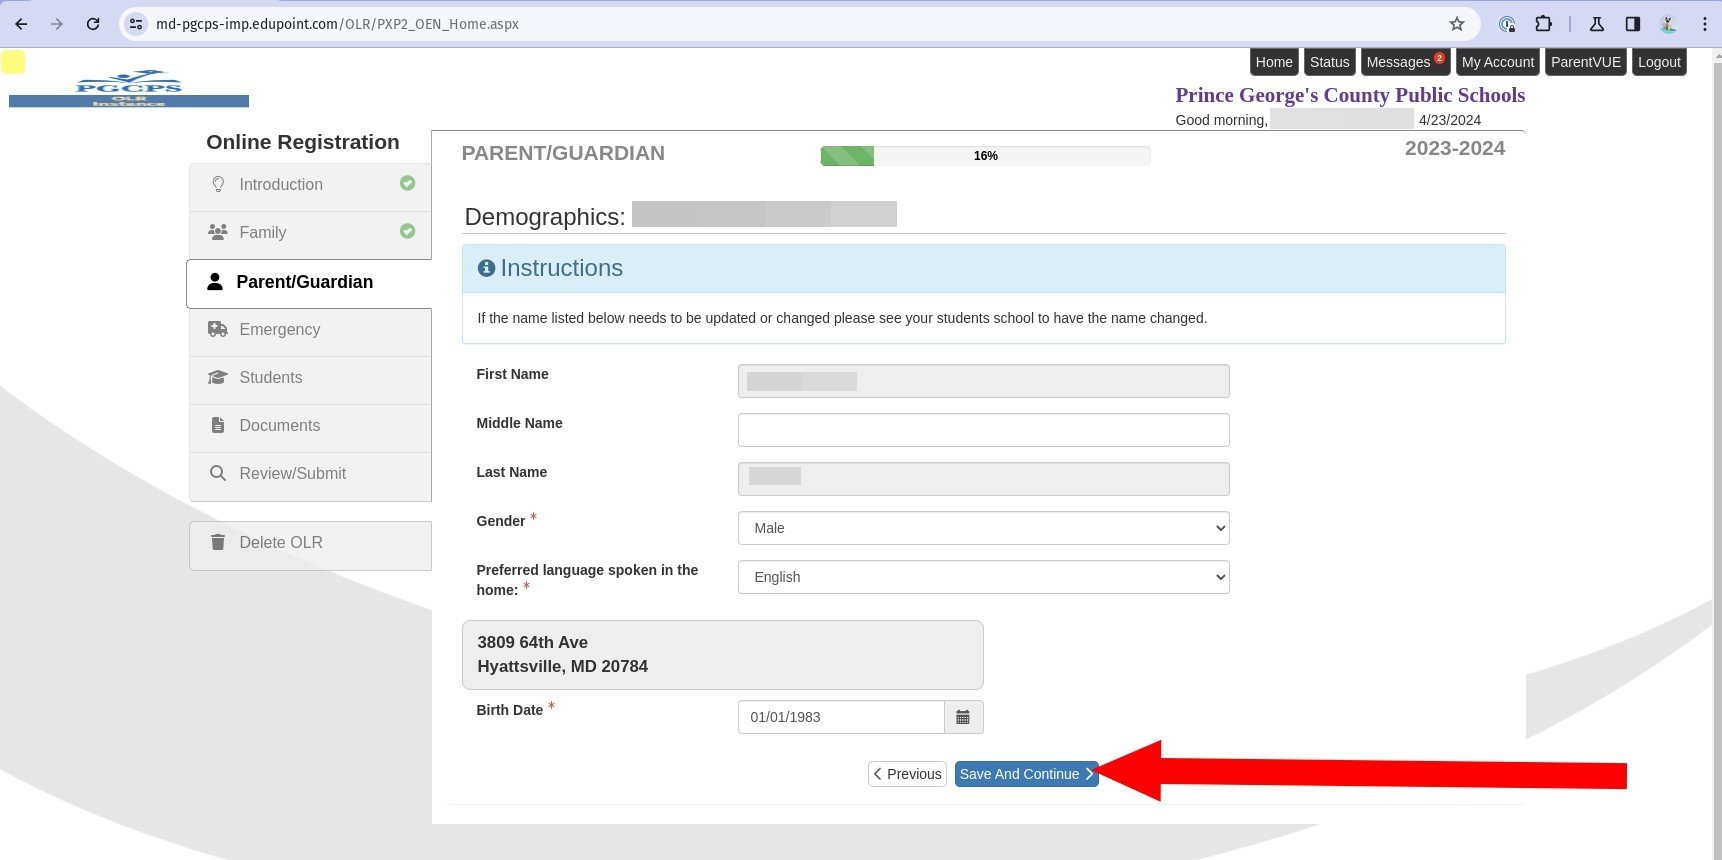
12. Verify that the personal information is Note that if the name is incorrect, you cannot change it here. You must change it as the registrar.
13. Select the Preferred language spoken in the home. Once selected, future communications with the household will be offered in that language whenever If you choose a language other than English, the student’s school will automatically be set to International Student Admissions and Enrollment (ISAEO) to ensure additional support services are available.
14. Click Save and Continue.
Work Information
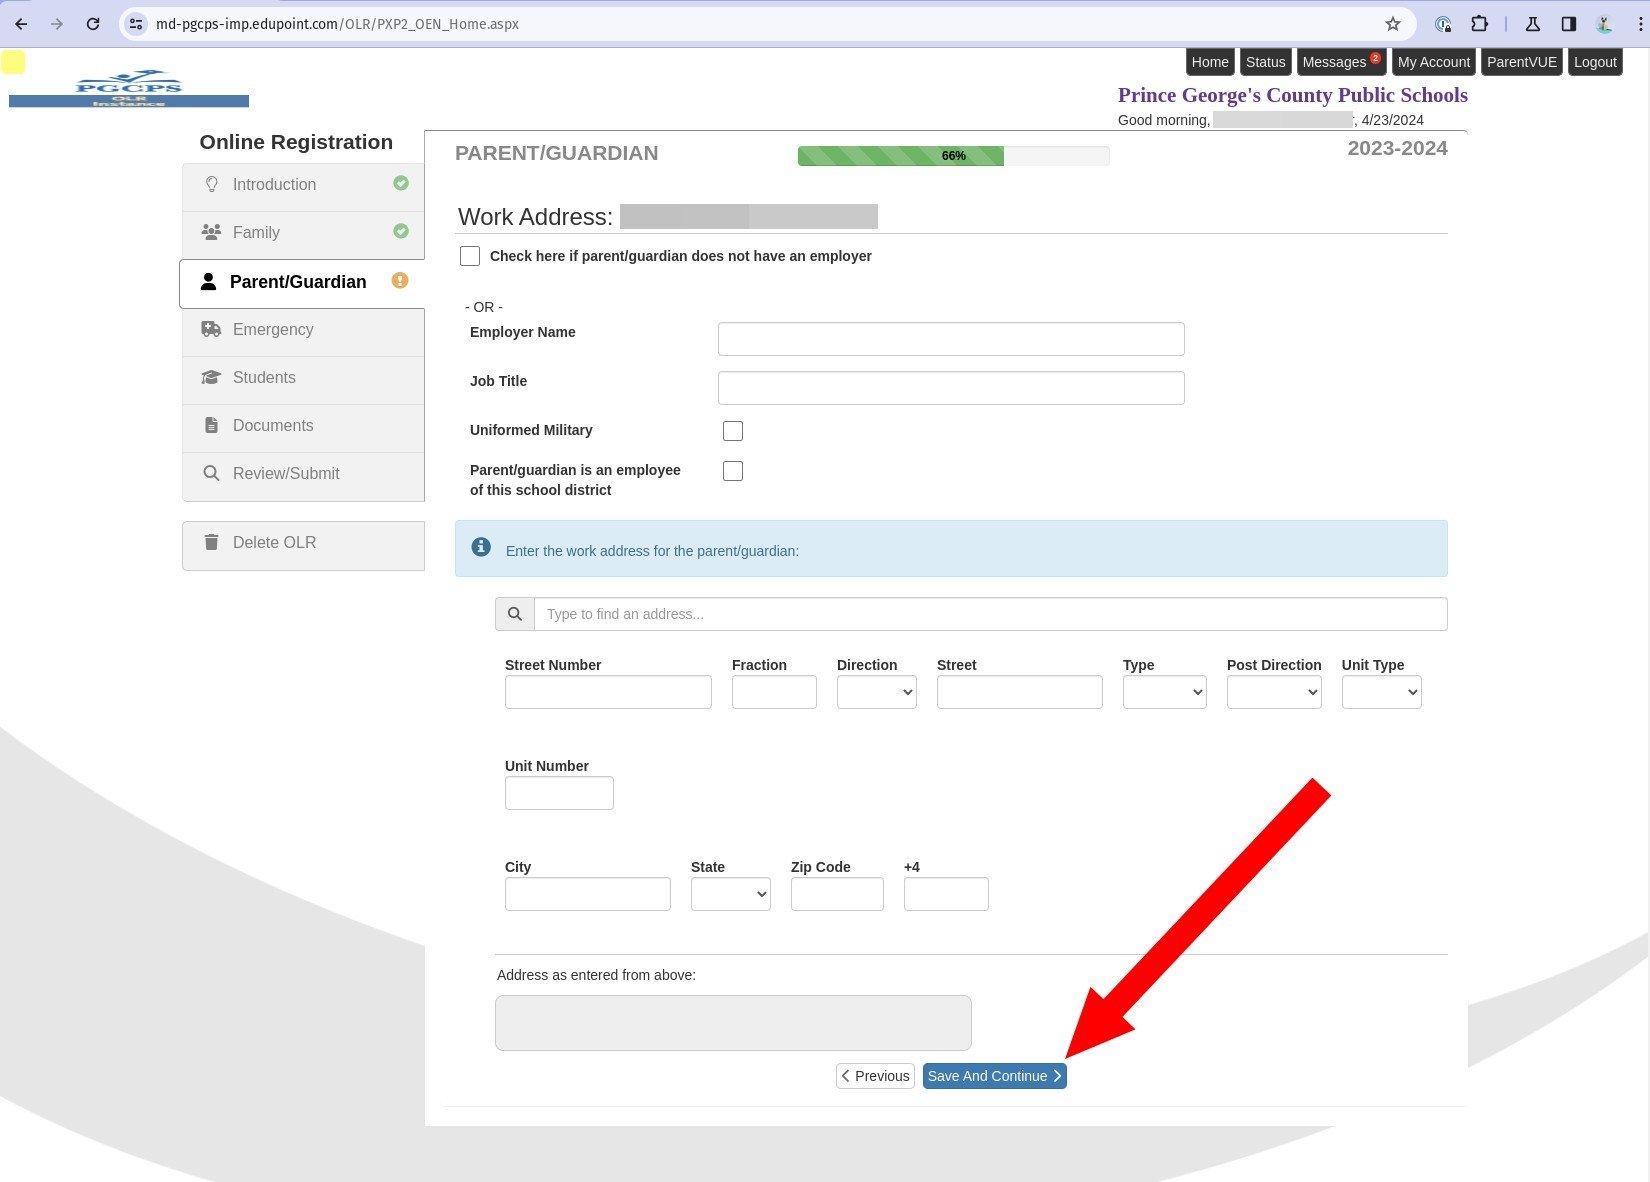
15. Enter the work contact information, or select the checkbox to indicate that they are not currently employed.
16. Click Save and Continue.
Phone Numbers and Email Addresses
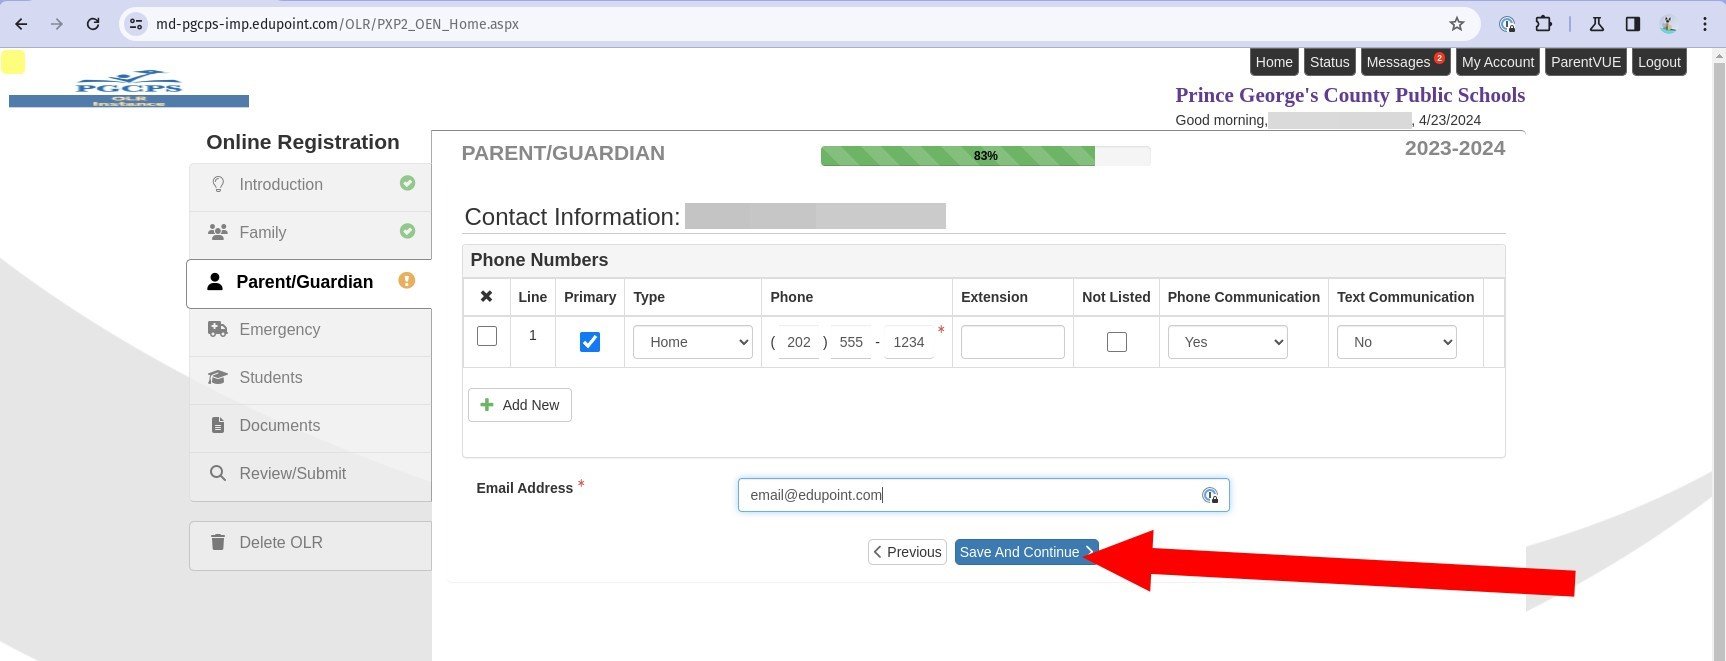
17. Verify or add Phone Numbers. You can indicate whether the recipient wants to receive phone calls, text messages, or both, when the school or district has important announcements such as school closures. One of the phone numbers on your account must be designated as Primary.
18. Verify the Email Address.
19. Click Save and Continue.
Military Service
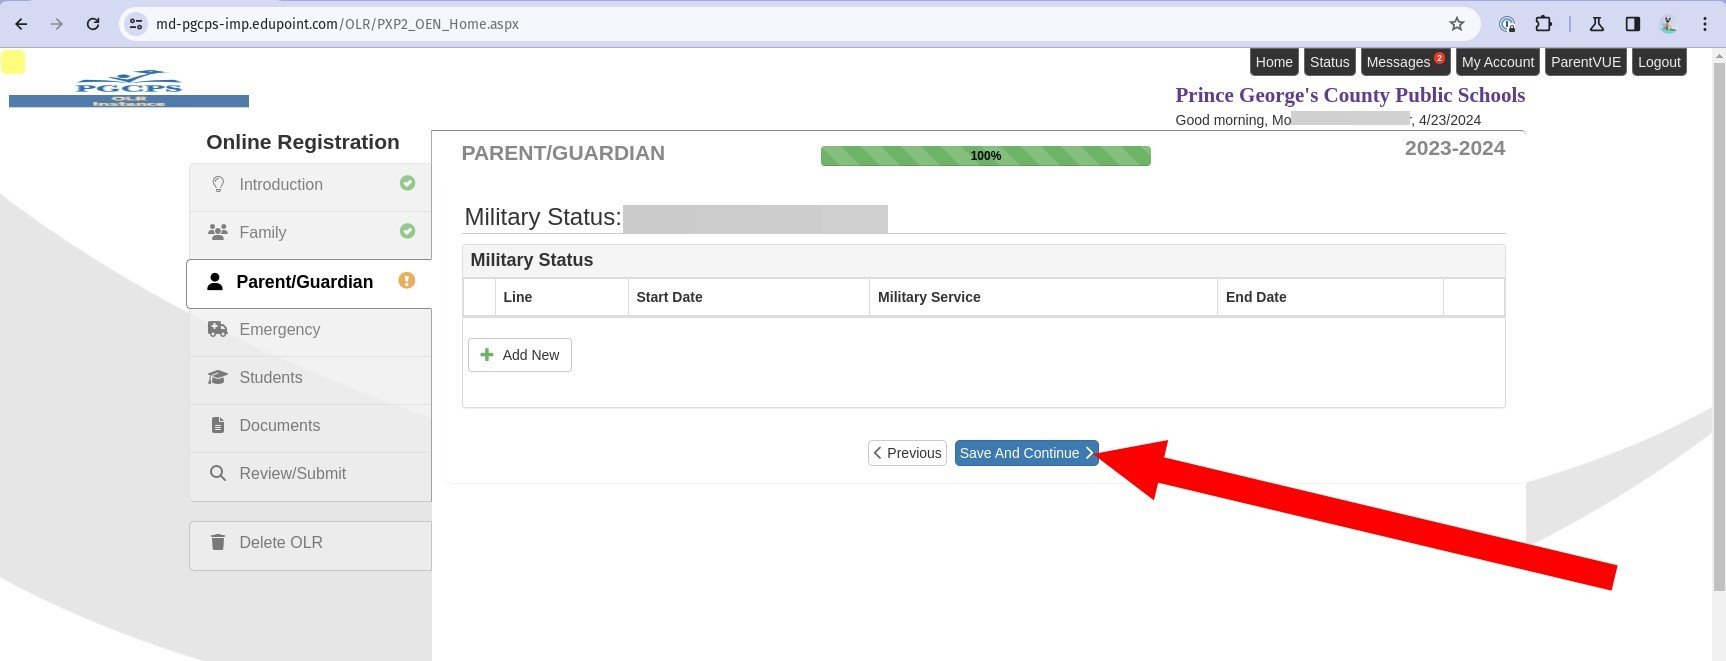
20. If they have Military Service, click Add New to enter it
21. Click Save and Continue.
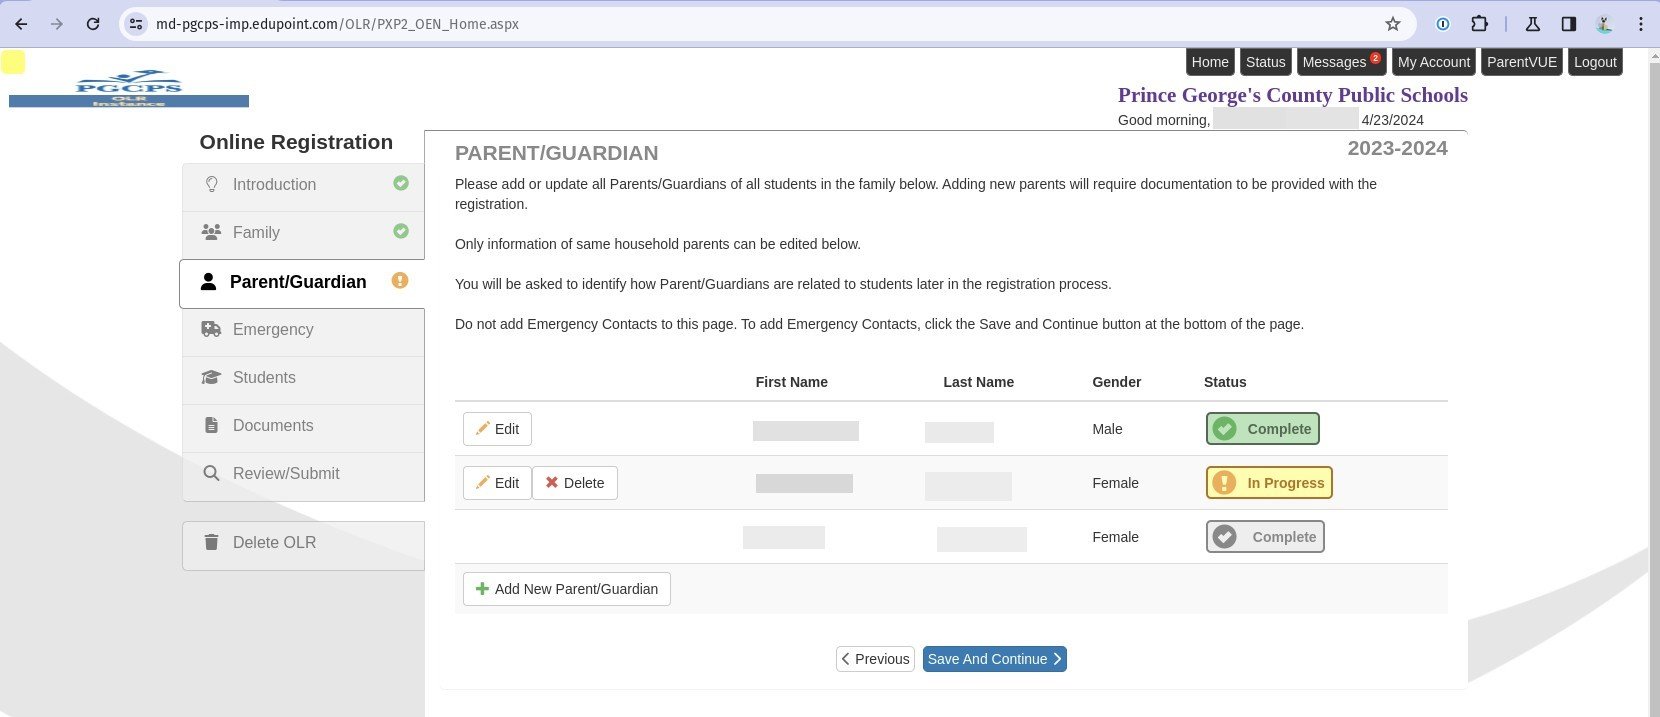
22. Add or update the list of parents and guardians associated with the household. This does not include other emergency contacts, which are added on the next page.
23. To change information about an existing parent or guardian, click the Edit button
24. To add an additional parent or guardian, click Add New Parent/Guardian.
NOTE: Documentation for newly added parents and guardians is required.
25. Click Save and Continue.
Additional Emergency Contacts
26. Add or update information for emergency contacts who are not parents or guardians associated with the household. Emergency contacts must have a phone number, or you will not be able to proceed.
NOTE: You must have at least one emergency contact in order to complete registration.
27. Click Save and Continue.
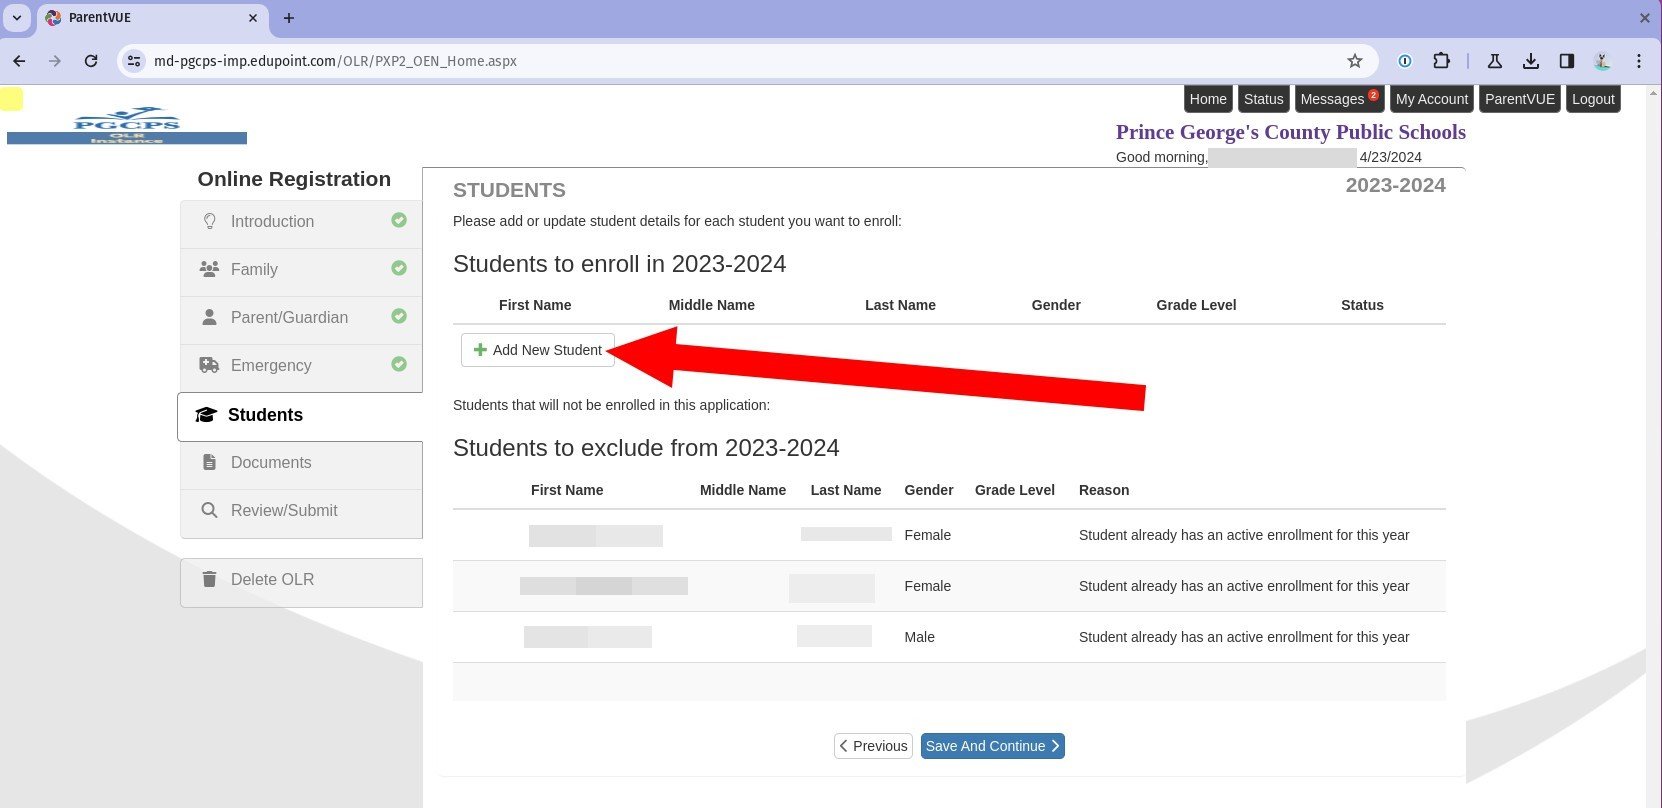
Add New Students

28. To remove a student record from the enrollment process, locate the name in the Students to enroll section and click Exclude.To include an existing student record in the enrollment process, locate the name in the Students to exclude section and click Include.

29. To enroll a new student who is not already in the system, click Add New Student.
New Student Demographics
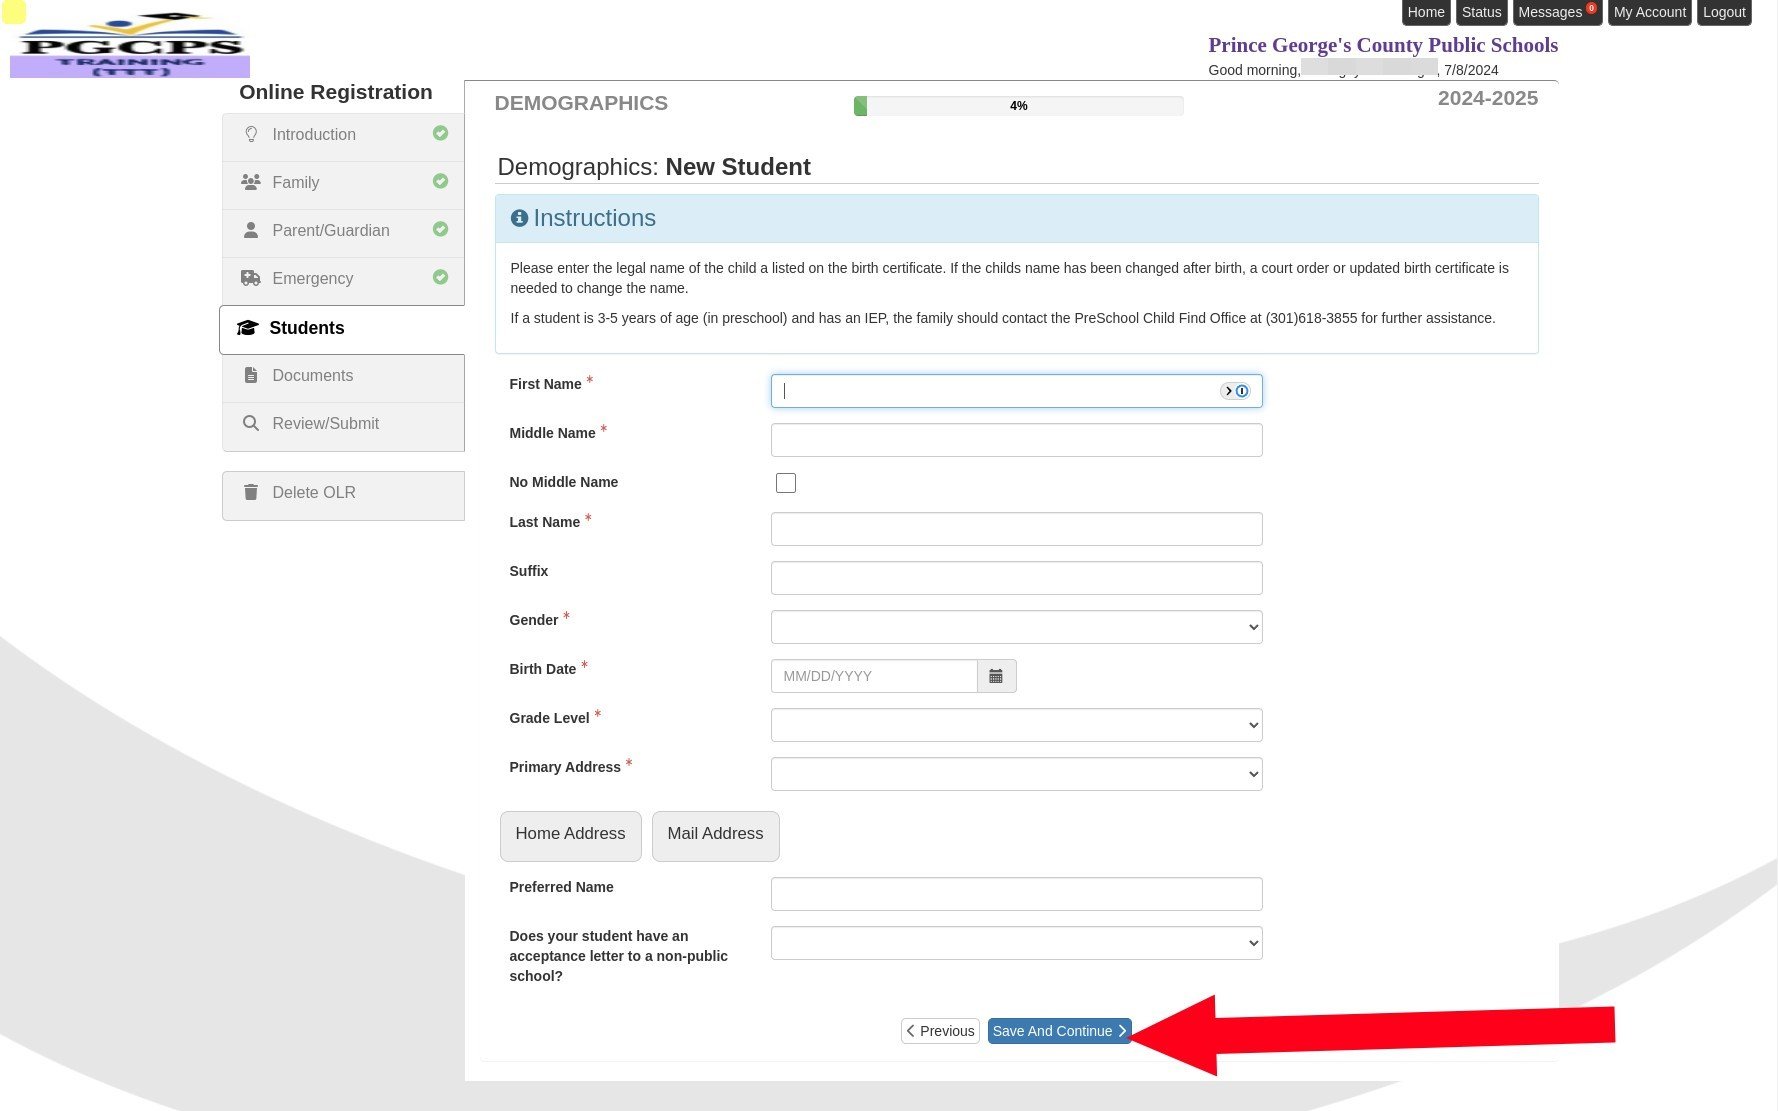
30. Enter information for the student. Any field marked with a red asterisk (*) is required.
31. When you have completed the form, click Save and Continue.
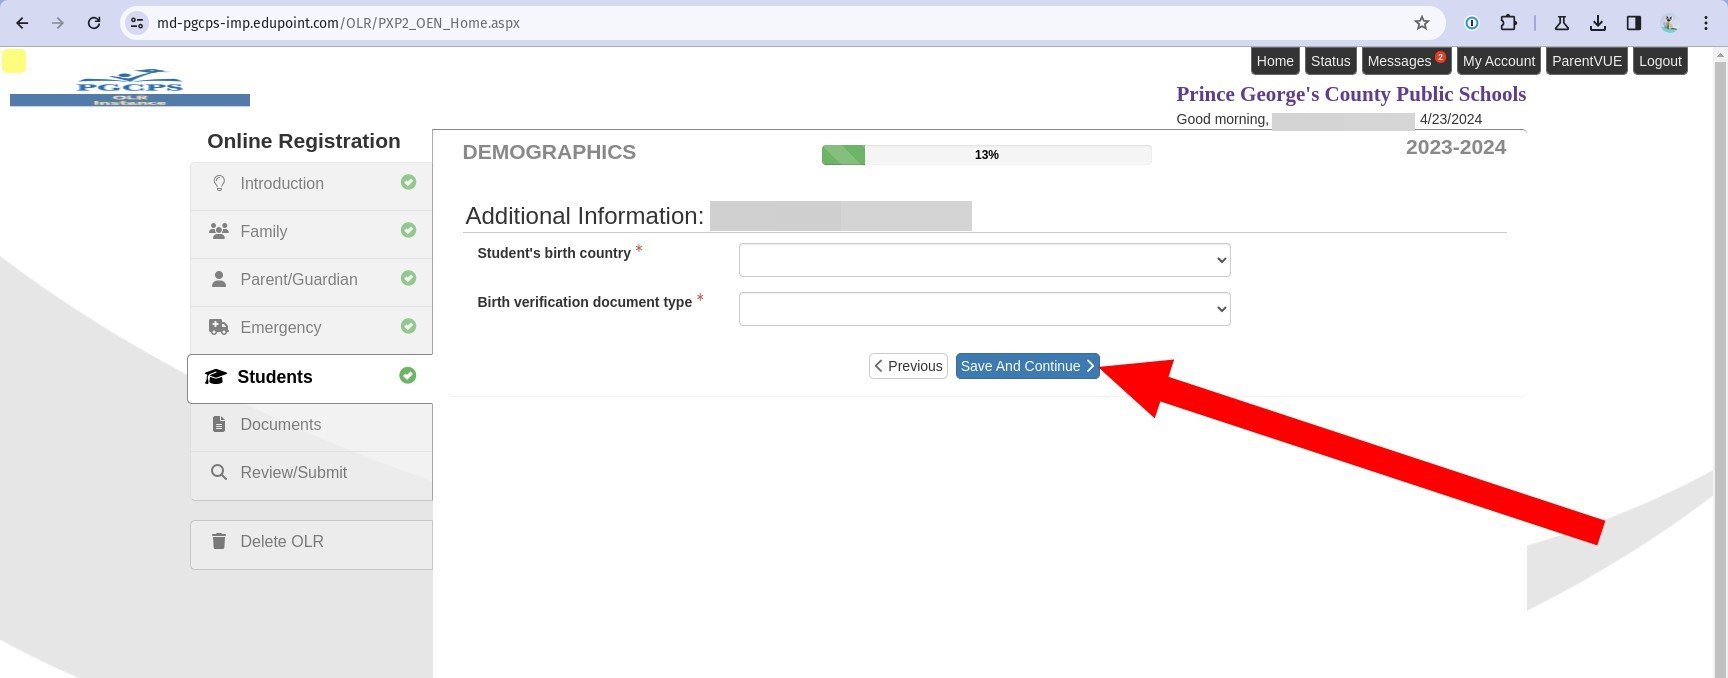
32. Select the Student’s birth country from the drop down list. If you select “United States”, you need to select the state. If you select a birth country outside the US, you must also enter the Date the student entered the US, the Date the student first attended school in the US, as well as the Month and Year the student last attended school in their birth country.
33. Select the Birth verification document type from the drop down list. This is required regardless of the student’s country of origin.
34. Click Save and Continue.
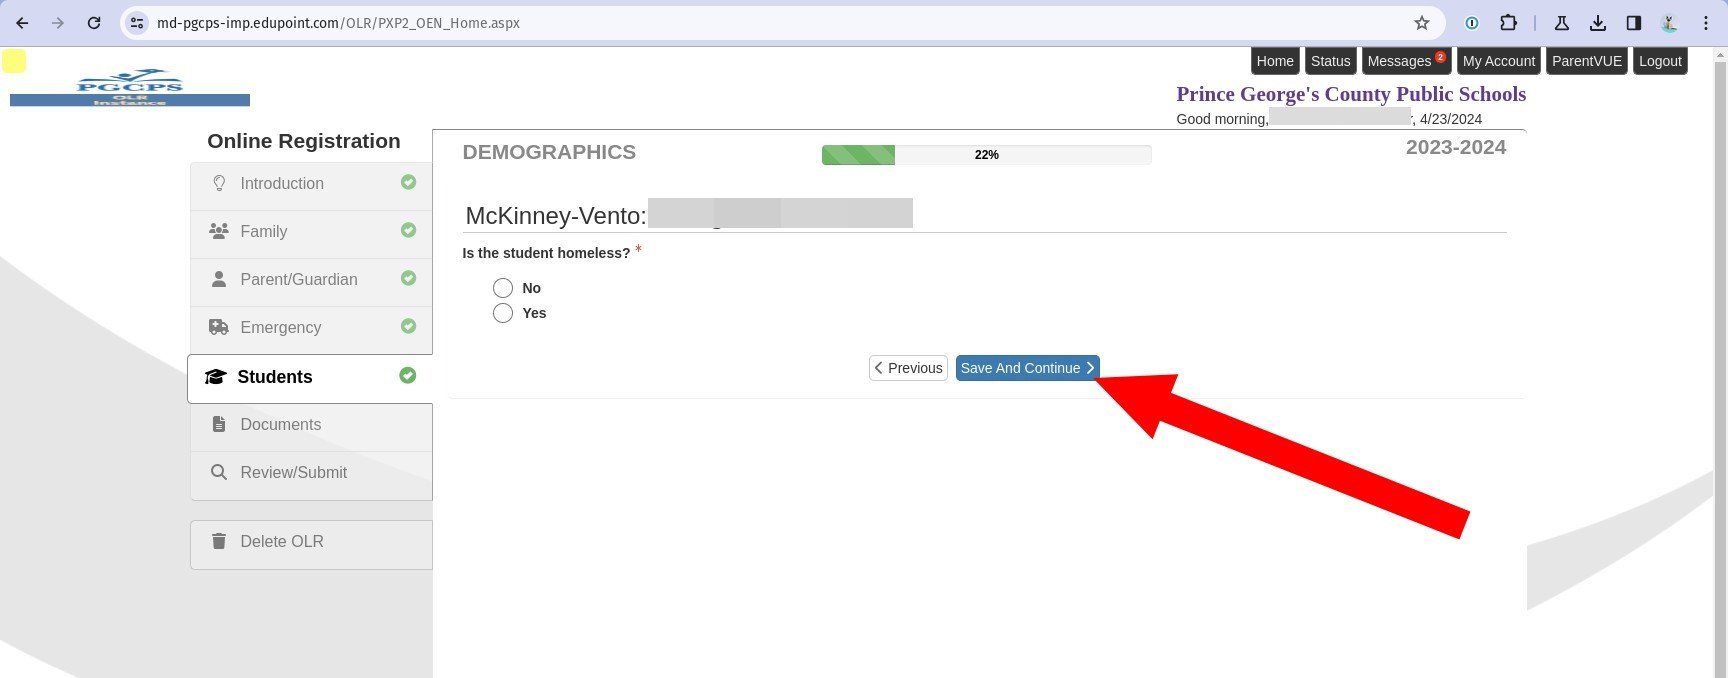
35. Indicate whether the student is homeless. If the answer is Yes, you are required to indicate where the student stays at night.
36. Click Save and Continue. If you indicated that the student is homeless, you are taken to a separate page to complete a Displacement Statement form. If you are enrolling a student in 00K, you are taken to the Prior Care page, where you must enter information on the student’s previous experience with childcare before enrollment. If you did not indicate the student is homeless or entering kindergarten, you are taken to the Parent/Guardian Relationships page.
Parent/Guardian Relationships
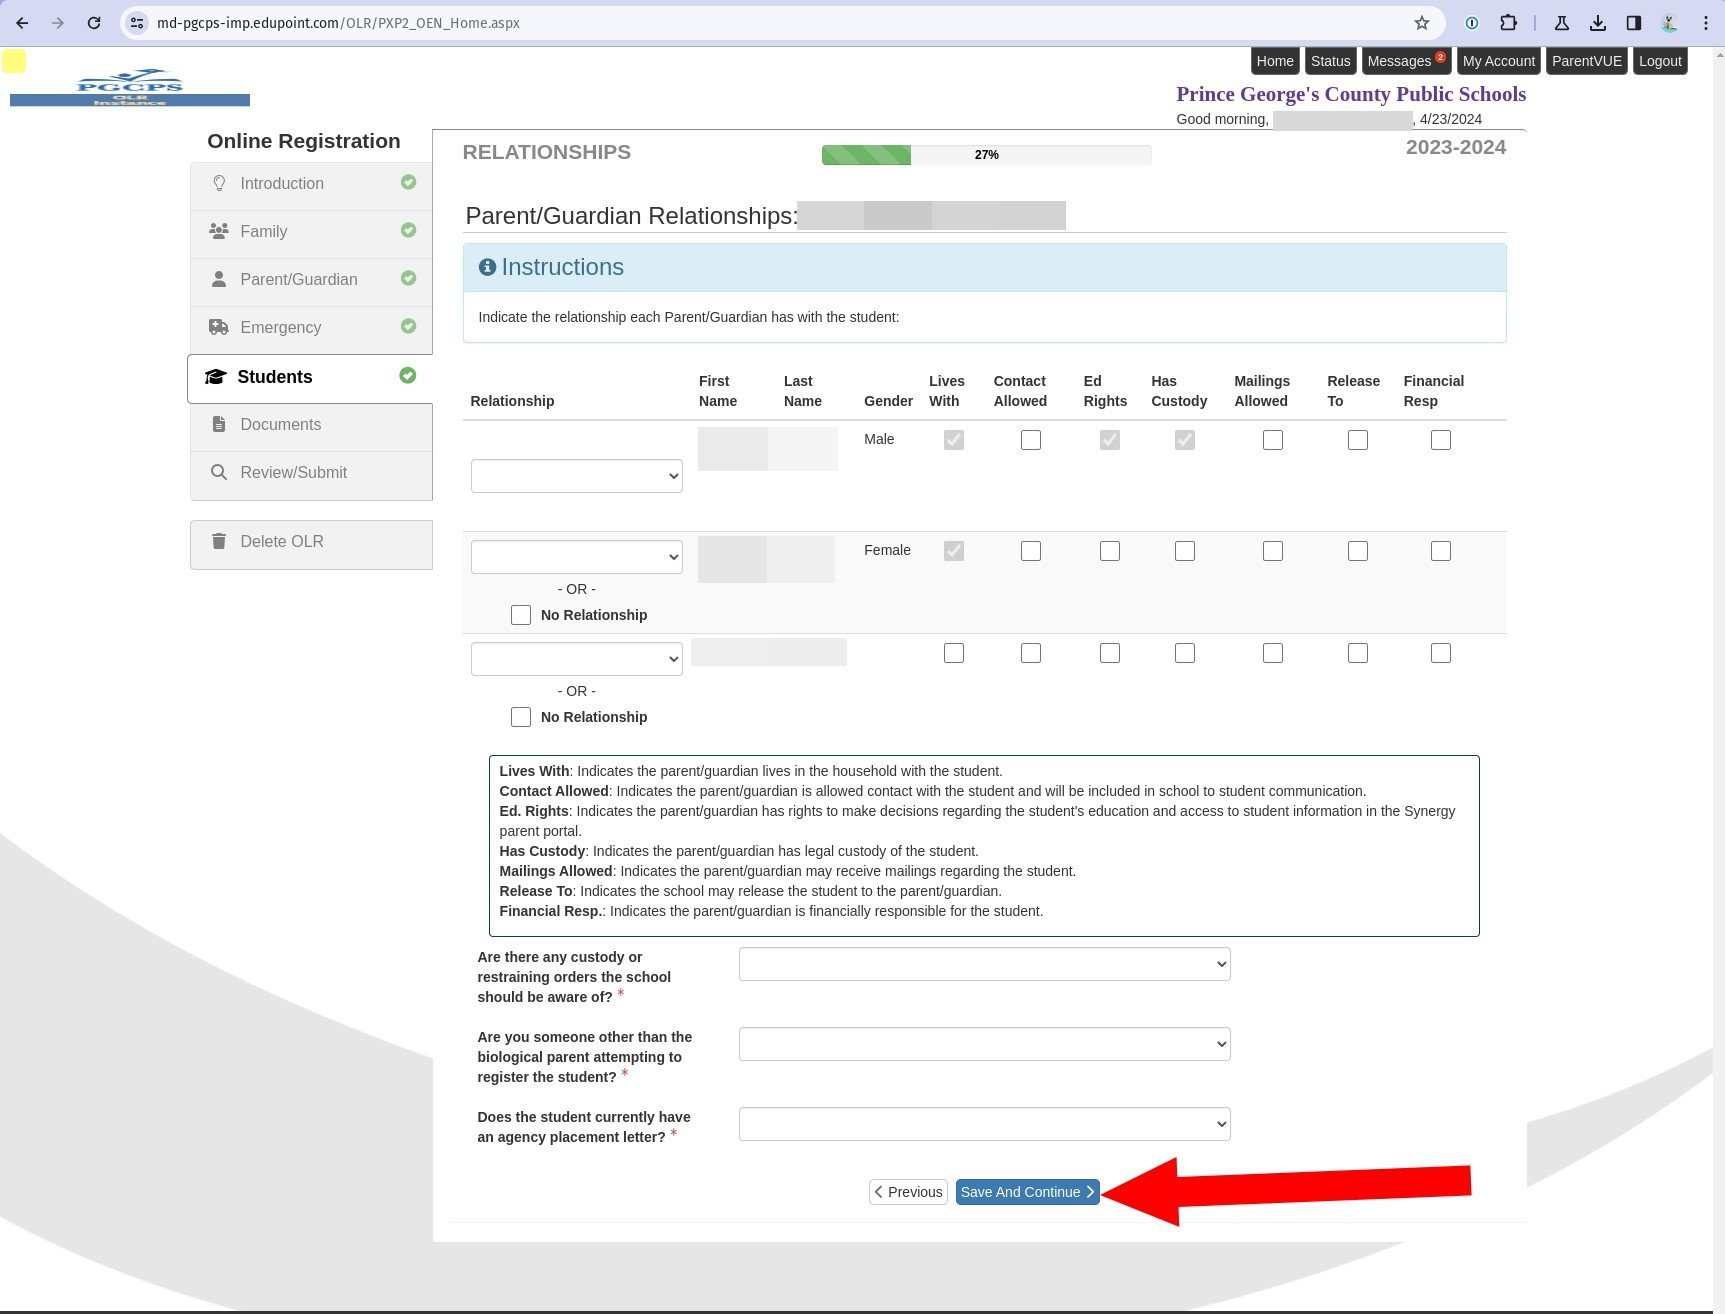
37. Verify or select a Relationship to the student for every parent or guardian associated with the household from the drop-down list.
38. Select other parameters where appropriate:
- Lives With: Indicates the parent/guardian lives in the household with the student.
- Contact Allowed: Indicates the parent/guardian is allowed contact with the student and will be included in school to student communication.
- Ed. Rights: Indicates the parent/guardian has rights to make decisions regarding the student's education and access to student information in the Synergy parent portal.
- Has Custody: Indicates the parent/guardian has legal custody of the student.
- Mailings Allowed: Indicates the parent/guardian may receive mailings regarding the student.
- Release To: Indicates the school may release the student to the parent/guardian.
- Financial Resp.: Indicates the parent/guardian is financially responsible for the student.
39. Select answers from the drop-down list for the remaining required questions.
40. Click Save and Continue.
Emergency Contact Relationships
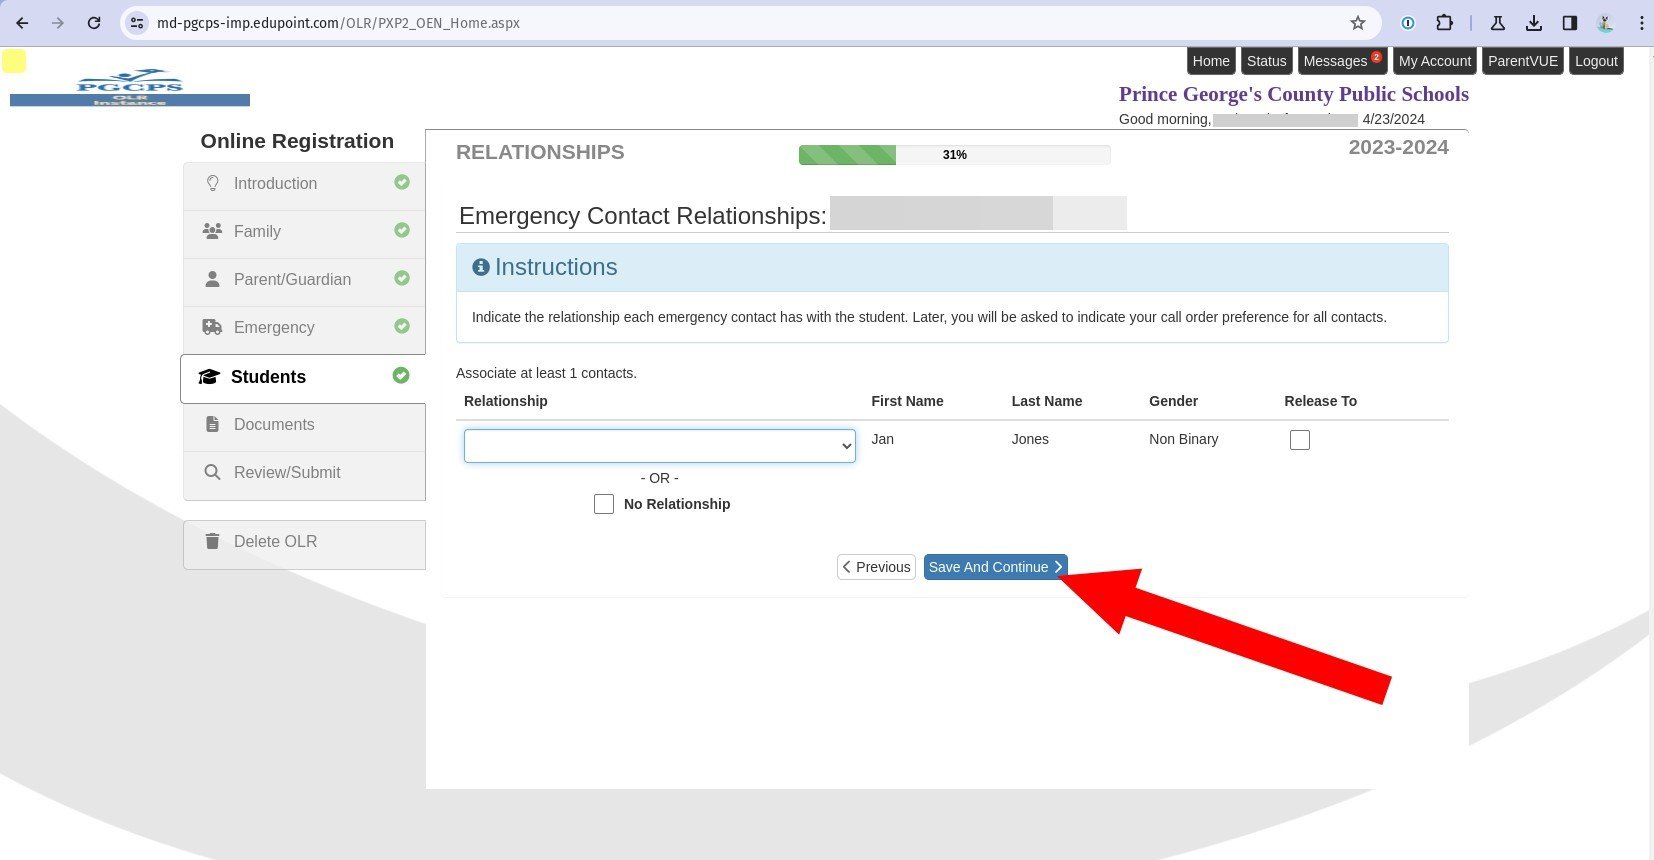
41. Verify or select a Relationship for the Emergency Contact.
42. Indicate whether the school can release the student to this person.
43. Click Save and Continue.
Emergency Contact Order
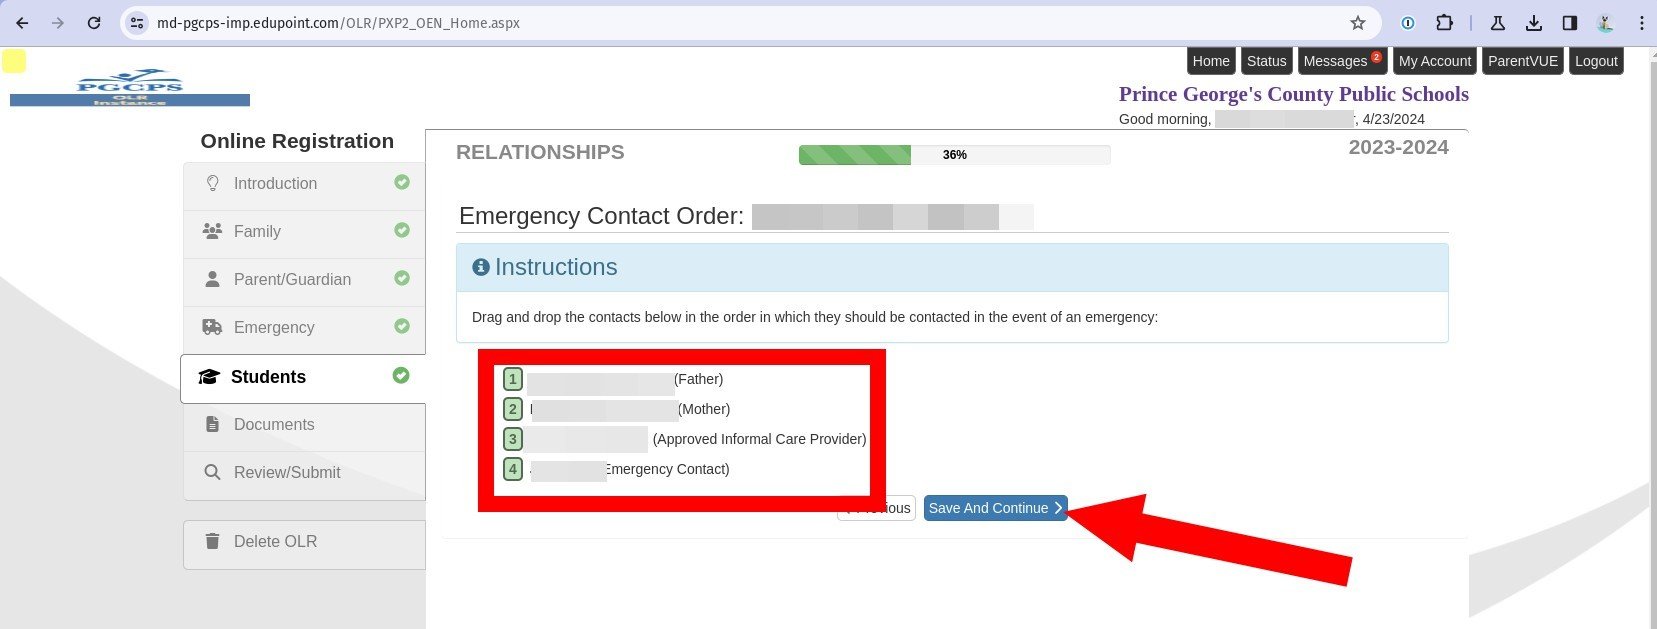
44. Drag and drop the list of parents, guardians, and emergency contacts in the order they should be contacted in the event of an emergency.
45. Click Save and Continue.
Ethnicity and Race
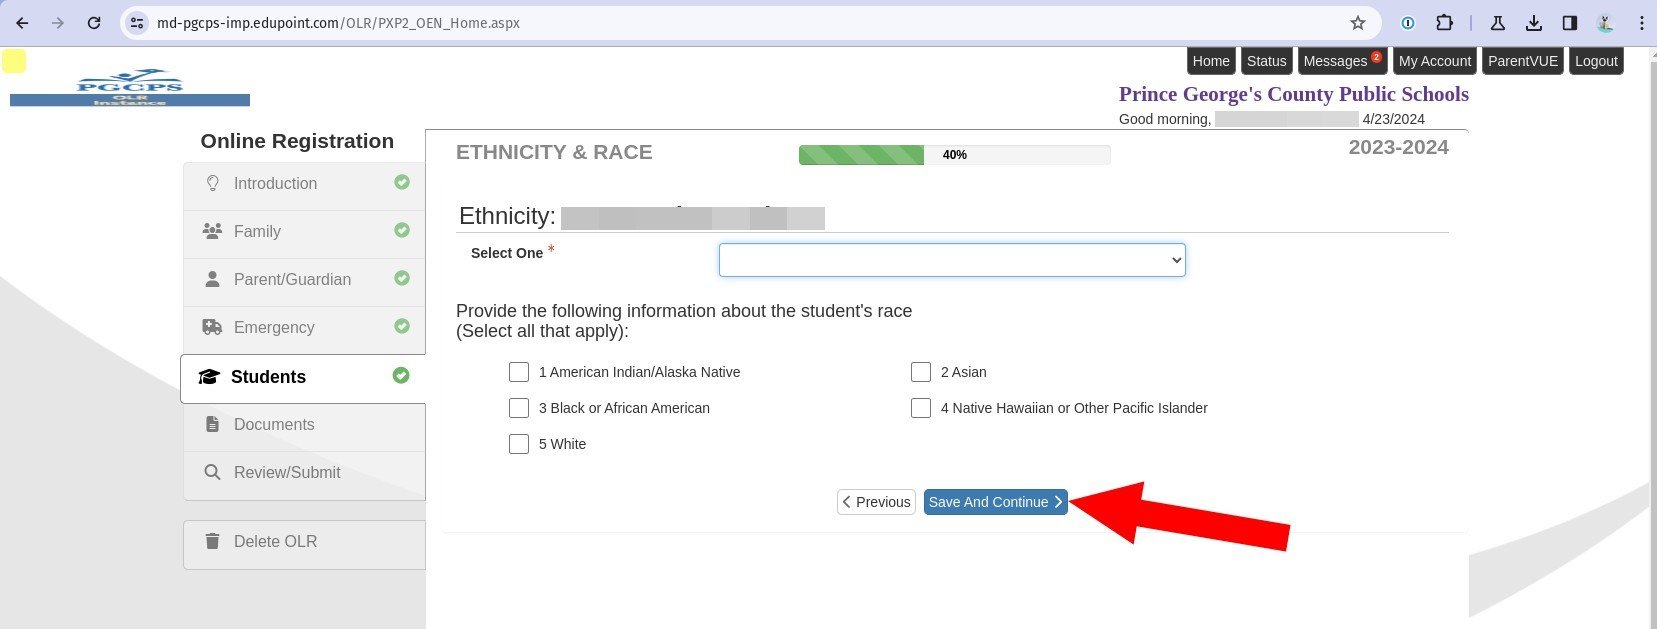
46. Select an Ethnicity from the drop down list.
47. Select applicable race or races.
48. Click Save and Continue.
Language Survey
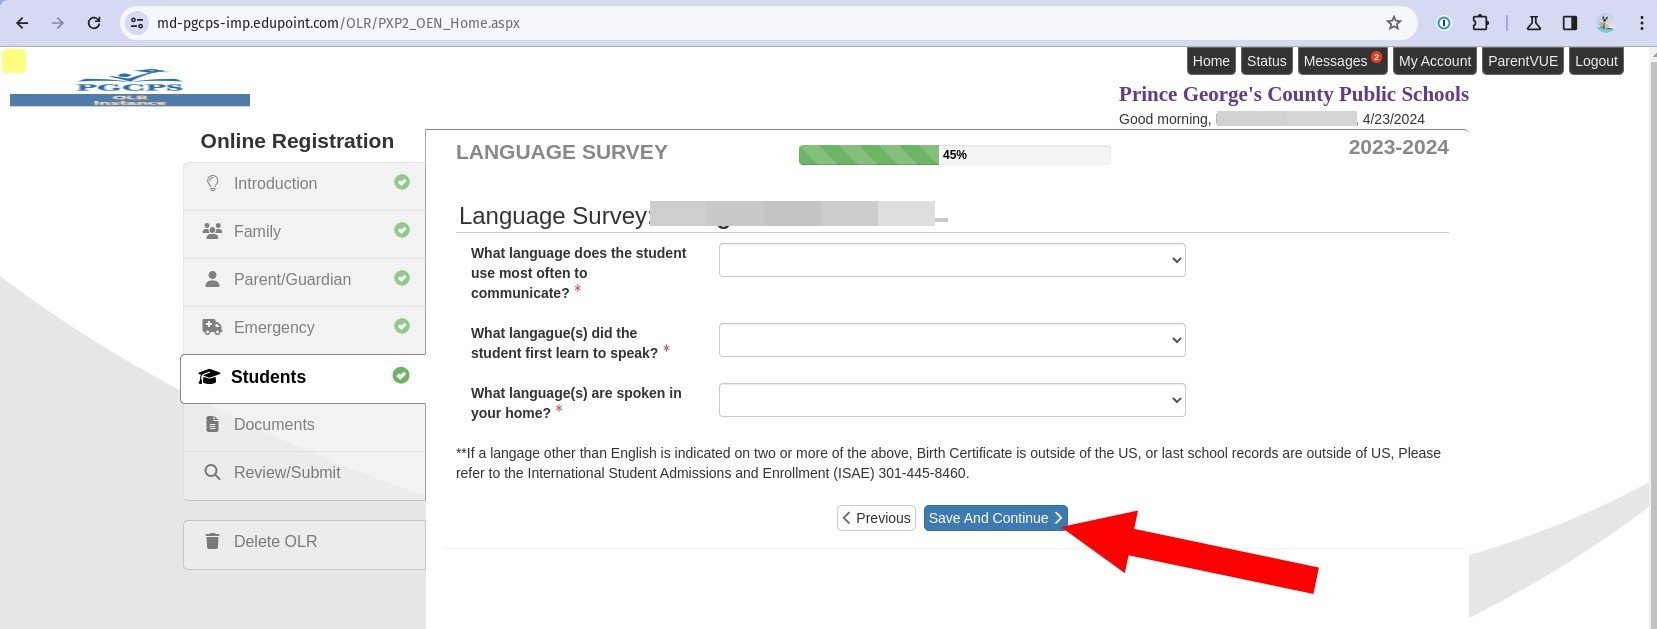
49. Answer the required Language Survey questions using the drop down list for each one. If you select a language other than English for two or more questions, your enrollment request will be routed to the International Student Admissions and Enrollment (ISAE) department after you submit it.
50. Click Save and Continue.
Health Information
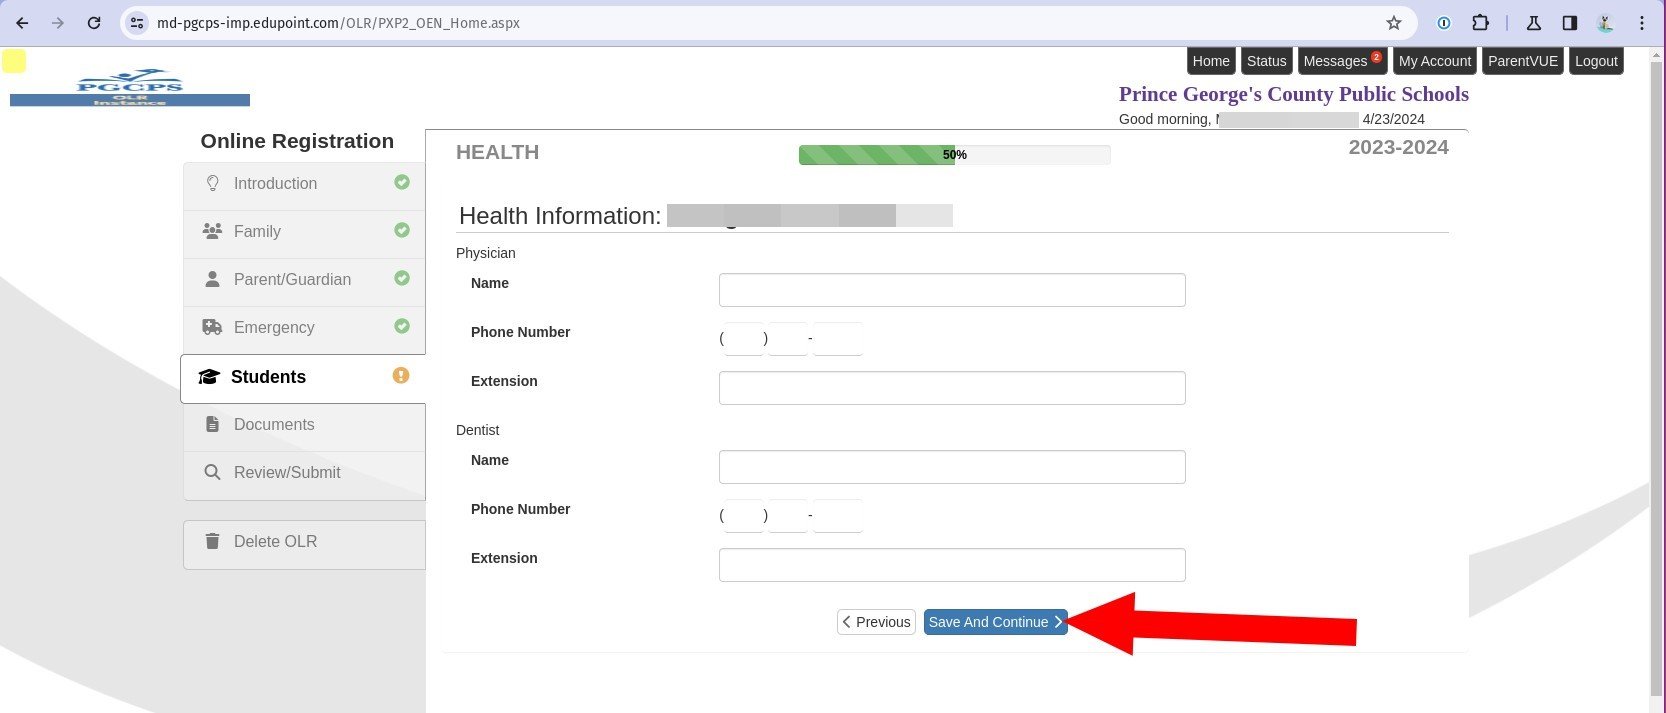
51. Enter contact information for the student’s Physician and Dentist in case of an emergency. These fields are not required.
52. Click Save and Continue.
Publicity Release
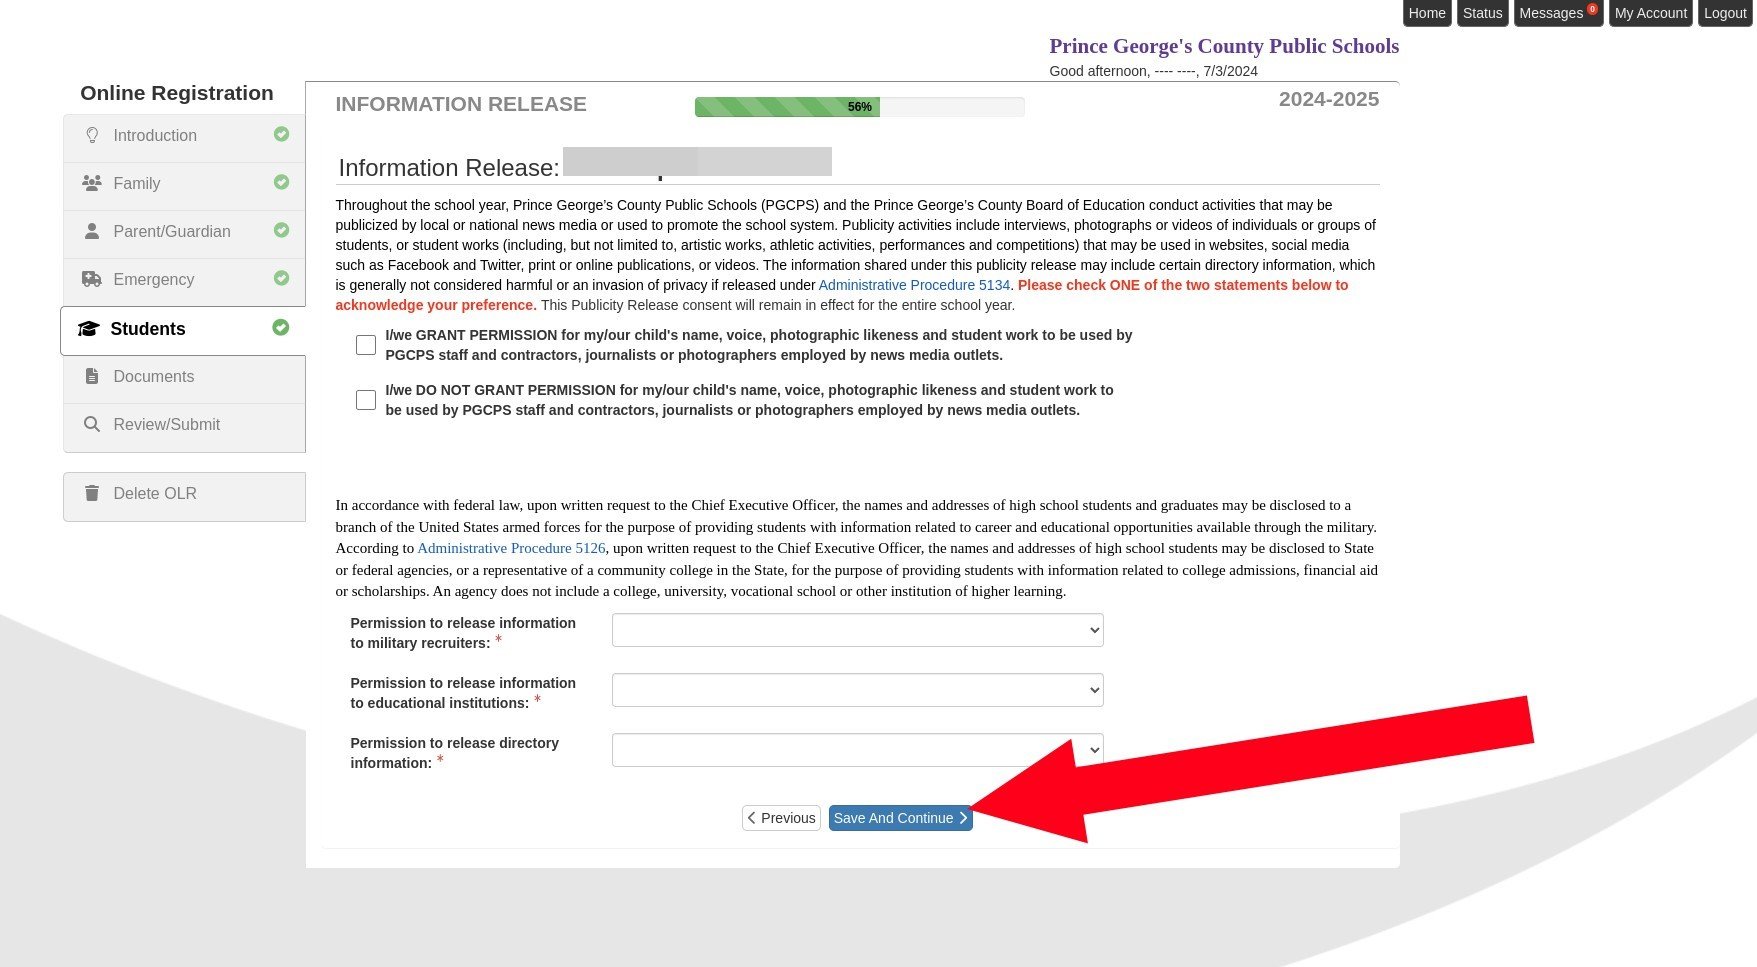
53. Indicate whether you Grant Permission or Do Not Grant Permission to have your student’s name, voice, photographic likeness, and student work to be used by PGCPS staff and contractors, journalists, or photographers employed by news media outlets.
54. Select answers to the required Information Release questions from the drop down list.
55. Click Save and Continue.
Internet Access and Survey
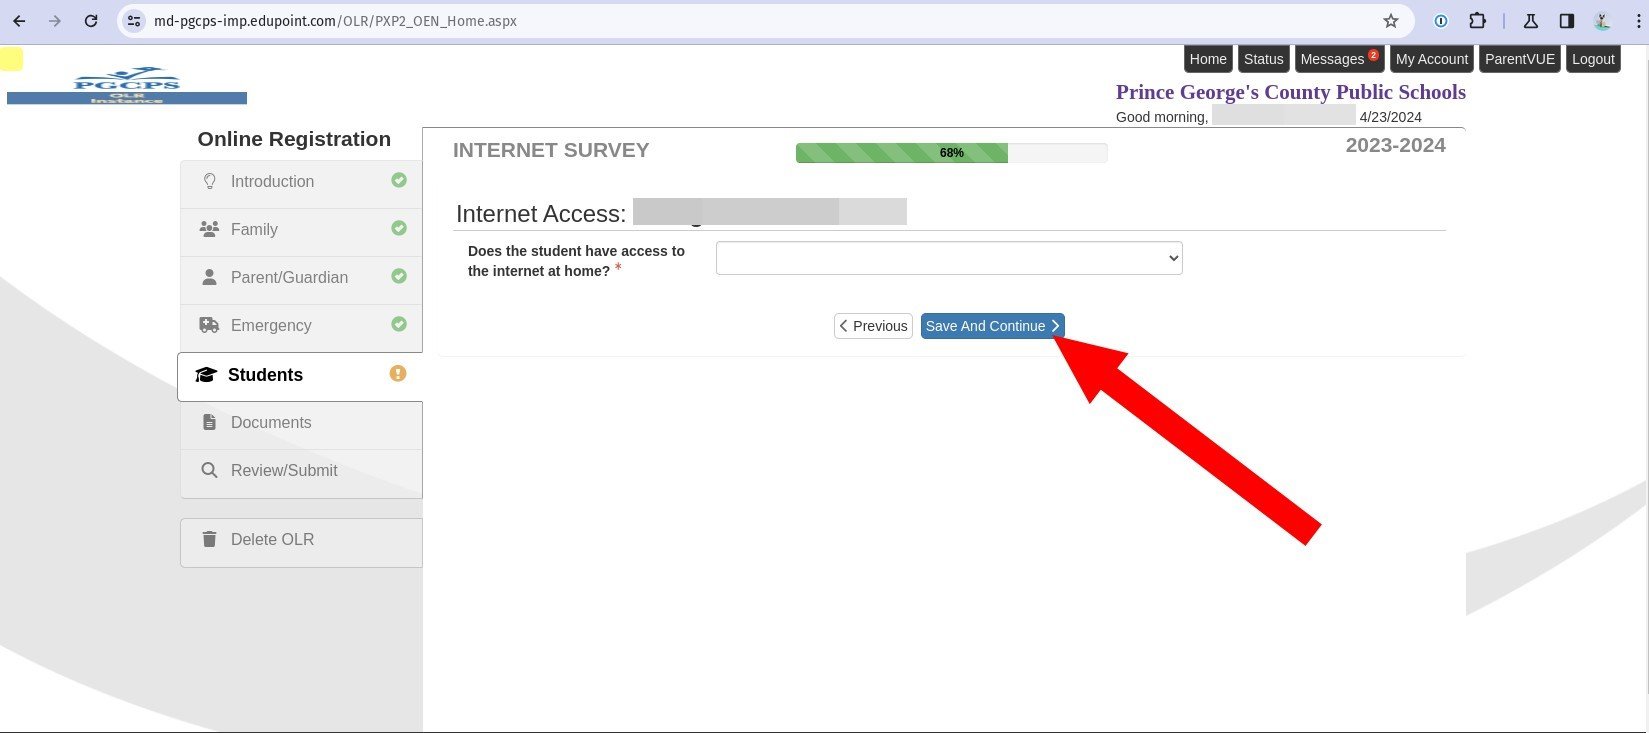
56. Select an answer to the required Internet Access question from the drop down list. If you answer “No”, select an answer to the question What is the primary barrier to having internet access in the student's home? from the drop-down list.
57. Click Save and Continue. If you selected “Yes”, you are taken to the Internet Survey page. If you selected “No”, you go directly to the Previous Schools Attended page.
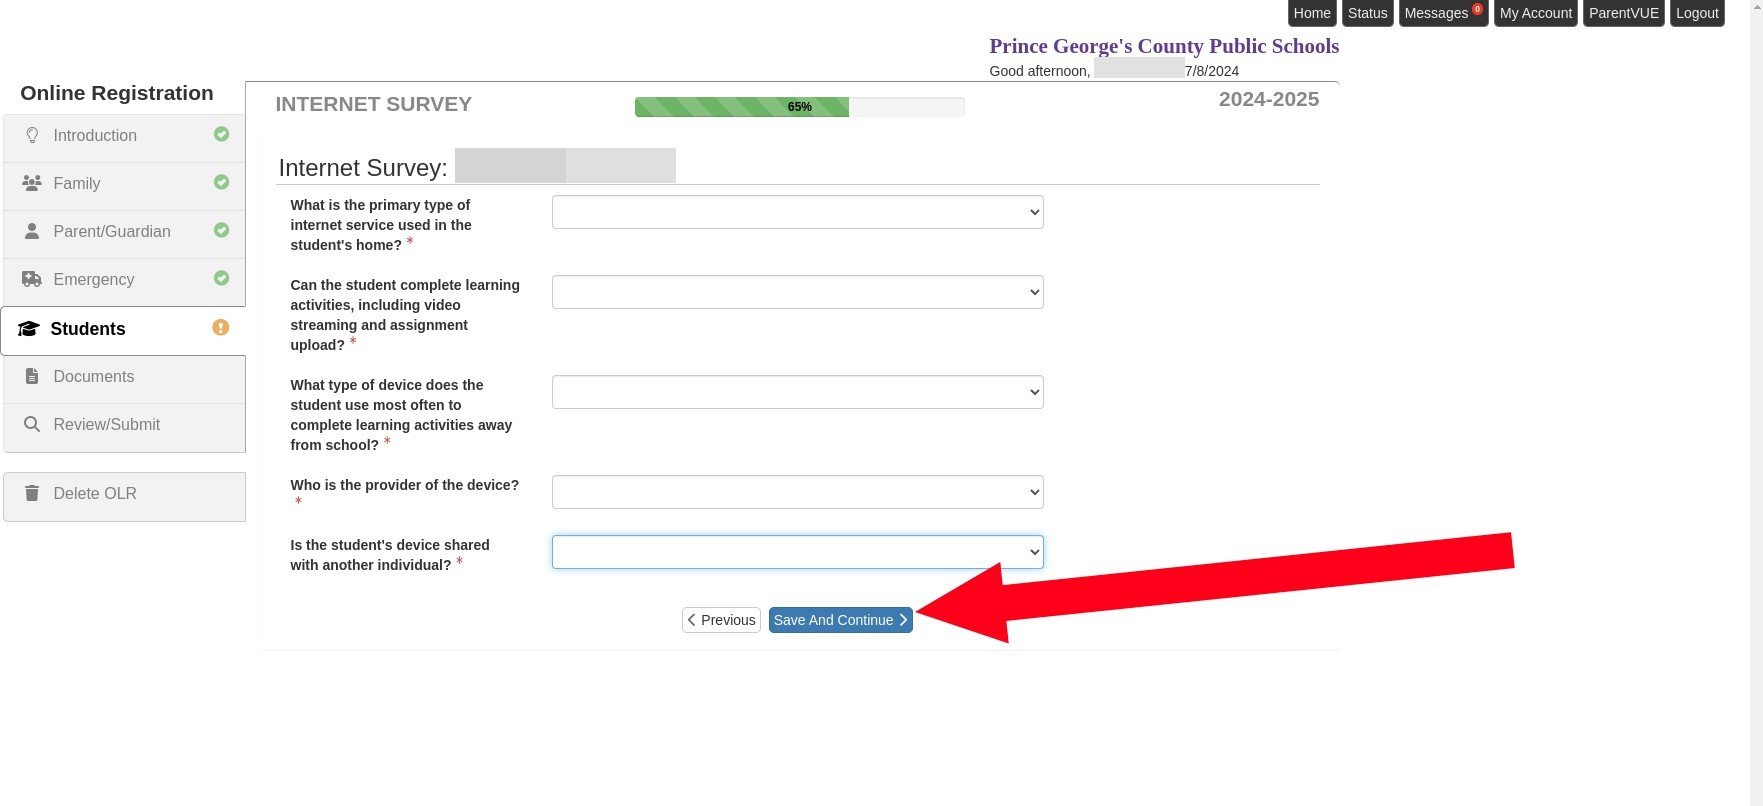
58. Select an answer to each question from the drop-down list.
59. Click Save and Continue.
Previous Schools
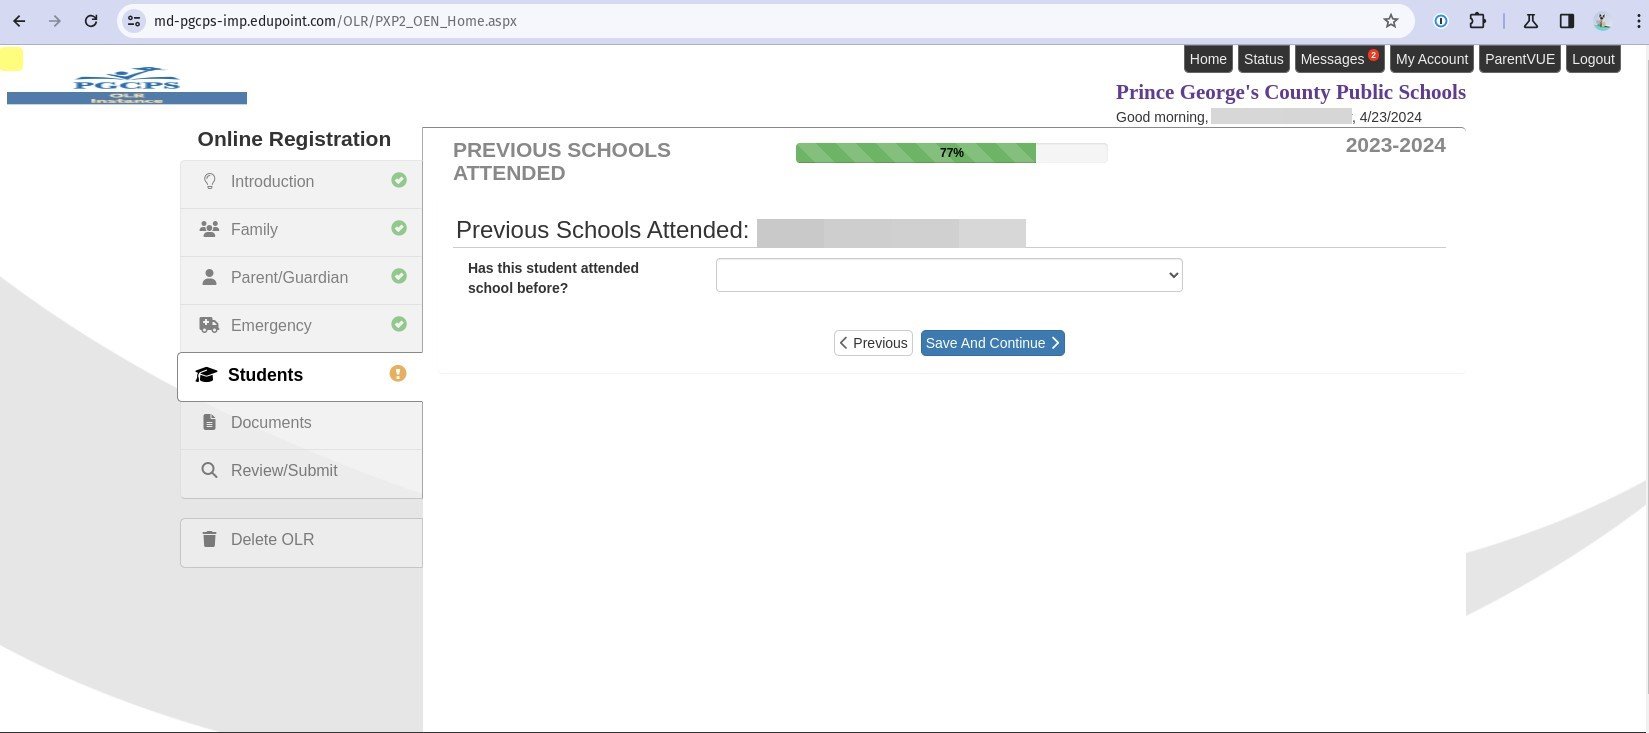
60. Indicate whether the student has attended school before by selecting an answer from the drop down list.
61. Click Save and Continue. If you answered “Yes” to whether the student has attended other schools, you are taken to a separate page to enter information about any previous school experience. If you answer “No” you are taken directly to the Special Education page.
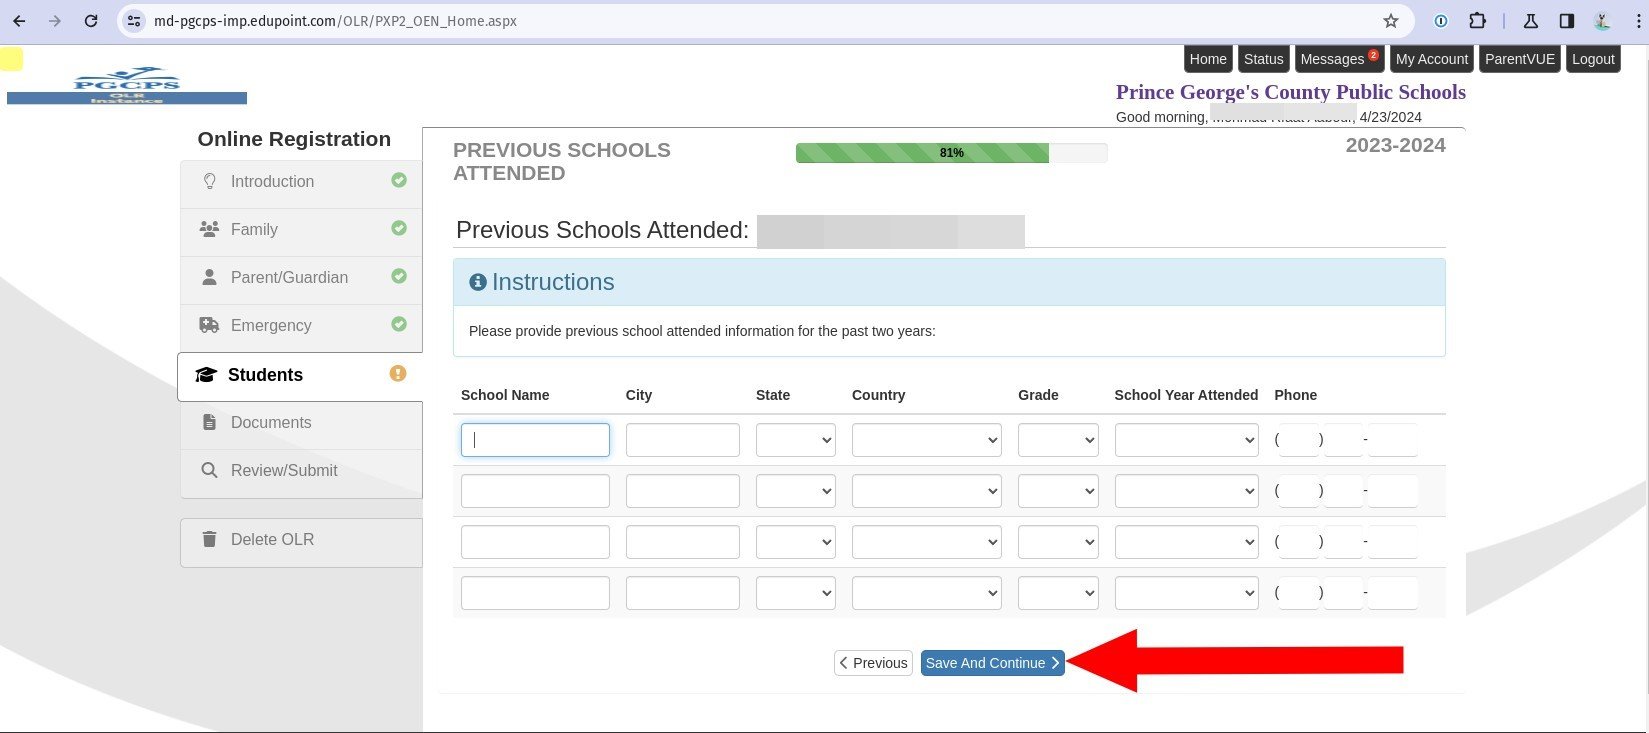
62. If you answered “Yes” on the previous page, enter the previous school information in the lines provided. If the most recent attended school was in another country, the student’s school will automatically be set to International Student Admissions and Enrollment (ISAEO) to ensure additional support services are available.
63. Click Save and Continue.
Special Services
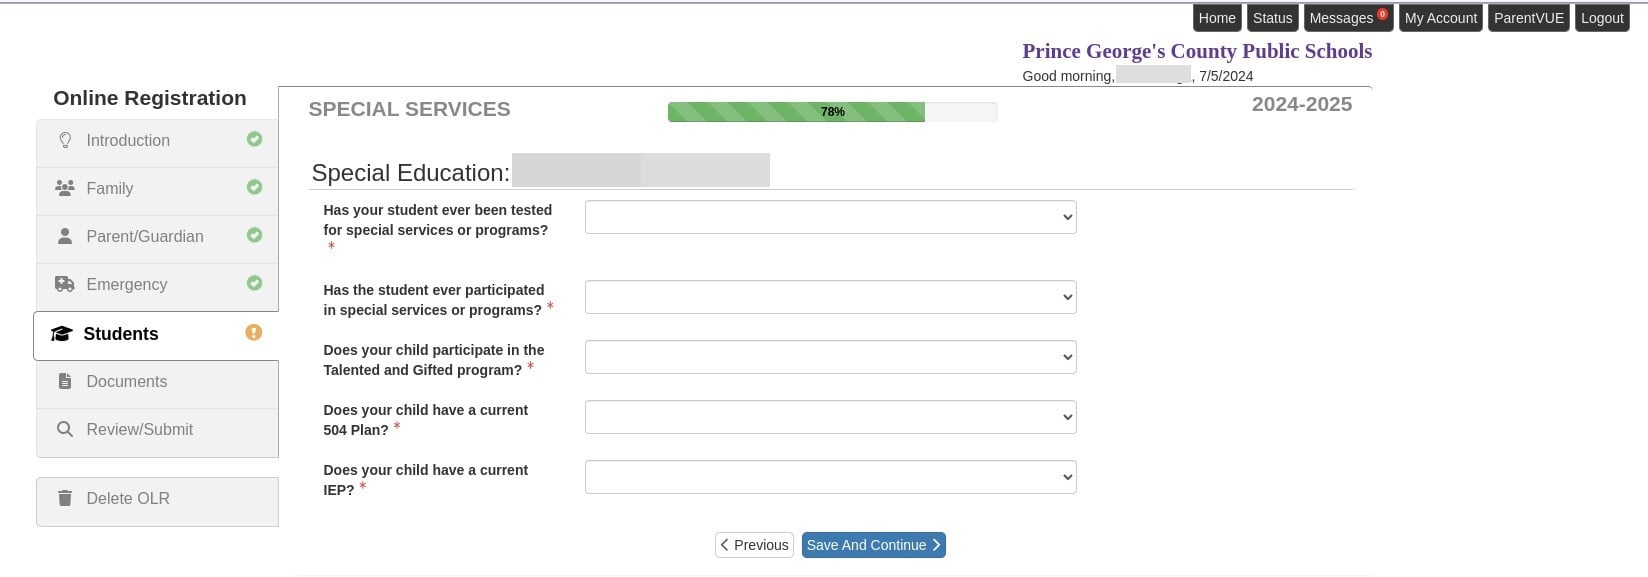
64. Answer each question by selecting a response from the drop-down list.
65. Click Save and Continue.
Transportation
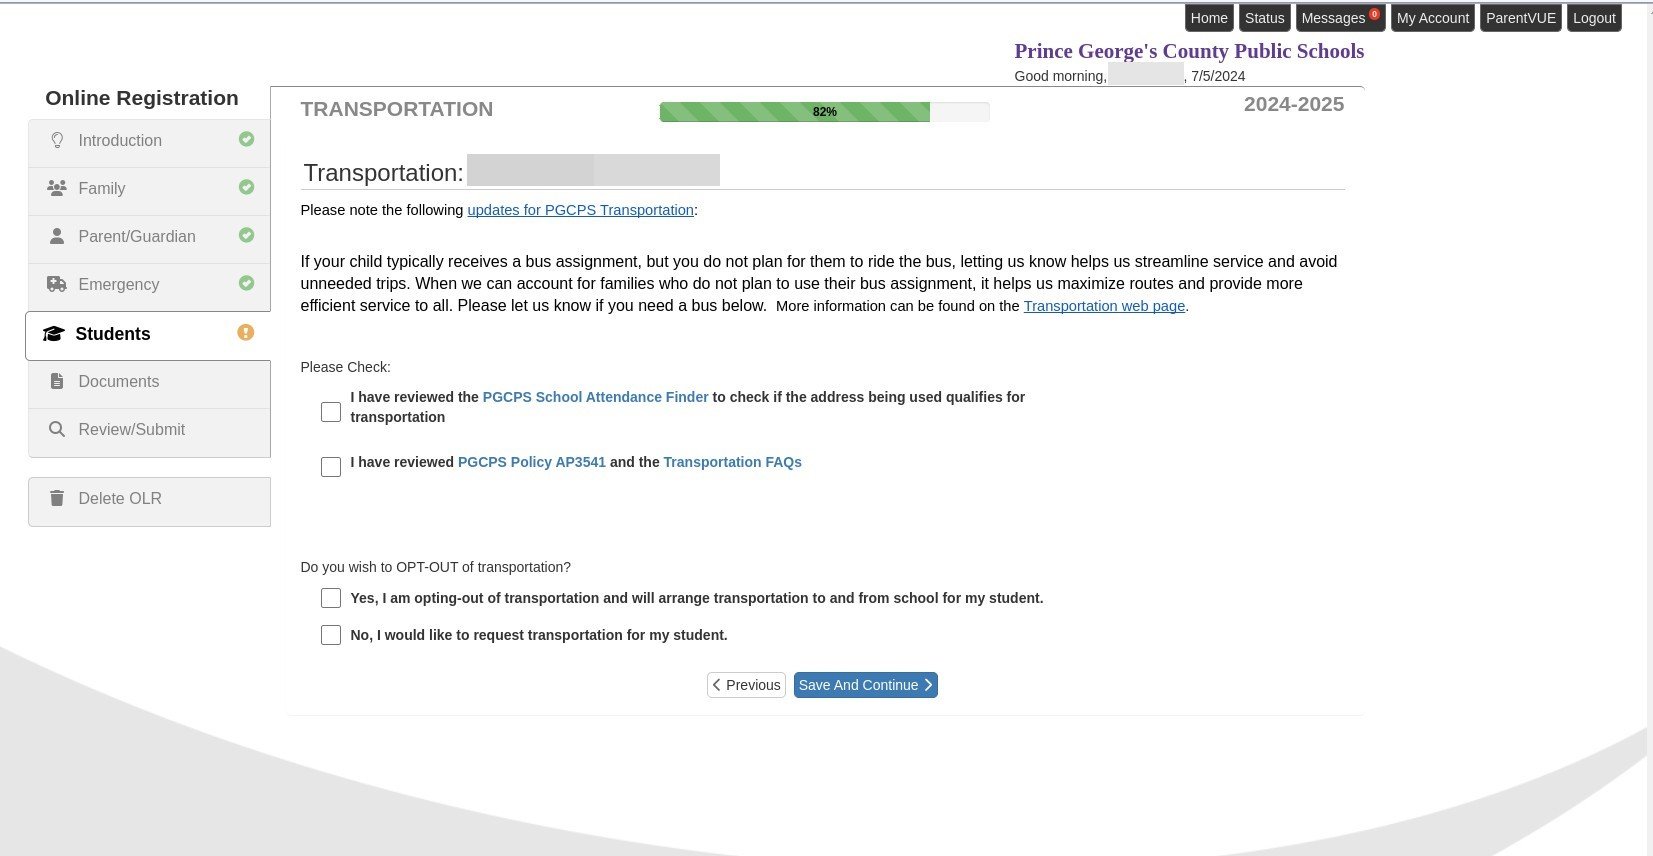
66. Review the linked transportation documents, then select the checkboxes to indicate you have done so.
67. Indicate whether you wish to opt-out of transportation. If you indicate that you would like to request transportation, you are then asked if the student will be picked up or dropped off at an address different from the home address. If you answer “Yes” to this follow up question, you can then enter the address of that pick up/drop off location.
68. Click Save and Continue.
School Selection
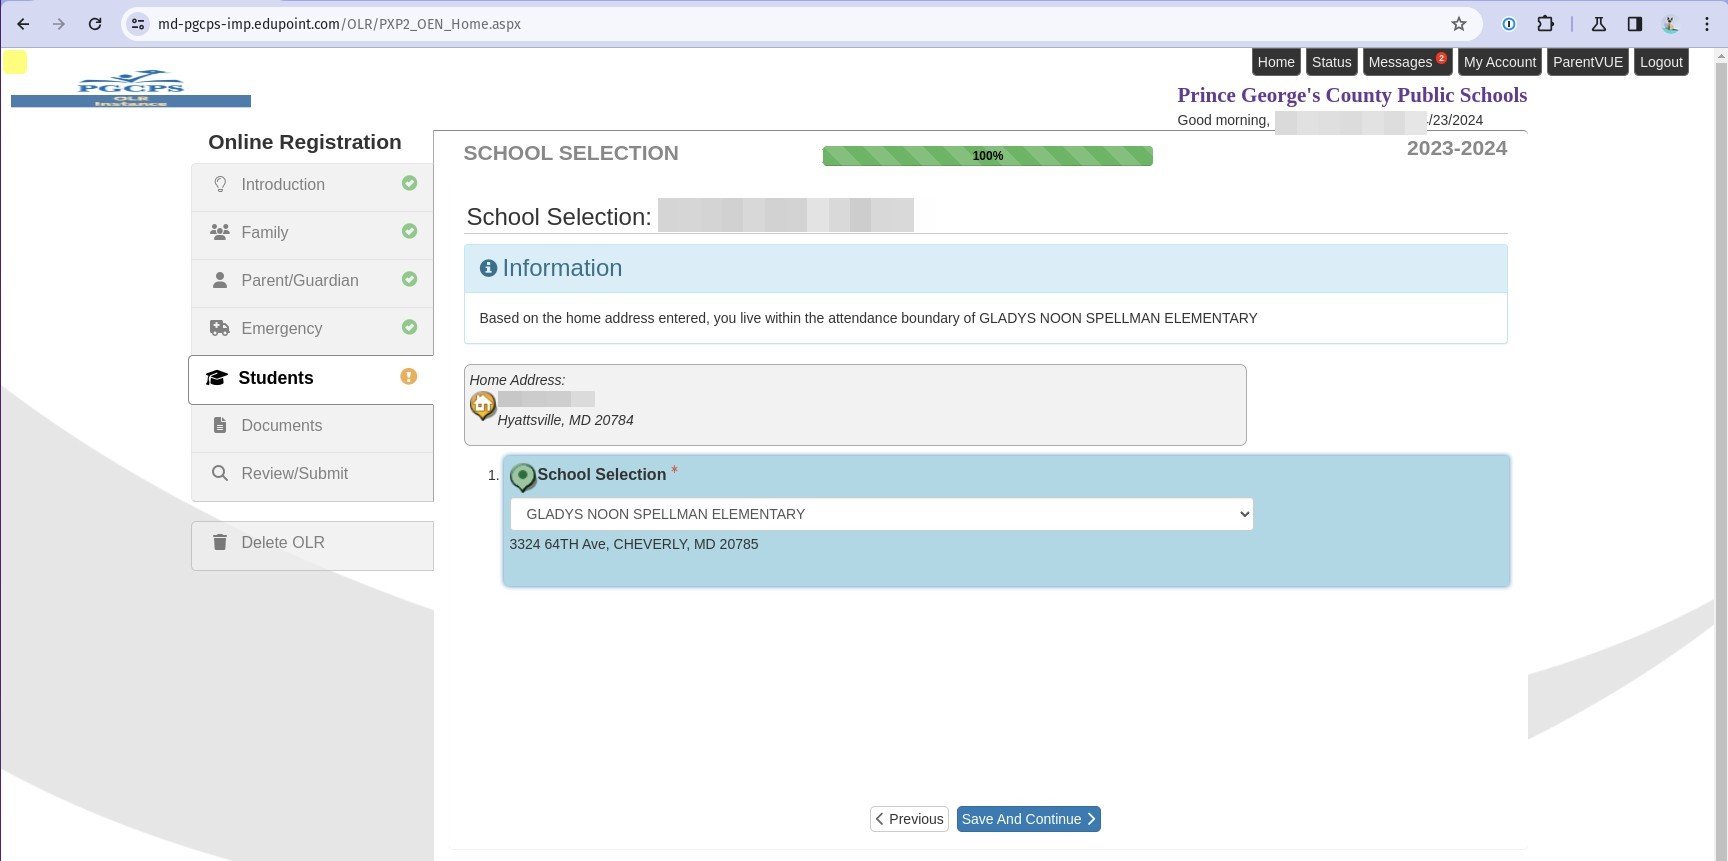
69. The boundary school based on the home address is automatically chosen. If they are preapproved for a different school, you can select it from the School Selection drop down list.
70. Click Save and Continue.
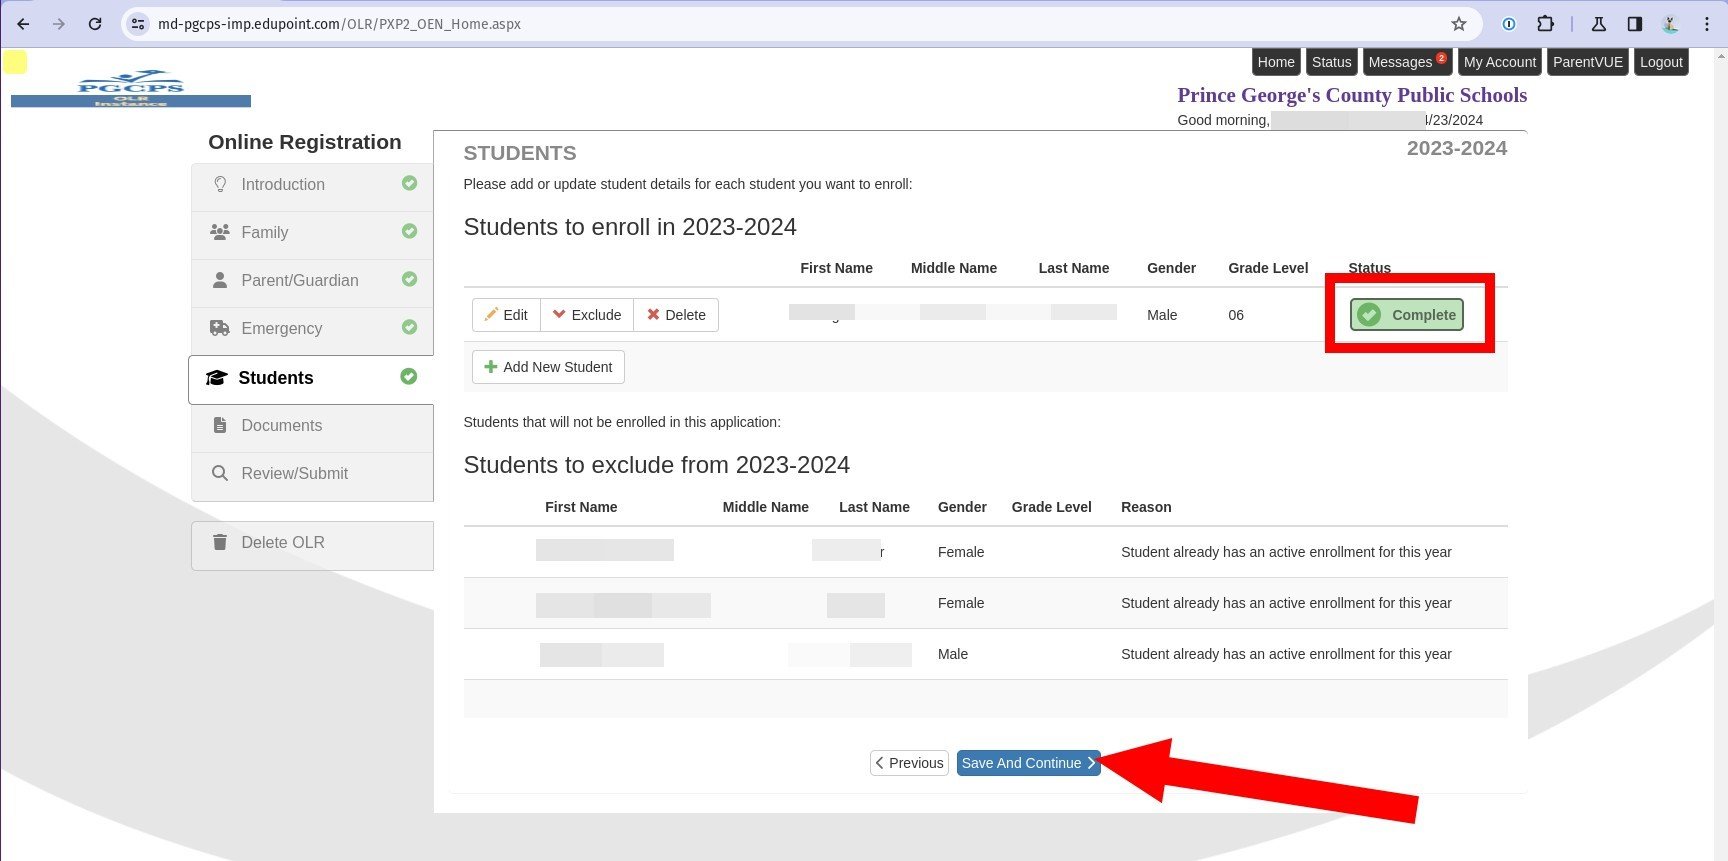
71. You automatically return to the Student list. You can now see the status of the new student is marked “Complete”. If you need to add additional students, click Add New Student and repeat the previous steps. Otherwise click Save and Continue.
Required Documents
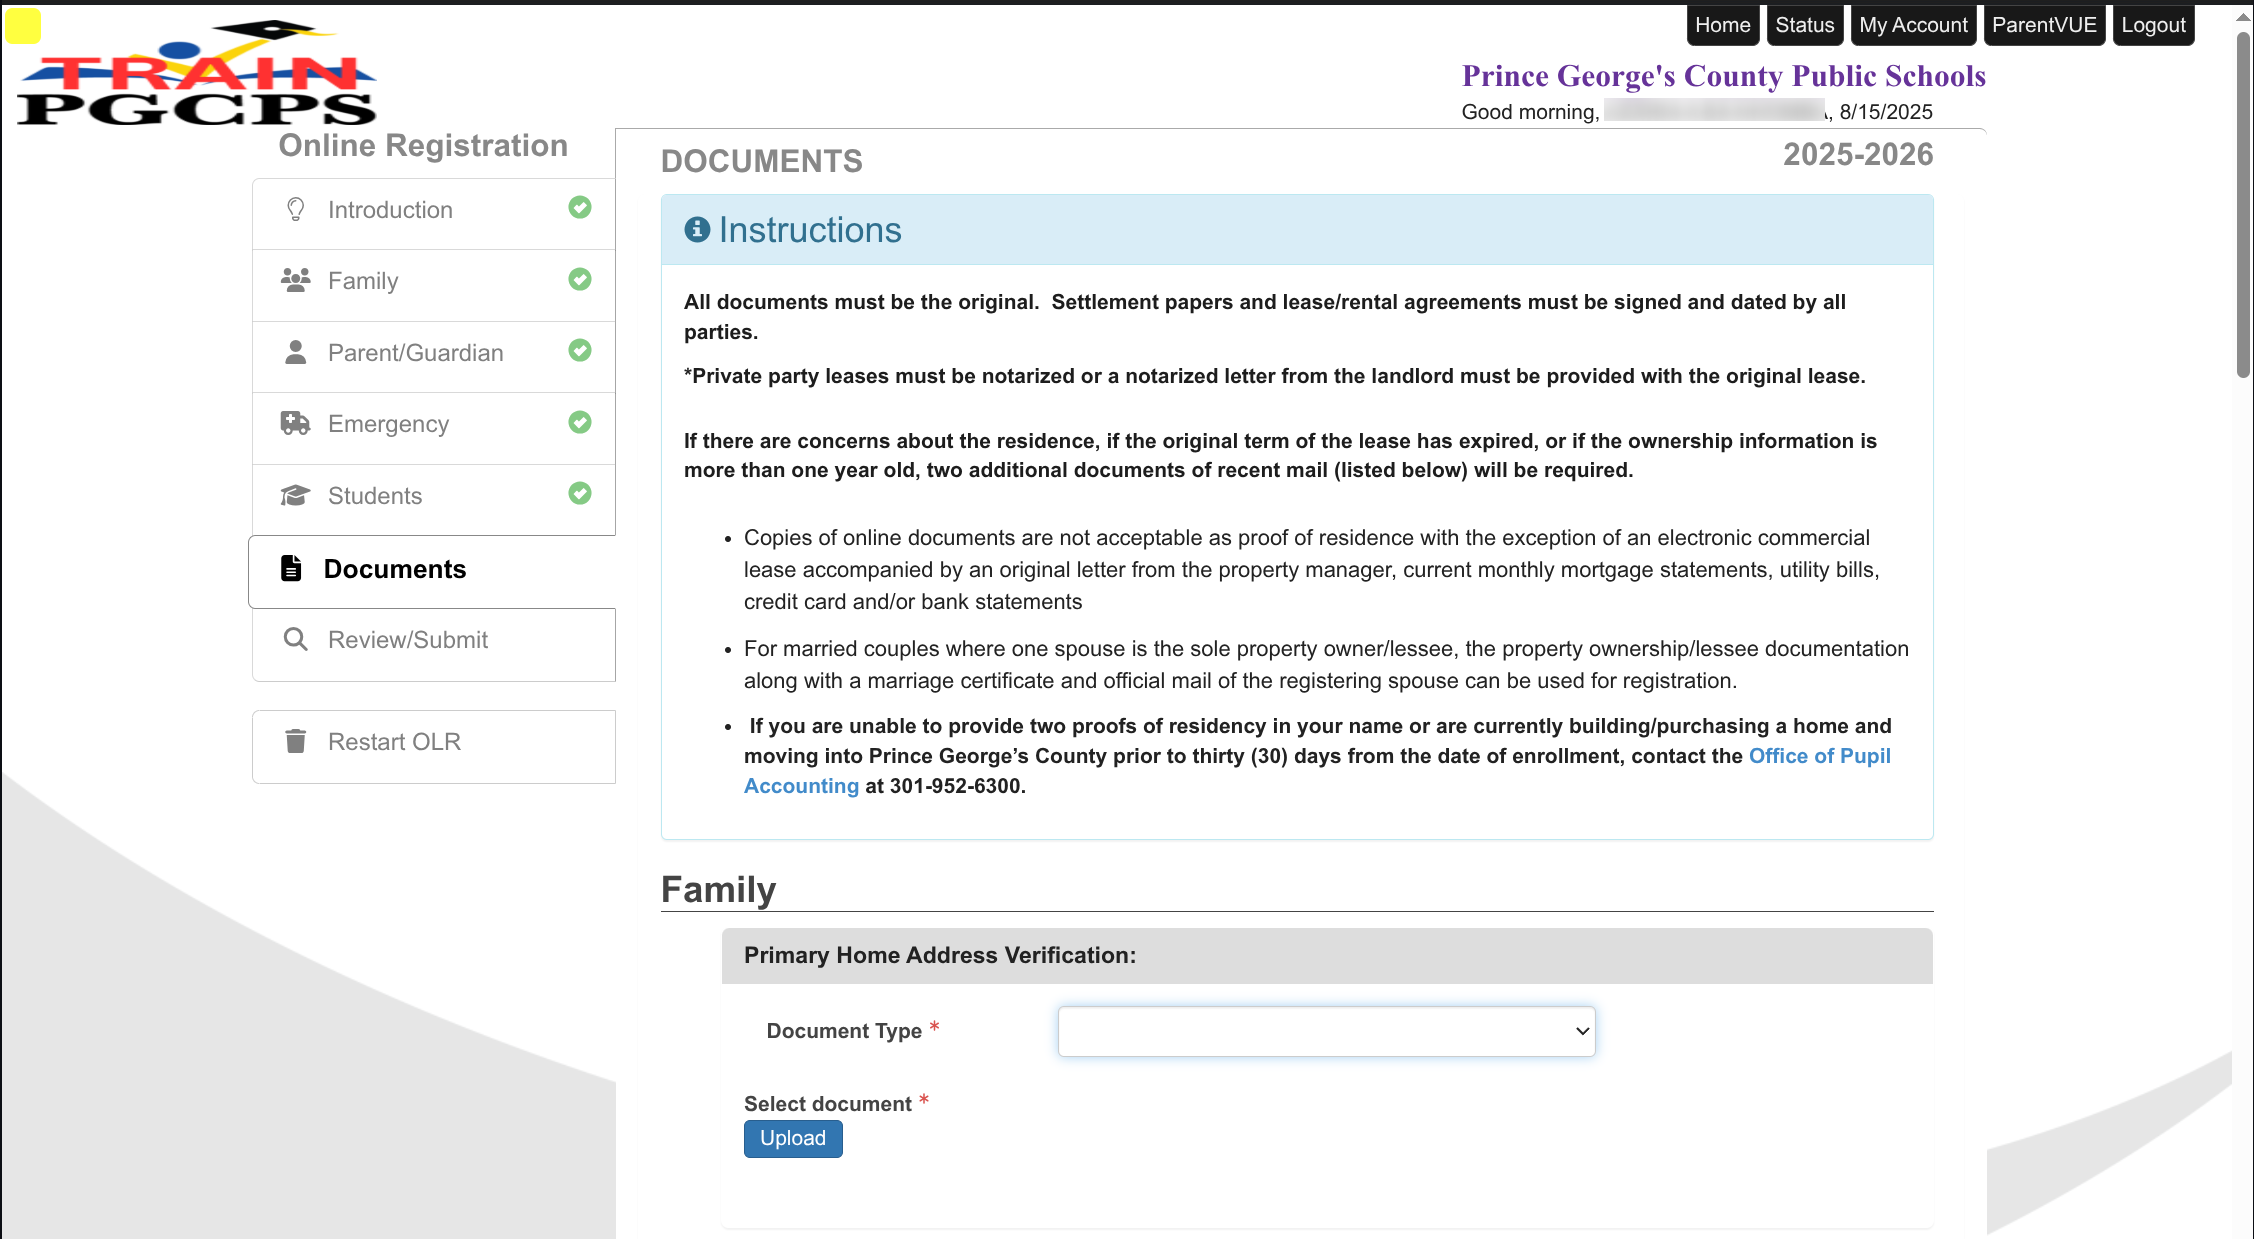
72. You are given a list of required documents. If you have an electronic copy of the document, select the Document Type from the drop-down list, then click Upload to upload that document from your computer. If you do not have an electronic copy, upload a blank document for each required entry, and then once you complete the entire enrollment request, you will need to bring the paper documents to the school before the process is completed.
NOTE: The enrollment request cannot be approved until all required documentation has been received by the school either electronically or delivered in hard copy to the school.
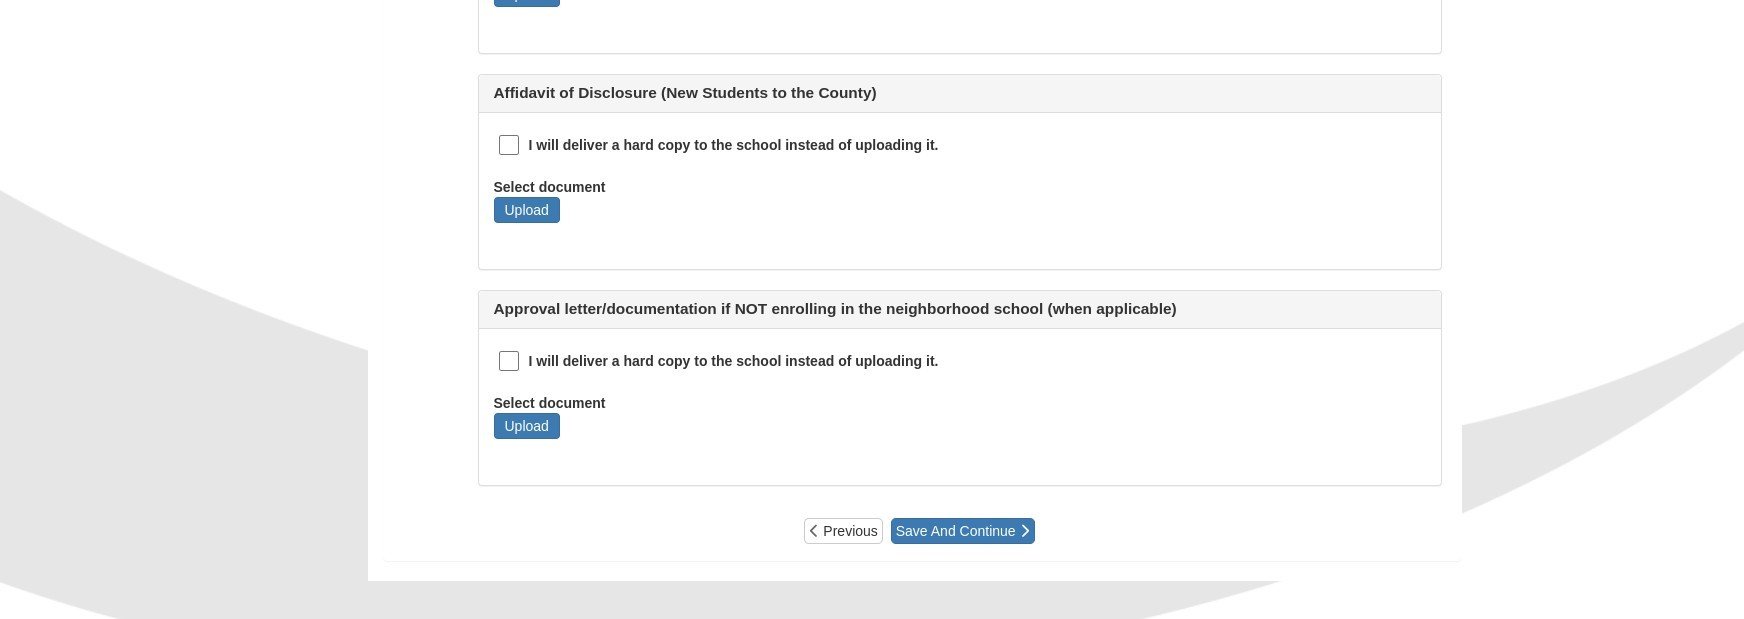
73. Once all required documents have been uploaded, or you have indicated that you will deliver a hardcopy to the school, click Save and Continue.
Review and Submit the Student's Enrollment Request
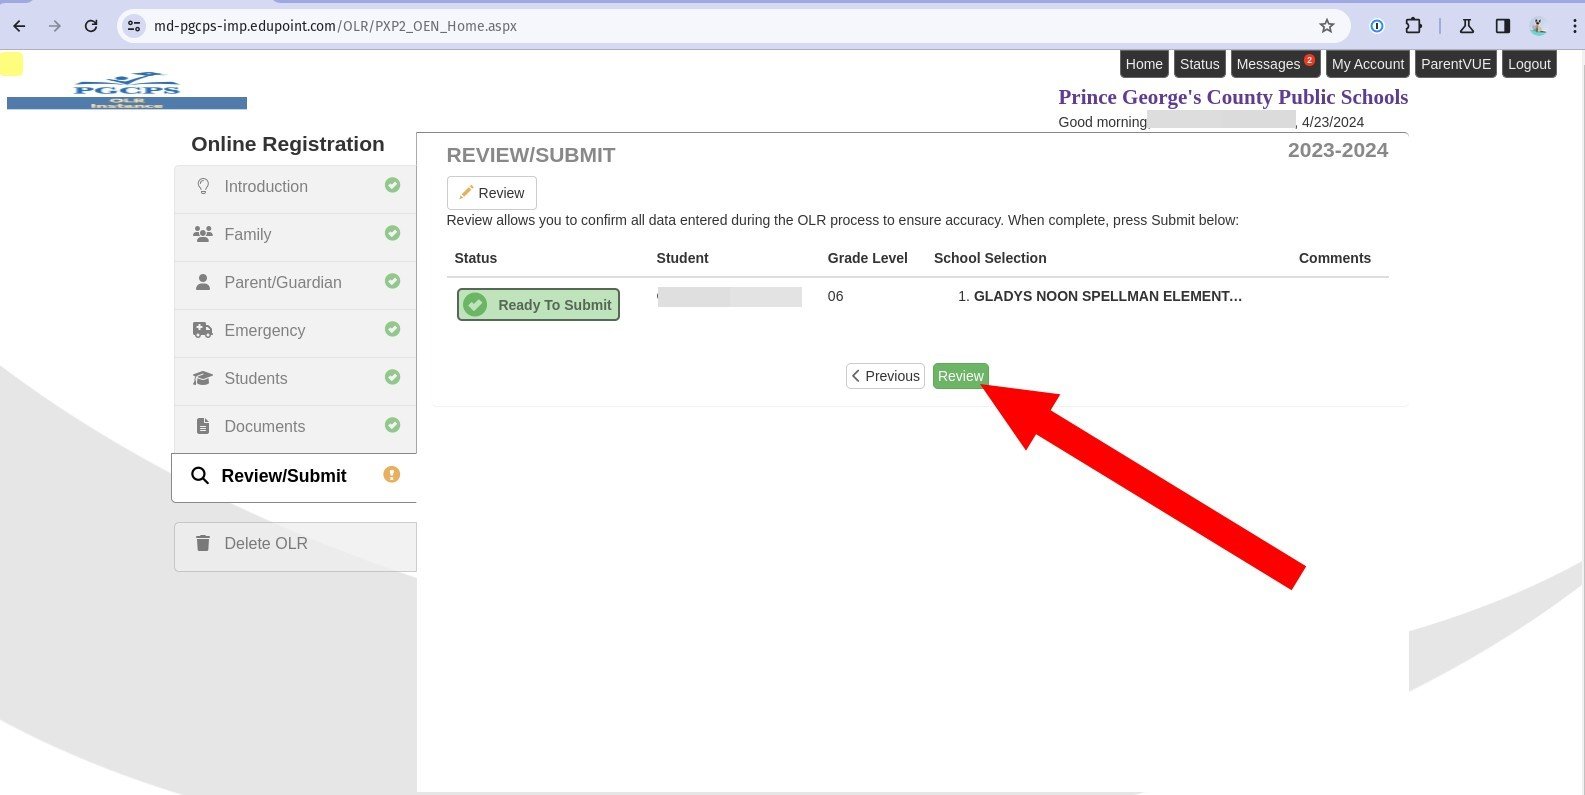
74. The OLR status is shown as ready to submit. Click Review to continue.
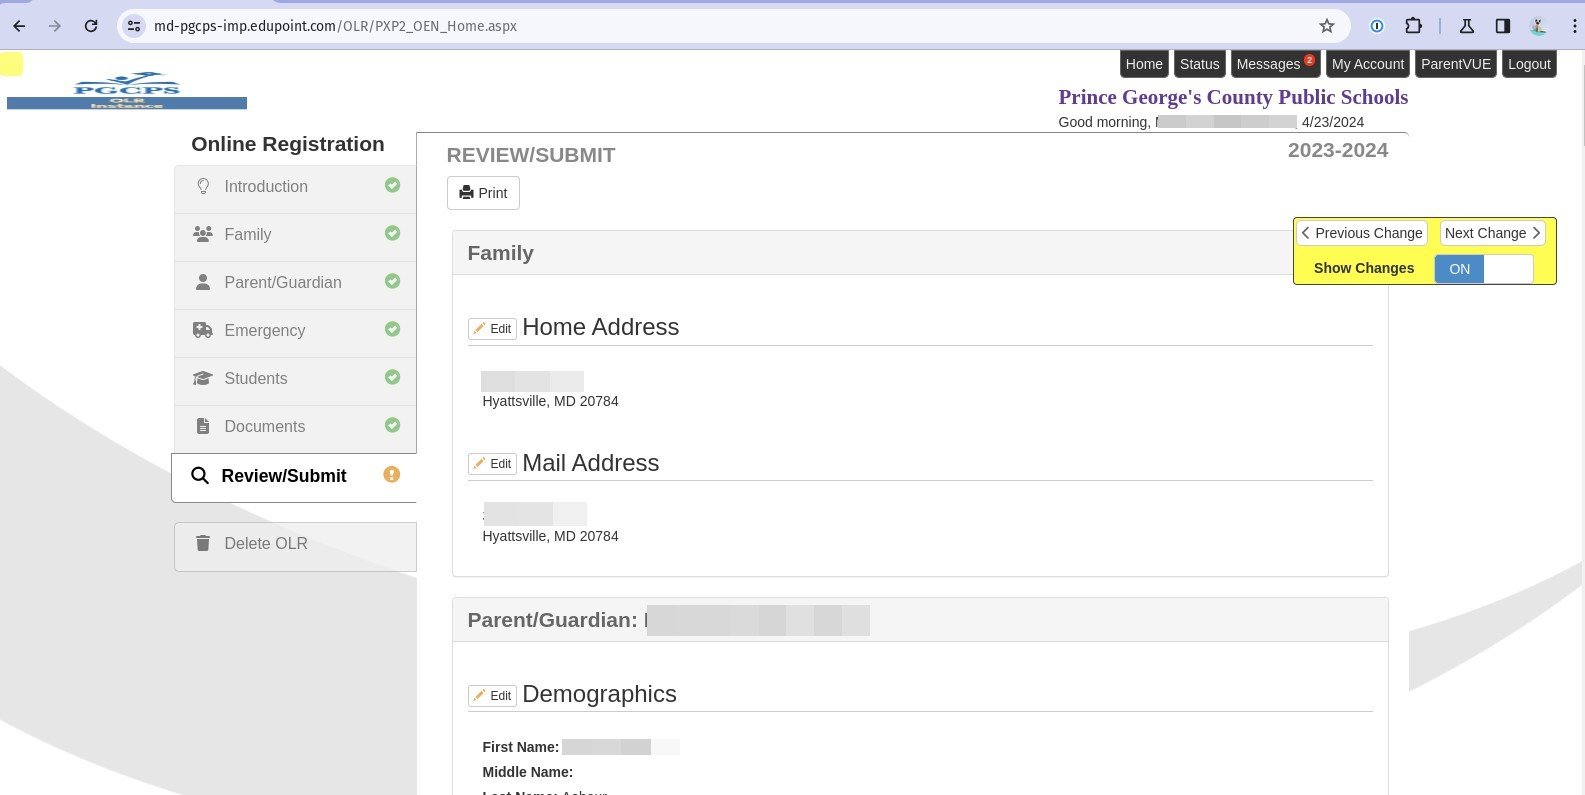
75. The Review/Submit page displays all information you have provided. Click Print to export a printer-friendly version of the information for your records.
76. If you need to change something, click Edit next to that section and make the necessary adjustments.
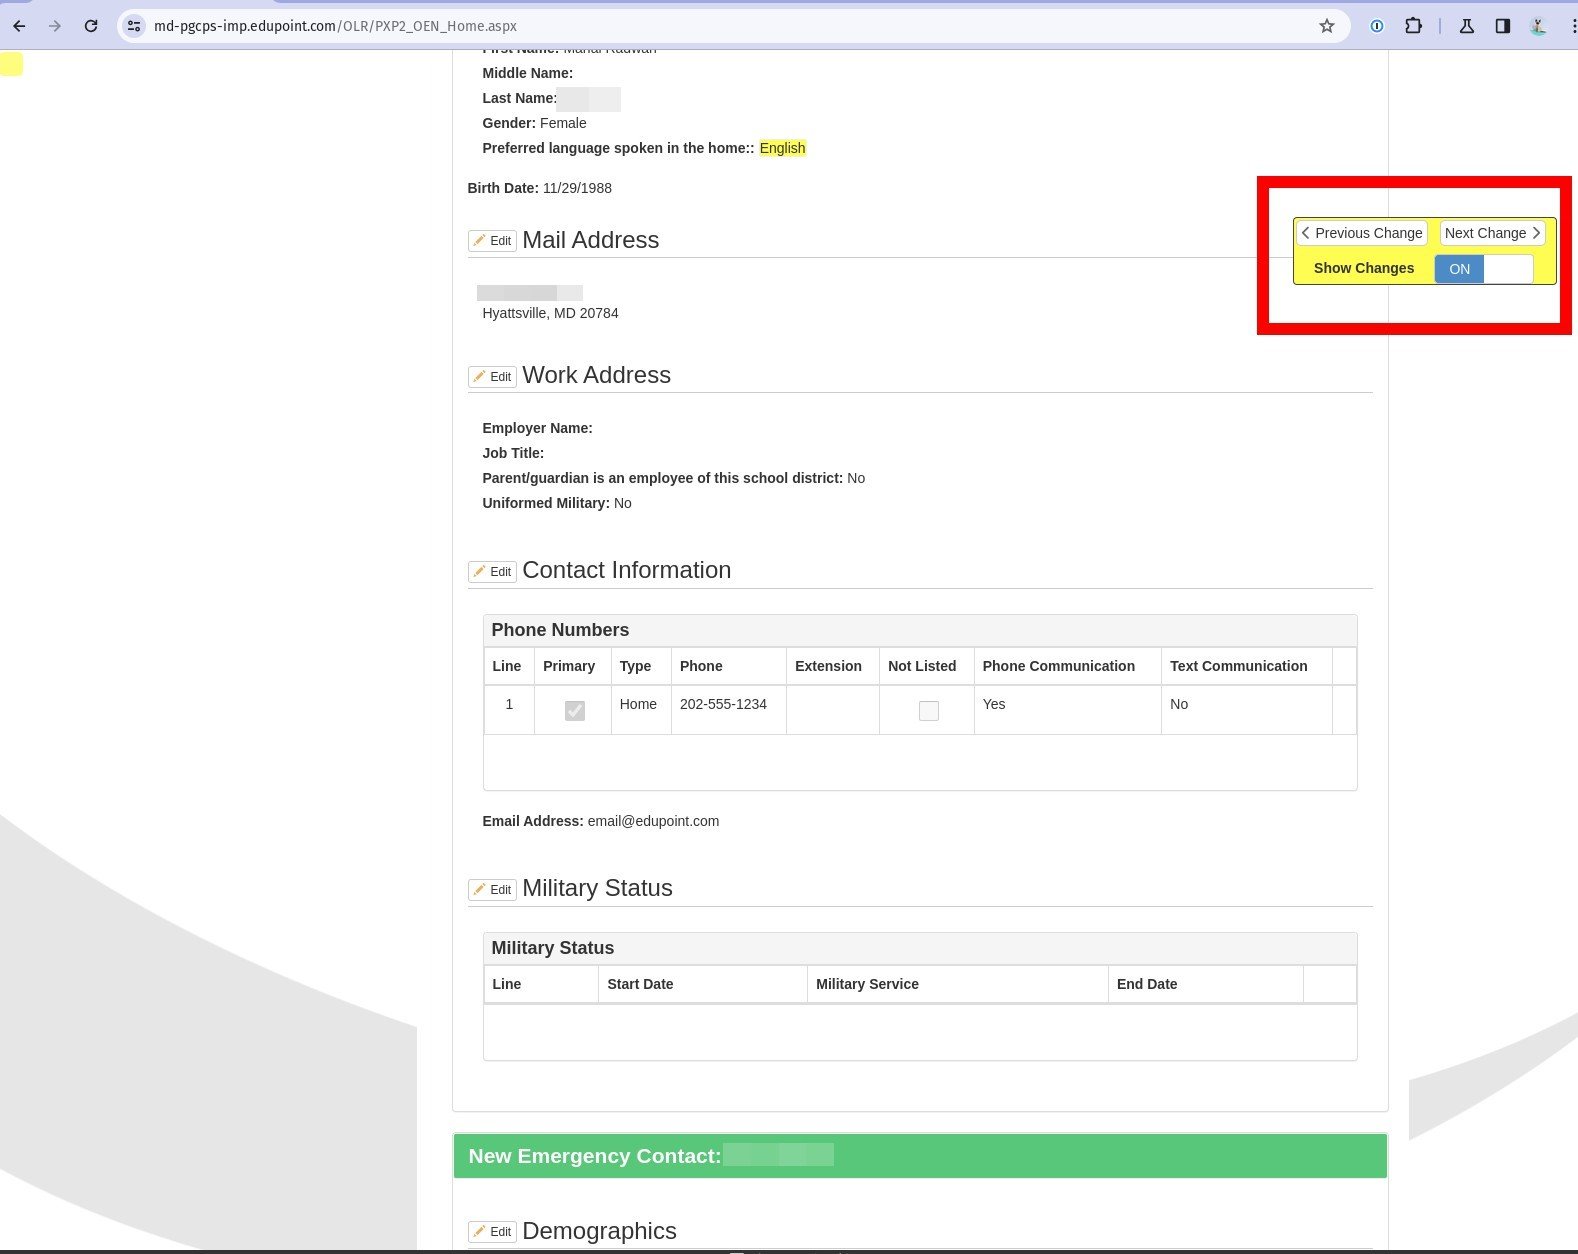
77. New information is indicated with a green banner.
78. If you have changed any information from a previous OLR submission, it is highlighted in yellow. Use the Show Changes tool to move directly to the next or previous change.
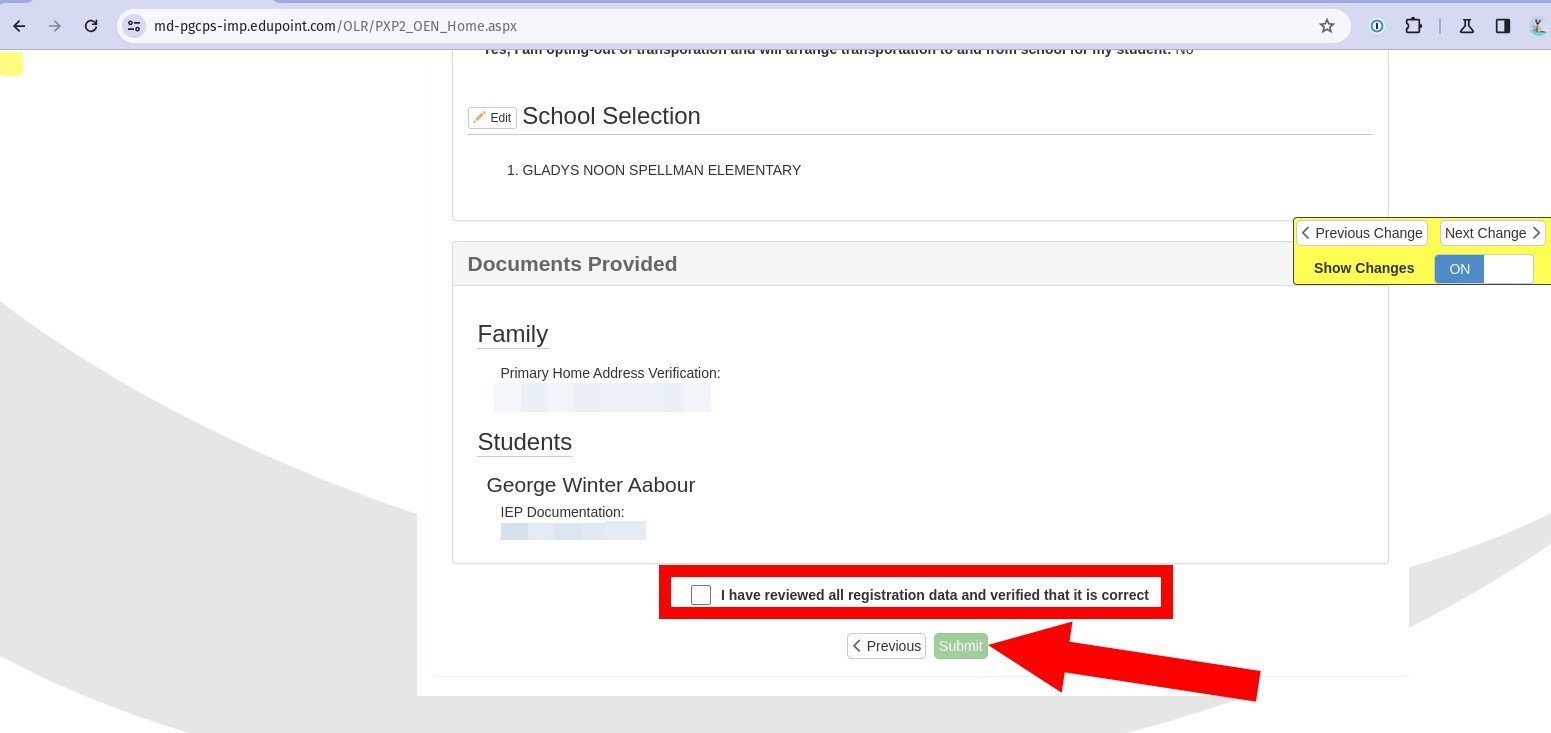
79. Once you have reviewed all information for accuracy, select the verification check box.
80. Click Submit.
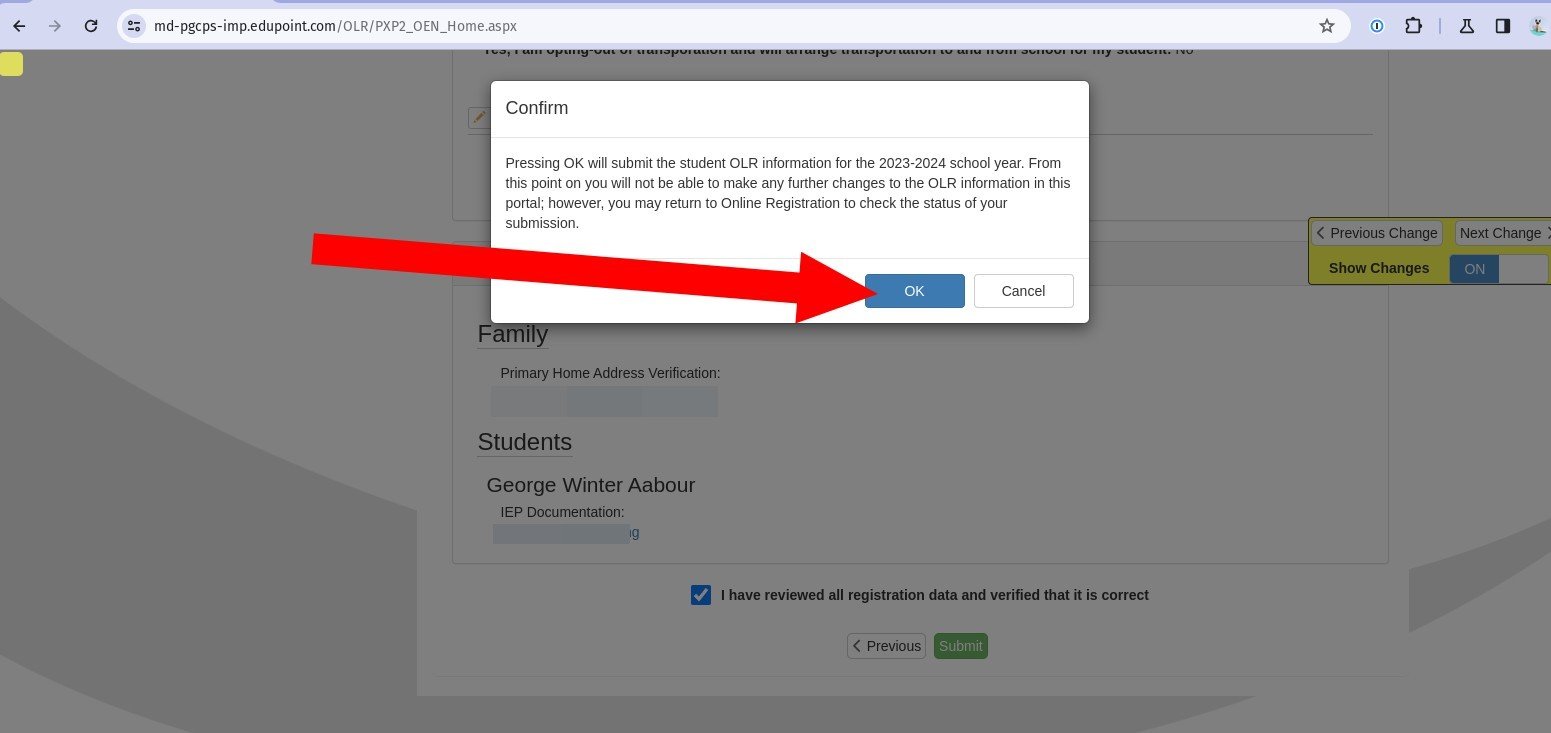
81. Click OK to approve the submission.
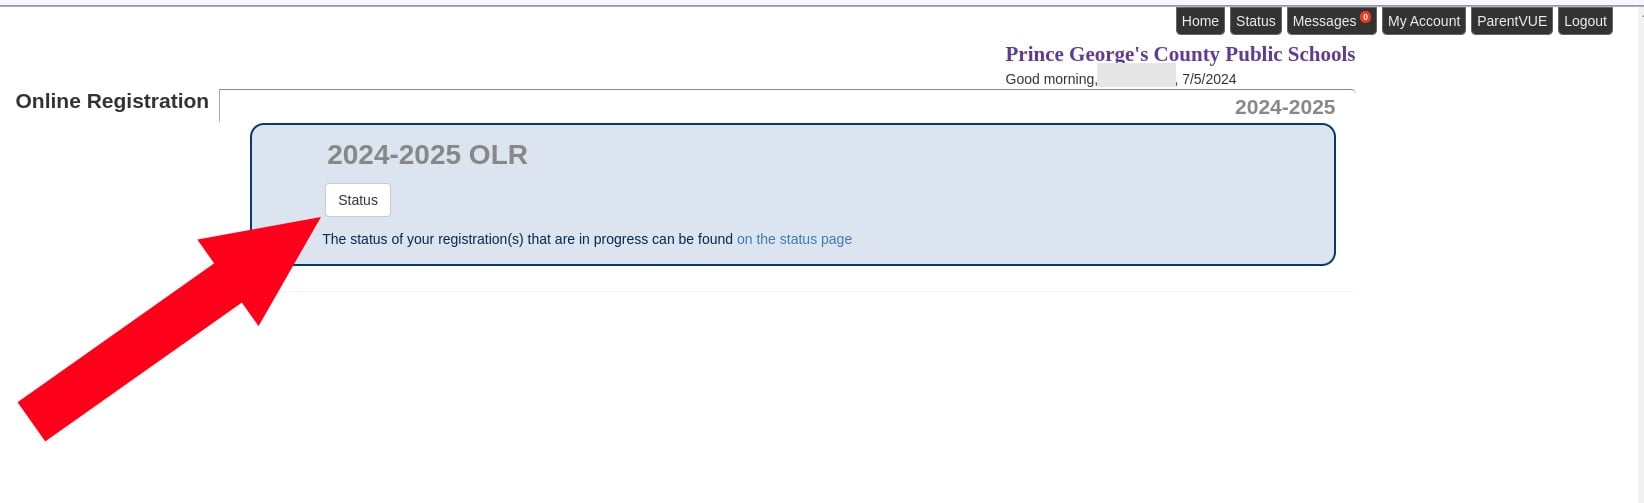
82. You receive a confirmation that your OLR has been successfully You can check the status of your enrollment request at any time on the Status page.
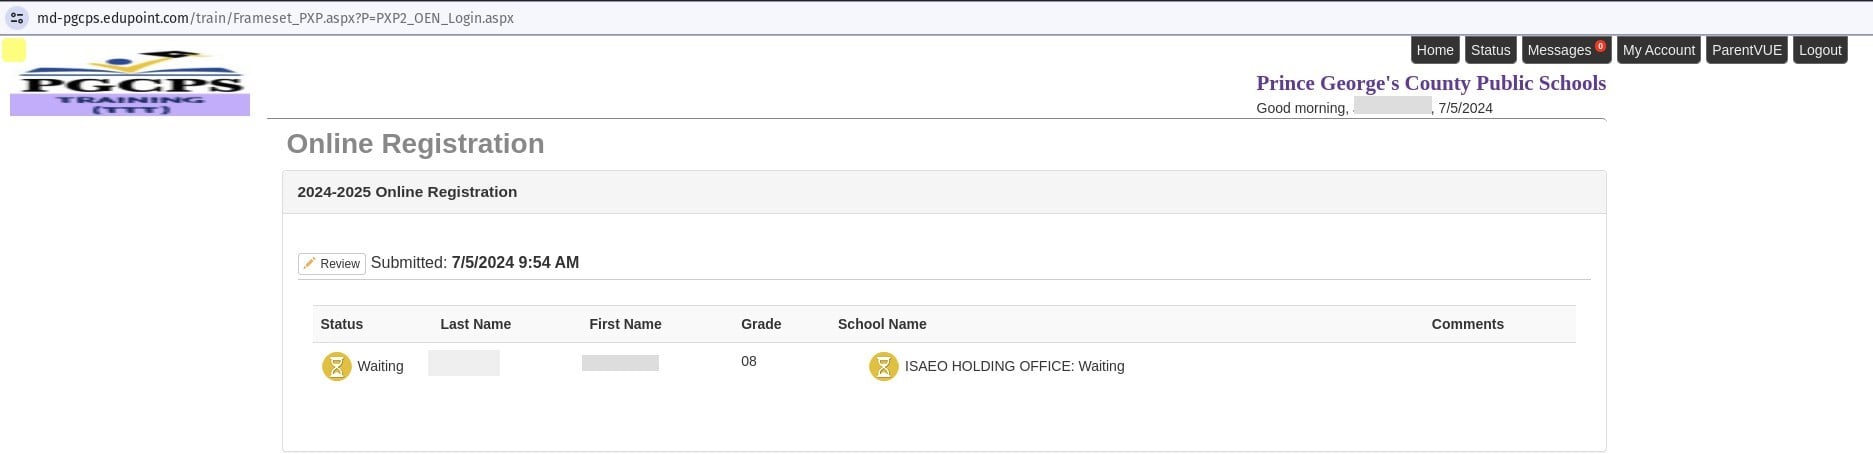
Note: The student is not officially enrolled until the school's registrar reviews all documentation and approves the enrollment request.
Student Transfer Requests
At this time, you cannot request a school transfer within Synergy.
If you are moving to a new address, but remain within the same school boundary, you need only fill out a change of address form found on the PGCPS website, then take that completed form with proof of residency to the school.
If you are moving to a new address, but you will not be in the same school boundary, you must transfer the student to the correct school. To do so, complete a withdrawal form at the current school, then enroll the student in the new school using the online registration (OLR) process.
ParentVUE Registration Guide (Full Text) Text
What is Online Registration?
Online Registration (OLR) is the Synergy module that allows parents and guardians to register their student in a school within Prince George’s County Public Schools. You can enroll a new student, or request an approved transfer for an existing student to another school.
NOTE: To use OLR, you must first have a ParentVUE account. See the Synergy ParentVUE Guide for more information.
Accessing Online Registration (OLR)
- Log in to ParentVUE
- Click the Online Registration button in the top right corner of the page.
- From the main online registration (OLR) page, you can:
- Enroll a new student
- Request a student ID without enrolling them
Enrolling a New Student
To enroll a new student who does not currently attend a school in PGCPS log in to ParentVUE and follow the provided steps.
1. Click Online Registration
2. Read through the introduction.
3. Click Continue.
4. If you already have students in the school system, you see them listed on this page. If you don’t have students enrolled in the school system, that section is If you do not see a student that you expected to see, first verify that you correctly followed the steps when activating your ParentVUE account, as described in the “Existing Parents and Guardians” section of the Synergy ParentVUE Guide. If you activated your account using the correct steps, and you still don’t see your student, contact the ParentVUE admin at your student’s school.
5. Click Save and Continue.
6. Before you begin entering information about the student, you must provide your full legal name in the Electronic Signature text box, which indicates that you agree to the following:
"By affixing your name below, you attest that you are the account holder or a person authorized to provide the requested information and you expressly agree that the information provided is accurate to the best of your knowledge. A PGCPS employee who accesses and intentionally enters inaccurate information in the OLR may be subject to discipline."
NOTE: The signature must match the name on the account.
7. Click Save and Continue.
Enter Family Information
Home Address
8. If you are new to the system, you must enter the first line of the home address in the Home Address search box, then select it from the If the address does not exist in the system, or it is not displayed correctly, you can enter it manually, but it will need to be verified by the Pupil Accounting and School Boundaries office after you submit the enrollment request. If you already have a home address in the system, verify it is up to date. If you need to make changes to an existing address, you can select the Check here if your address has changed checkbox, and search for the current address.
9. Click Save and Continue.
Mailing Address
10. Confirm that the mailing address is If you need to change it from the home address, clear the checkbox and you will be prompted to enter a different address.
11. Click Save and Continue.
Enter Parent/Guardian Information
Demographics
12. Verify that the personal information is Note that if the name is incorrect, you cannot change it here. You must change it as the registrar.
13. Select the Preferred language spoken in the home. Once selected, future communications with the household will be offered in that language whenever If you choose a language other than English, the student’s school will automatically be set to International Student Admissions and Enrollment (ISAEO) to ensure additional support services are available.
14. Click Save and Continue.
Work Information
15. Enter the work contact information, or select the checkbox to indicate that they are not currently employed.
16. Click Save and Continue.
Phone Numbers and Email Addresses
17. Verify or add Phone Numbers. You can indicate whether the recipient wants to receive phone calls, text messages, or both, when the school or district has important announcements such as school closures. One of the phone numbers on your account must be designated as Primary.
18. Verify the Email Address.
19. Click Save and Continue.
Military Service
20. If they have Military Service, click Add New to enter it
21. Click Save and Continue.
22. Add or update the list of parents and guardians associated with the household. This does not include other emergency contacts, which are added on the next page.
23. To change information about an existing parent or guardian, click the Edit button
24. To add an additional parent or guardian, click Add New Parent/Guardian.
NOTE: Documentation for newly added parents and guardians is required.
25. Click Save and Continue.
Additional Emergency Contacts
26. Add or update information for emergency contacts who are not parents or guardians associated with the household. Emergency contacts must have a phone number, or you will not be able to proceed.
NOTE: You must have at least one emergency contact in order to complete registration.
27. Click Save and Continue.
Add New Students
28. To remove a student record from the enrollment process, locate the name in the Students to enroll section and click Exclude.To include an existing student record in the enrollment process, locate the name in the Students to exclude section and click Include.
29. To enroll a new student who is not already in the system, click Add New Student.
New Student Demographics
30. Enter information for the student. Any field marked with a red asterisk (*) is required.
31. When you have completed the form, click Save and Continue.
32. Select the Student’s birth country from the drop down list. If you select “United States”, you need to select the state. If you select a birth country outside the US, you must also enter the Date the student entered the US, the Date the student first attended school in the US, as well as the Month and Year the student last attended school in their birth country.
33. Select the Birth verification document type from the drop down list. This is required regardless of the student’s country of origin.
34. Click Save and Continue.
35. Indicate whether the student is homeless. If the answer is Yes, you are required to indicate where the student stays at night.
36. Click Save and Continue. If you indicated that the student is homeless, you are taken to a separate page to complete a Displacement Statement form. If you are enrolling a student in 00K, you are taken to the Prior Care page, where you must enter information on the student’s previous experience with childcare before enrollment. If you did not indicate the student is homeless or entering kindergarten, you are taken to the Parent/Guardian Relationships page.
Parent/Guardian Relationships
37. Verify or select a Relationship to the student for every parent or guardian associated with the household from the drop-down list.
38. Select other parameters where appropriate:
- Lives With: Indicates the parent/guardian lives in the household with the student.
- Contact Allowed: Indicates the parent/guardian is allowed contact with the student and will be included in school to student communication.
- Ed. Rights: Indicates the parent/guardian has rights to make decisions regarding the student's education and access to student information in the Synergy parent portal.
- Has Custody: Indicates the parent/guardian has legal custody of the student.
- Mailings Allowed: Indicates the parent/guardian may receive mailings regarding the student.
- Release To: Indicates the school may release the student to the parent/guardian.
- Financial Resp.: Indicates the parent/guardian is financially responsible for the student.
39. Select answers from the drop-down list for the remaining required questions.
40. Click Save and Continue.
Emergency Contact Relationships
41. Verify or select a Relationship for the Emergency Contact.
42. Indicate whether the school can release the student to this person.
43. Click Save and Continue.
Emergency Contact Order
44. Drag and drop the list of parents, guardians, and emergency contacts in the order they should be contacted in the event of an emergency.
45. Click Save and Continue.
Ethnicity and Race
46. Select an Ethnicity from the drop down list.
47. Select applicable race or races.
48. Click Save and Continue.
Language Survey
49. Answer the required Language Survey questions using the drop down list for each one. If you select a language other than English for two or more questions, your enrollment request will be routed to the International Student Admissions and Enrollment (ISAE) department after you submit it.
50. Click Save and Continue.
Health Information
51. Enter contact information for the student’s Physician and Dentist in case of an emergency. These fields are not required.
52. Click Save and Continue.
Publicity Release
53. Indicate whether you Grant Permission or Do Not Grant Permission to have your student’s name, voice, photographic likeness, and student work to be used by PGCPS staff and contractors, journalists, or photographers employed by news media outlets.
54. Select answers to the required Information Release questions from the drop down list.
55. Click Save and Continue.
Internet Access and Survey
56. Select an answer to the required Internet Access question from the drop down list. If you answer “No”, select an answer to the question What is the primary barrier to having internet access in the student's home? from the drop-down list.
57. Click Save and Continue. If you selected “Yes”, you are taken to the Internet Survey page. If you selected “No”, you go directly to the Previous Schools Attended page.
58. Select an answer to each question from the drop-down list.
59. Click Save and Continue.
Previous Schools
60. Indicate whether the student has attended school before by selecting an answer from the drop down list.
61. Click Save and Continue. If you answered “Yes” to whether the student has attended other schools, you are taken to a separate page to enter information about any previous school experience. If you answer “No” you are taken directly to the Special Education page.
62. If you answered “Yes” on the previous page, enter the previous school information in the lines provided. If the most recent attended school was in another country, the student’s school will automatically be set to International Student Admissions and Enrollment (ISAEO) to ensure additional support services are available.
63. Click Save and Continue.
Special Services
64. Answer each question by selecting a response from the drop-down list.
65. Click Save and Continue.
Transportation
66. Review the linked transportation documents, then select the checkboxes to indicate you have done so.
67. Indicate whether you wish to opt-out of transportation. If you indicate that you would like to request transportation, you are then asked if the student will be picked up or dropped off at an address different from the home address. If you answer “Yes” to this follow up question, you can then enter the address of that pick up/drop off location.
68. Click Save and Continue.
School Selection
69. The boundary school based on the home address is automatically chosen. If they are preapproved for a different school, you can select it from the School Selection drop down list.
70. Click Save and Continue.
71. You automatically return to the Student list. You can now see the status of the new student is marked “Complete”. If you need to add additional students, click Add New Student and repeat the previous steps. Otherwise click Save and Continue.
Required Documents
72. You are given a list of required documents. If you have an electronic copy of the document, select the Document Type from the drop-down list, then click Upload to upload that document from your computer. If you do not have an electronic copy, upload a blank document for each required entry, and then once you complete the entire enrollment request, you will need to bring the paper documents to the school before the process is completed.
NOTE: The enrollment request cannot be approved until all required documentation has been received by the school either electronically or delivered in hard copy to the school.
73. Once all required documents have been uploaded, or you have indicated that you will deliver a hardcopy to the school, click Save and Continue.
Review and Submit the Student's Enrollment Request
74. The OLR status is shown as ready to submit. Click Review to continue.
75. The Review/Submit page displays all information you have provided. Click Print to export a printer-friendly version of the information for your records.
76. If you need to change something, click Edit next to that section and make the necessary adjustments.
77. New information is indicated with a green banner.
78. If you have changed any information from a previous OLR submission, it is highlighted in yellow. Use the Show Changes tool to move directly to the next or previous change.
79. Once you have reviewed all information for accuracy, select the verification check box.
80. Click Submit.
81. Click OK to approve the submission.
82. You receive a confirmation that your OLR has been successfully You can check the status of your enrollment request at any time on the Status page.
Note: The student is not officially enrolled until the school's registrar reviews all documentation and approves the enrollment request.
Student Transfer Requests
At this time, you cannot request a school transfer within Synergy.
If you are moving to a new address, but remain within the same school boundary, you need only fill out a change of address form found on the PGCPS website, then take that completed form with proof of residency to the school.
If you are moving to a new address, but you will not be in the same school boundary, you must transfer the student to the correct school. To do so, complete a withdrawal form at the current school, then enroll the student in the new school using the online registration (OLR) process.