Synergy ParentVUE Guide
Accessing ParentVUE
Any adult who has been designated as someone with educational rights to a student currently enrolled in PGCPS is entitled to a ParentVUE account. In order to access ParentVUE, you need the following:
- A computer or mobile device with an internet connection.
- A modern web browser such as Google Chrome, Apple Safari, Microsoft Edge, or Mozilla Firefox.
- A working email address (if you don’t already have one, you can create one for free at gmail.com).
- Your student’s full legal name and date of birth.
- Either an activation link sent to your email address, or an activation key provided by the school.
The activation code is simply a unique string of numbers. An activation link is a website link with the code embedded in it that will automatically fill in that code when you click it.
There are a couple of ways to get your activation key or link:
- Parents and guardians who are completely new to PGCPS can create an account themselves at pgcps.org and receive an activation link.
- Parents who either have students currently enrolled at PGCPS, or who previously had a student enrolled, already have an account created. However, if they have not used that account yet, they must activate it with either a unique activation link that can be requested online, or a unique activation key provided by the student’s school.
NOTE: Activation codes and links expire after 90 days. If you receive an activation code or link but do not use it within that time period, you need to request a new one, either online or at the school.
New Parents and Guardians
If you are new to the Prince George’s County Public Schools and have never had a student enrolled in the system:
- Go to New Families enrollment
- Locate and click the link to enroll a student.
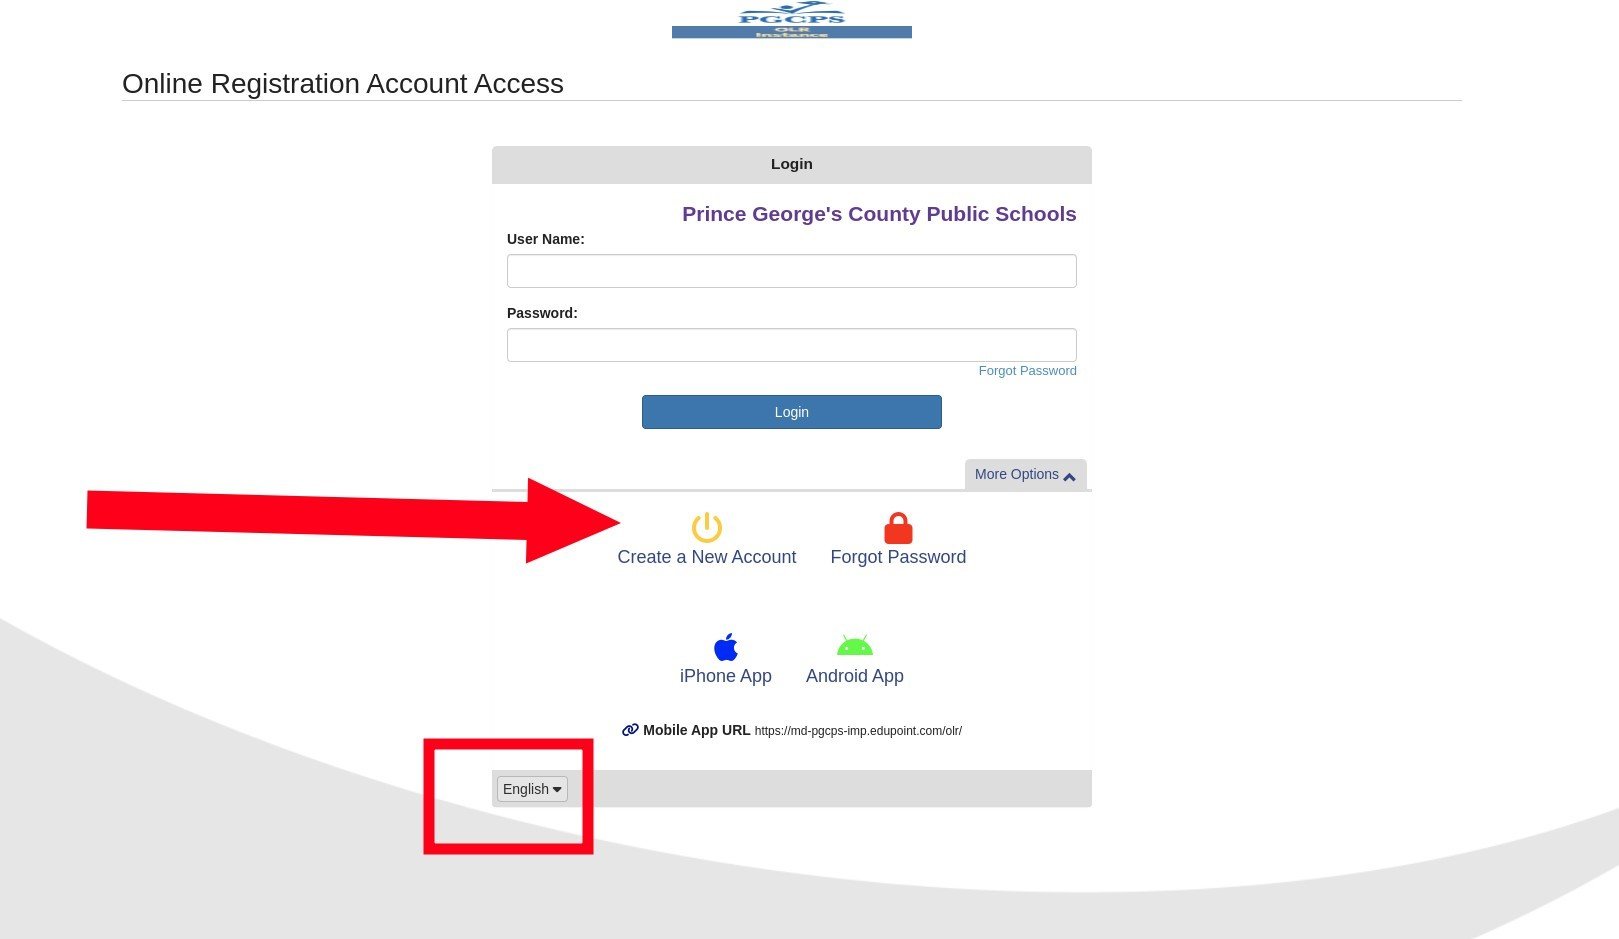
- If you would like to change the language, you can select your preferred language from the drop-down list in the lower left corner of the page.
- To create a ParentVUE account, click Create a New Account.
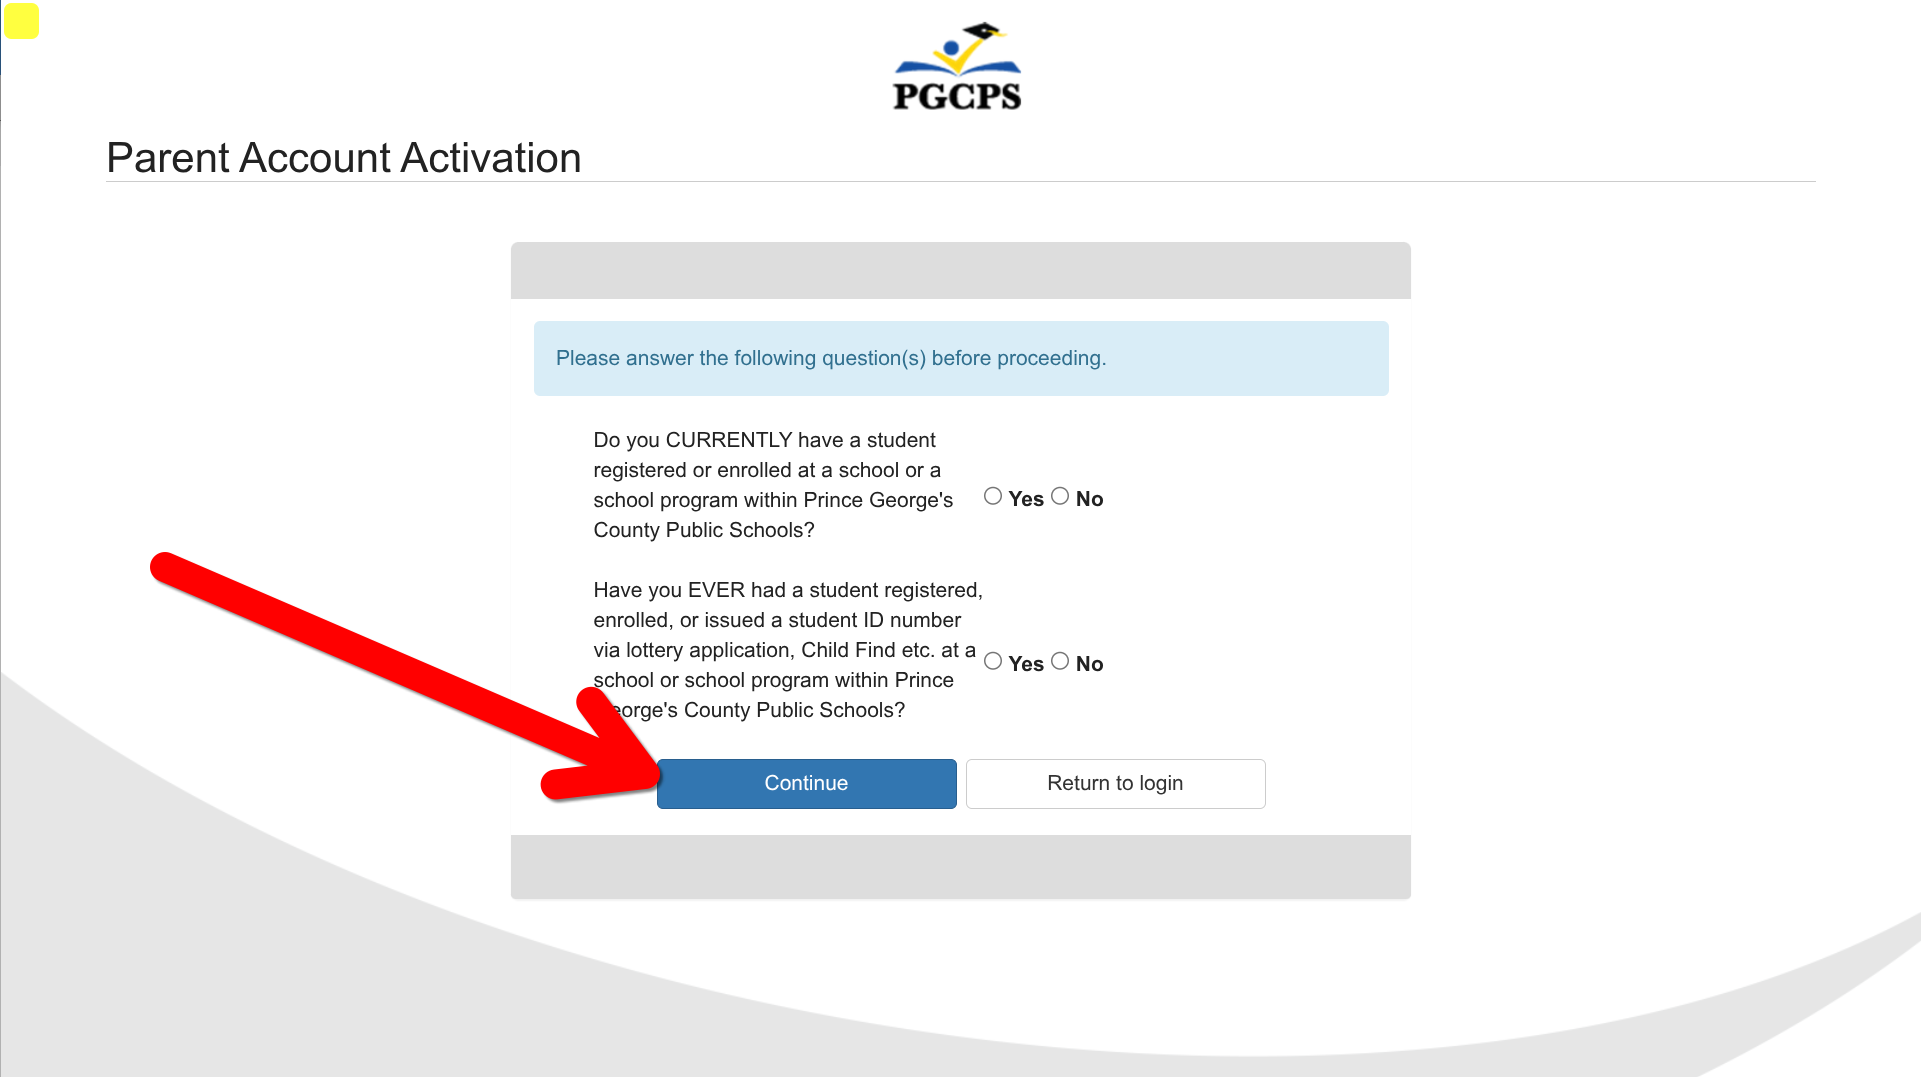
- Answer Yes or No to the questions.
- Click Continue.
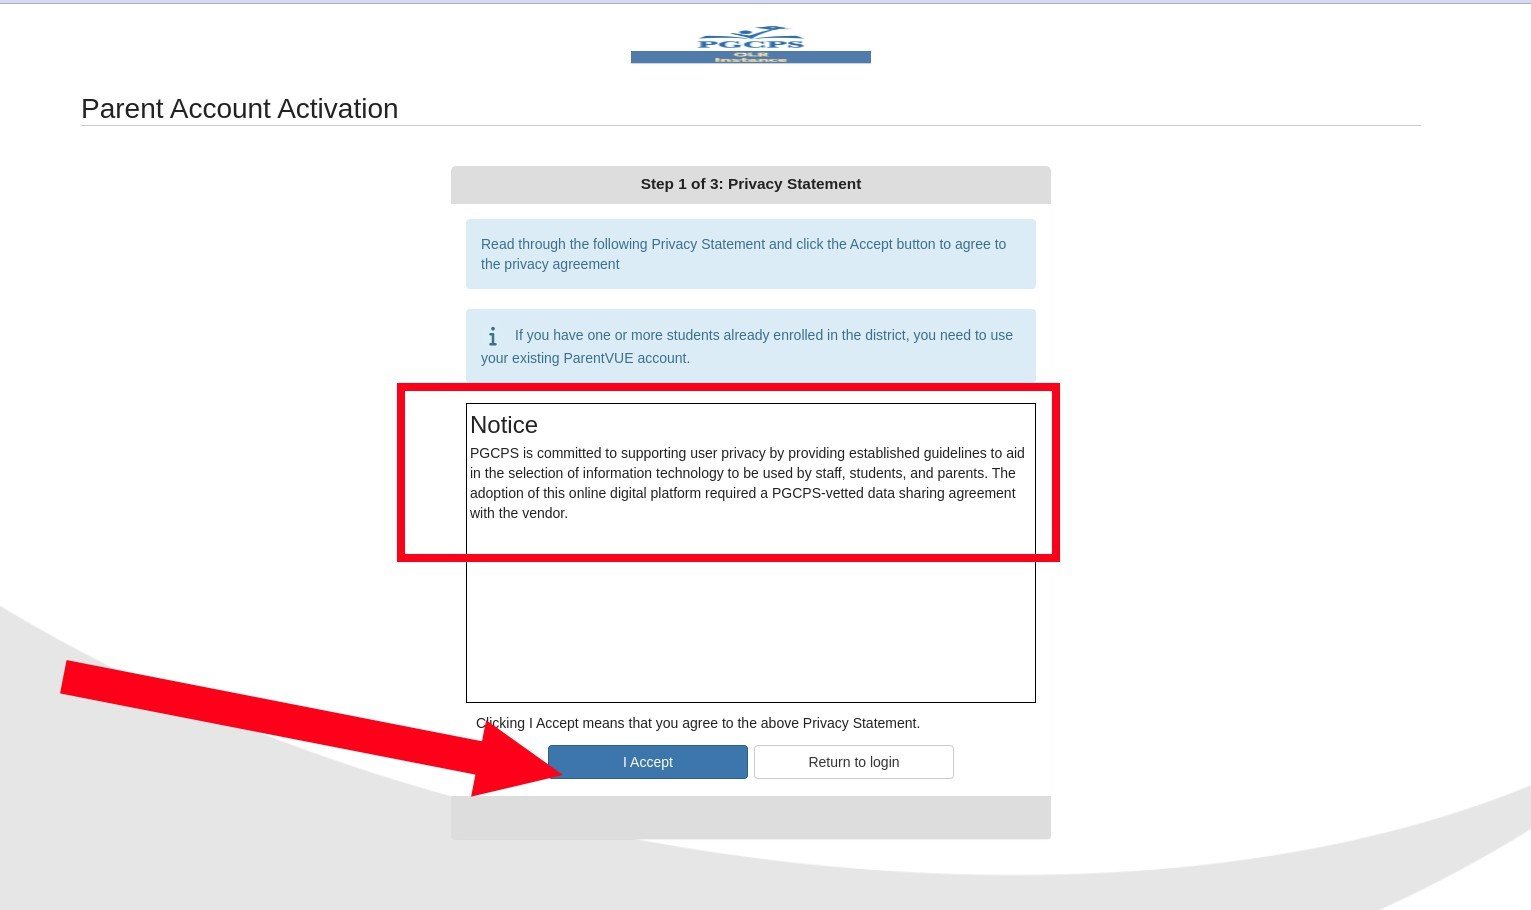
- Read the Notice, then click I Accept.
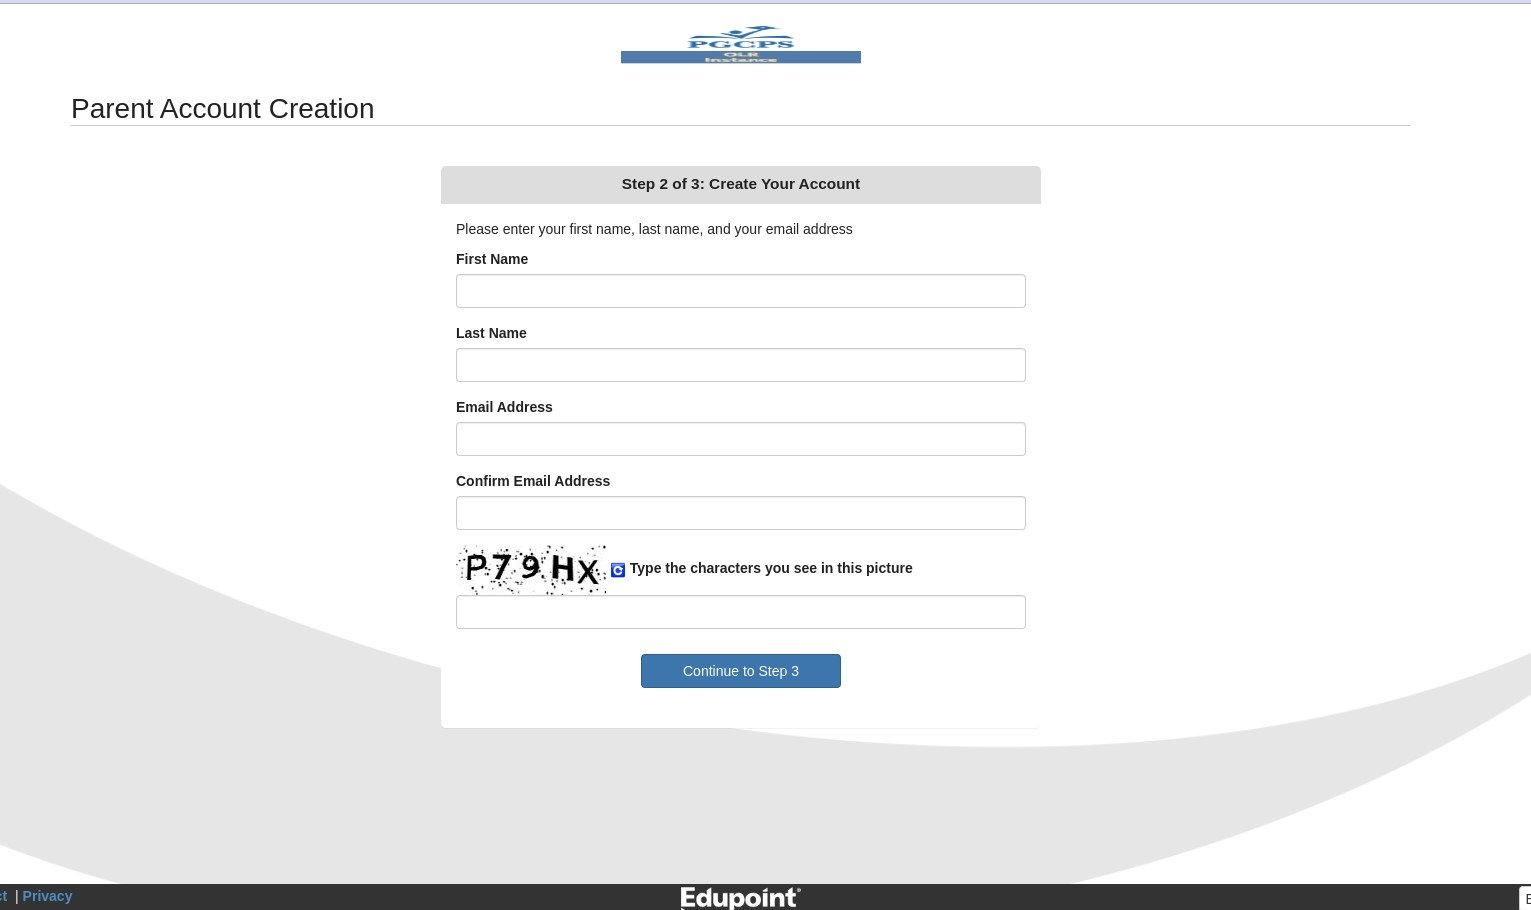
- Enter your First Name.
- Enter your Last Name.
- Enter your Email Address, then enter the same address in the Confirm Email Address.
- Type the letters and numbers you see in the This is a security measure implemented to reduce the number of fake accounts created.
- Click Continue to Step 3.
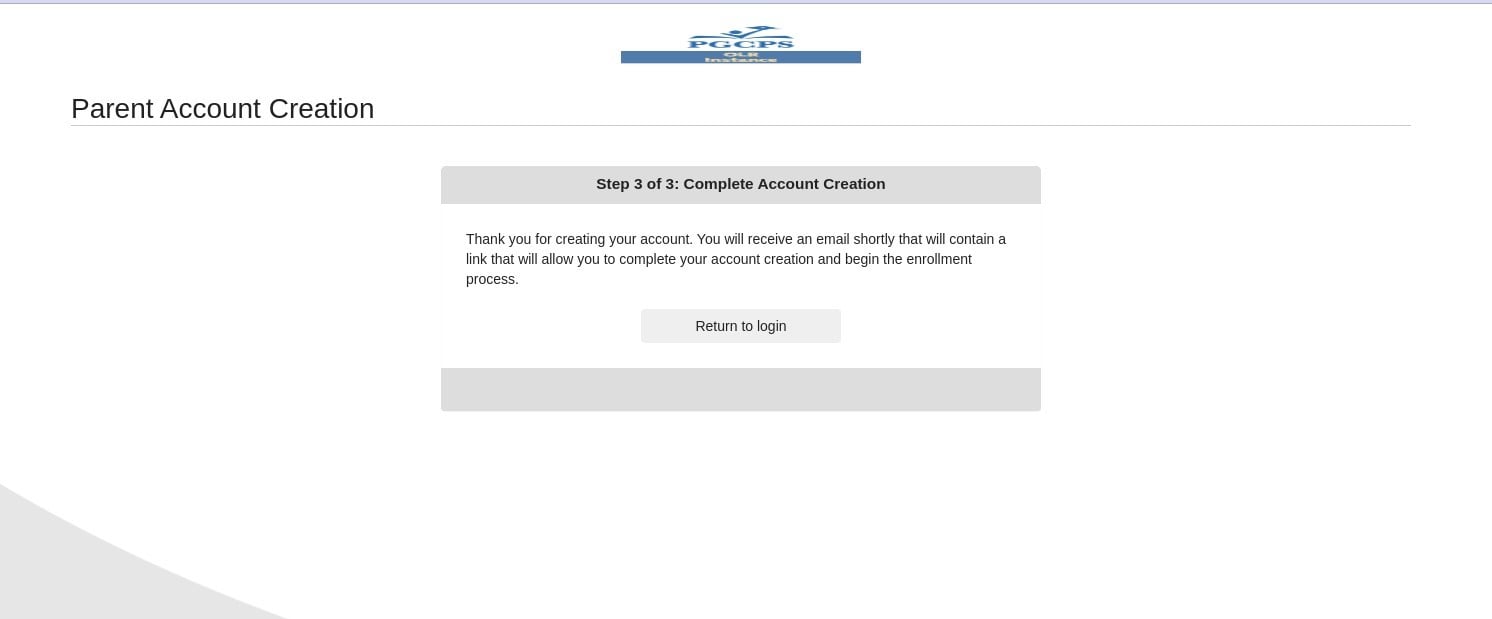
- You should receive an email message to the address provided with the activation link you need to activate your new account. Open the email message from feedback@pgcps.org with the subject “ParentVUE Registration”.
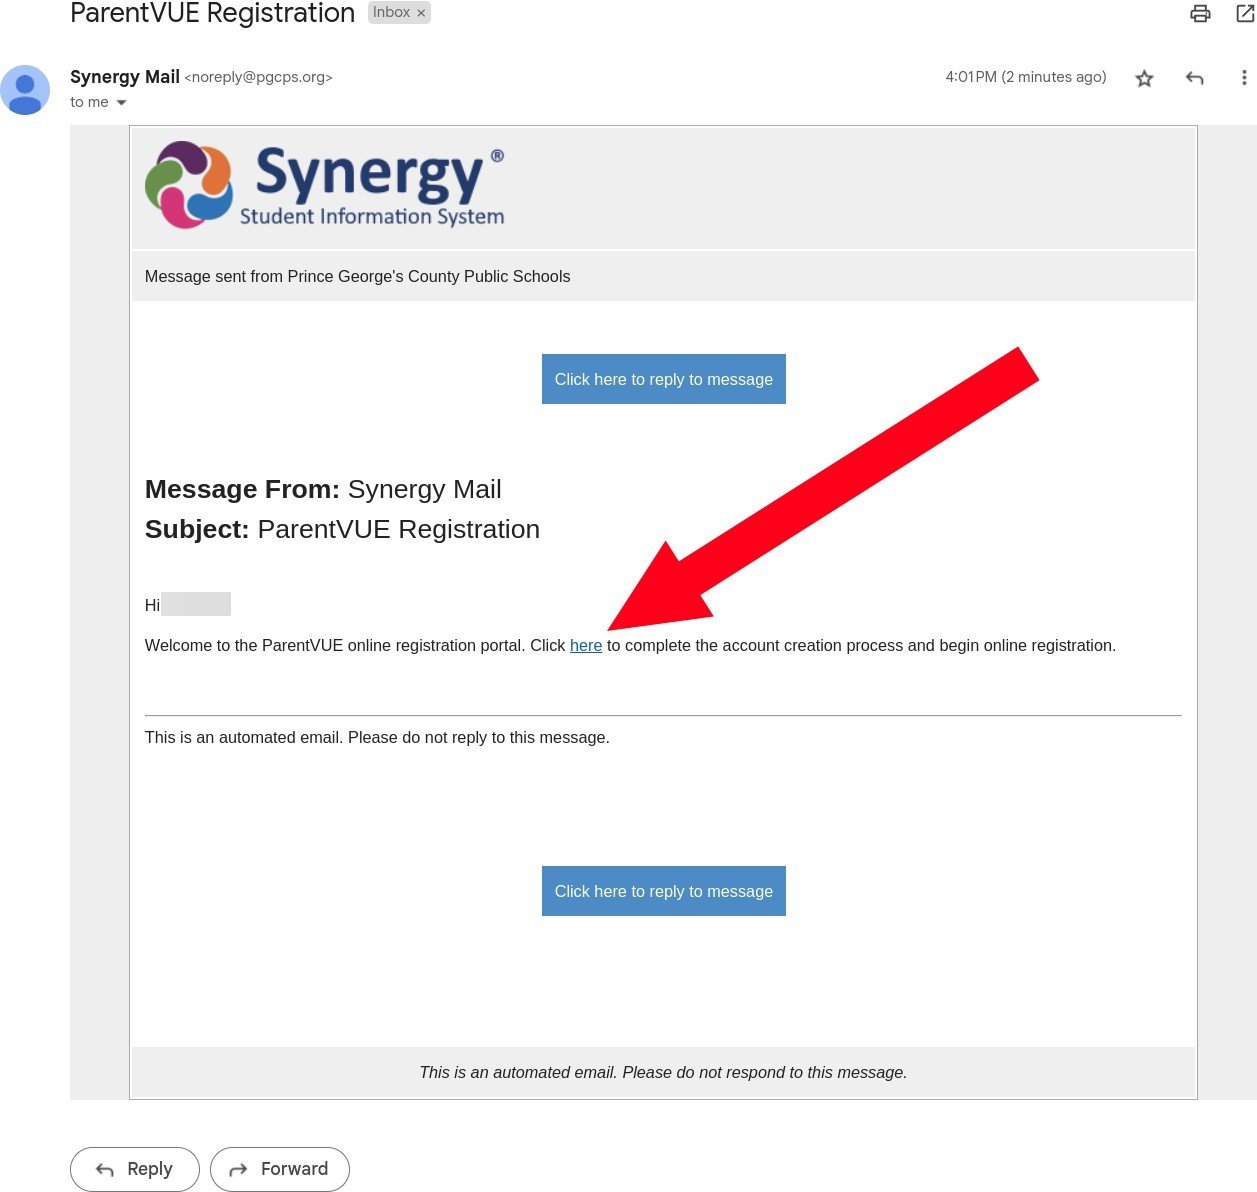
- Click the link contained within the email.
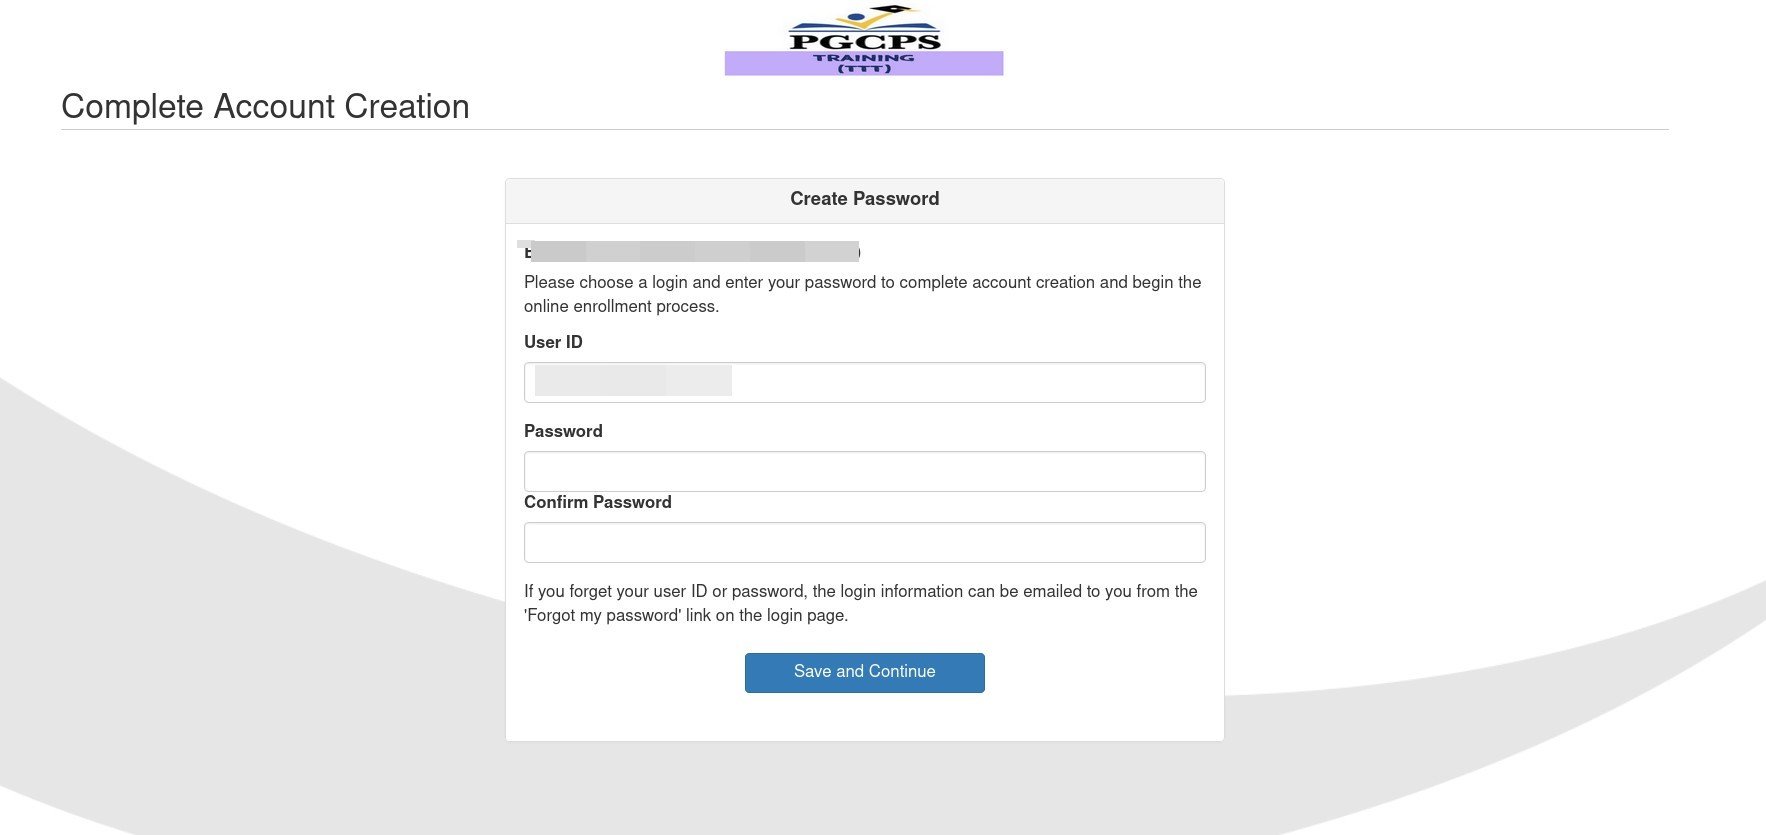
- Your User ID is automatically filled in as your email address.
- Enter a Password, then retype it in the Confirm Password field.
- Click Save and Continue.
Existing Parents & Guardians
If you have ever had a student enrolled in Prince George’s County Public Schools, then you already have parent data in the system that is linked to that student’s account. That existing data is used to create your ParentVUE account, but for security purposes, you must have either an activation link or activation key to activate that account and access the existing parent and student data.
To request the account activation link online:
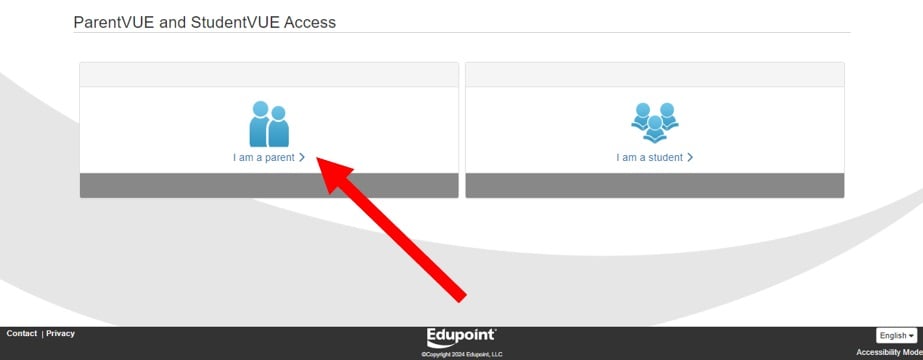
- Go to ParentVUE
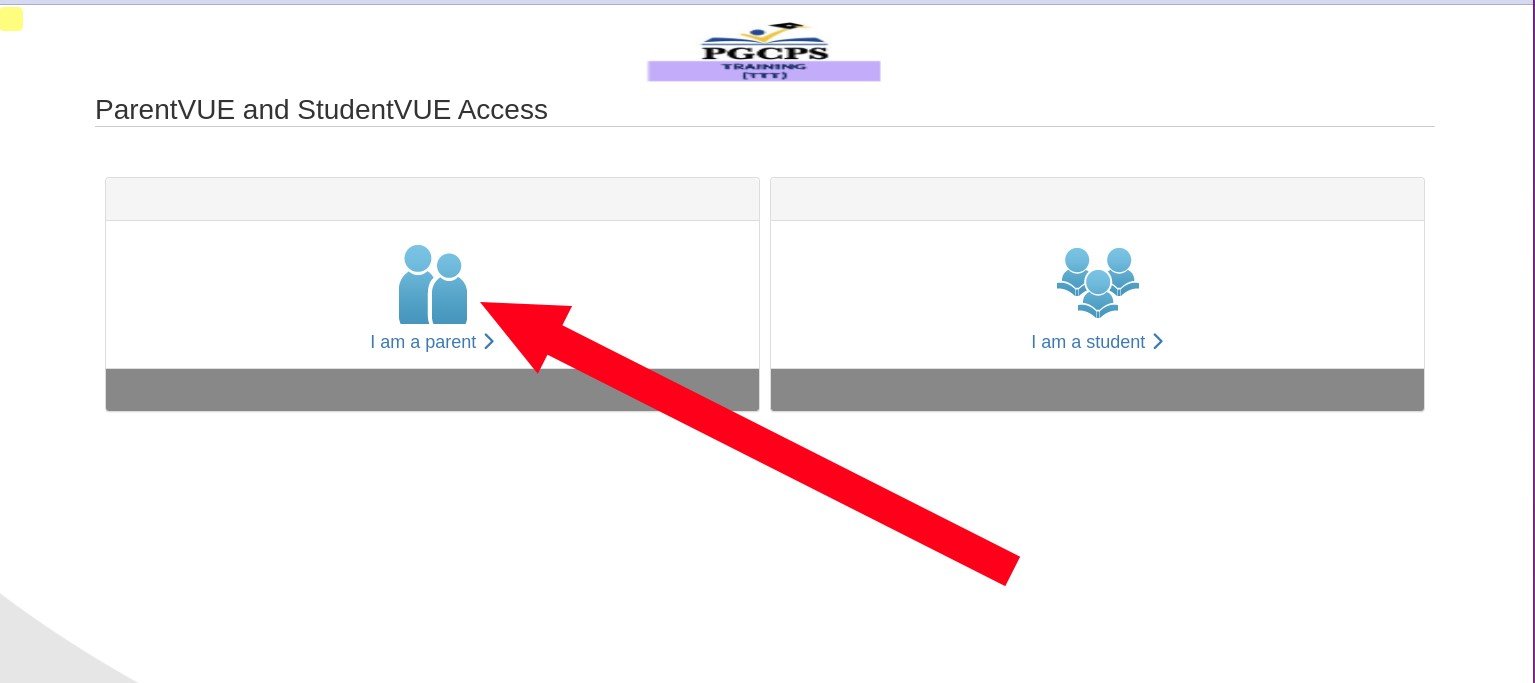
- Click I am a parent.
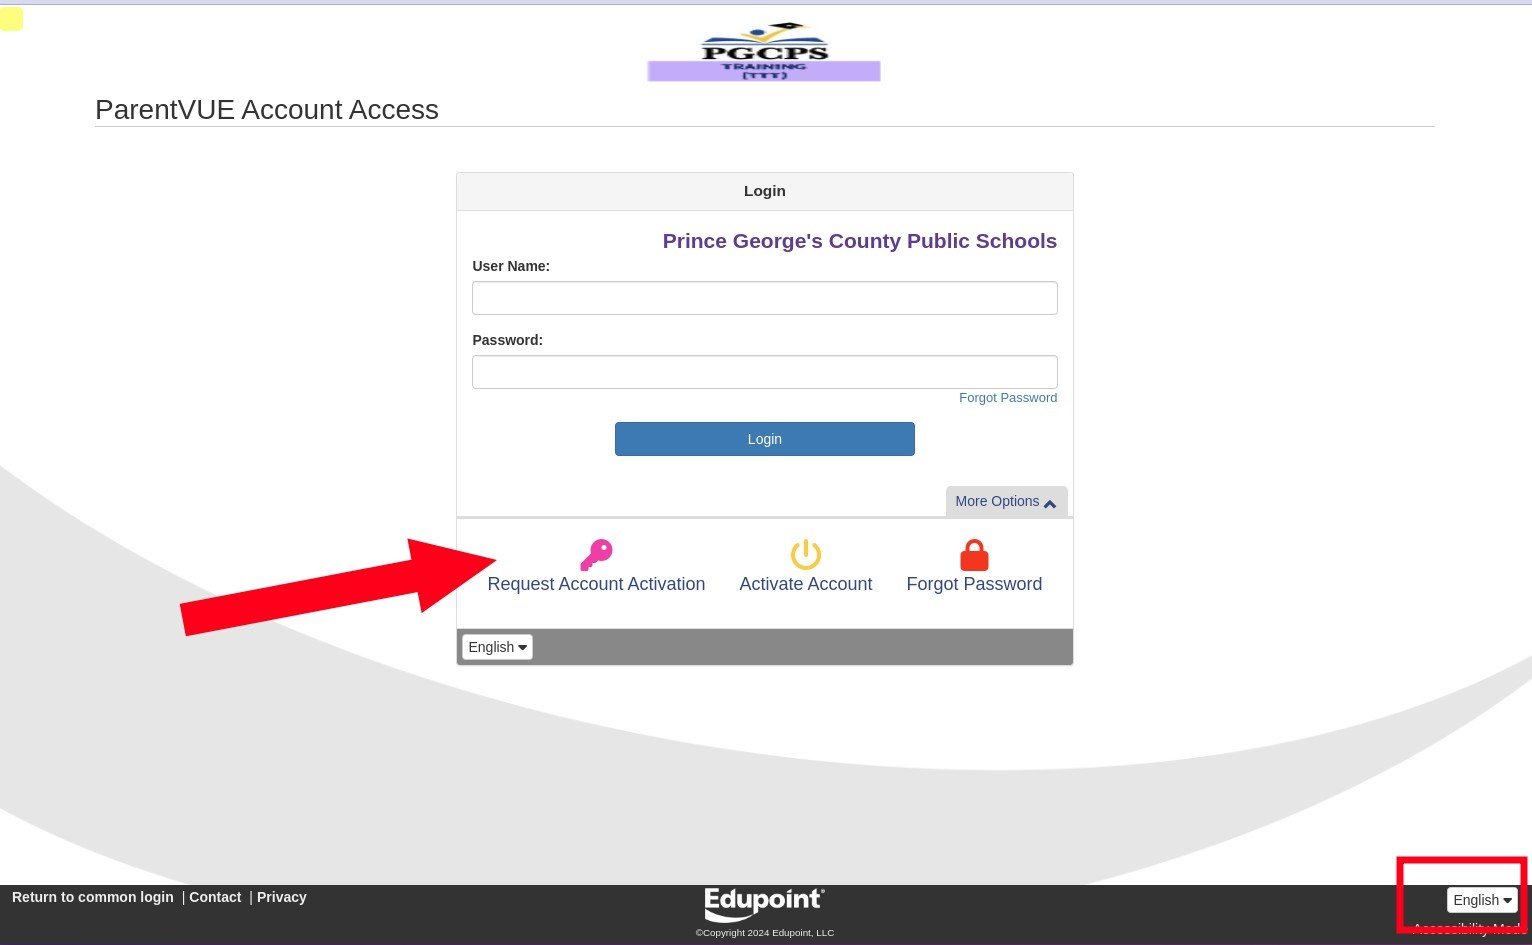
- If you would like to change the language, you can select your preferred language from the drop-down list in the lower right corner of the page.
- To create a ParentVUE account, click Request Account Activation.
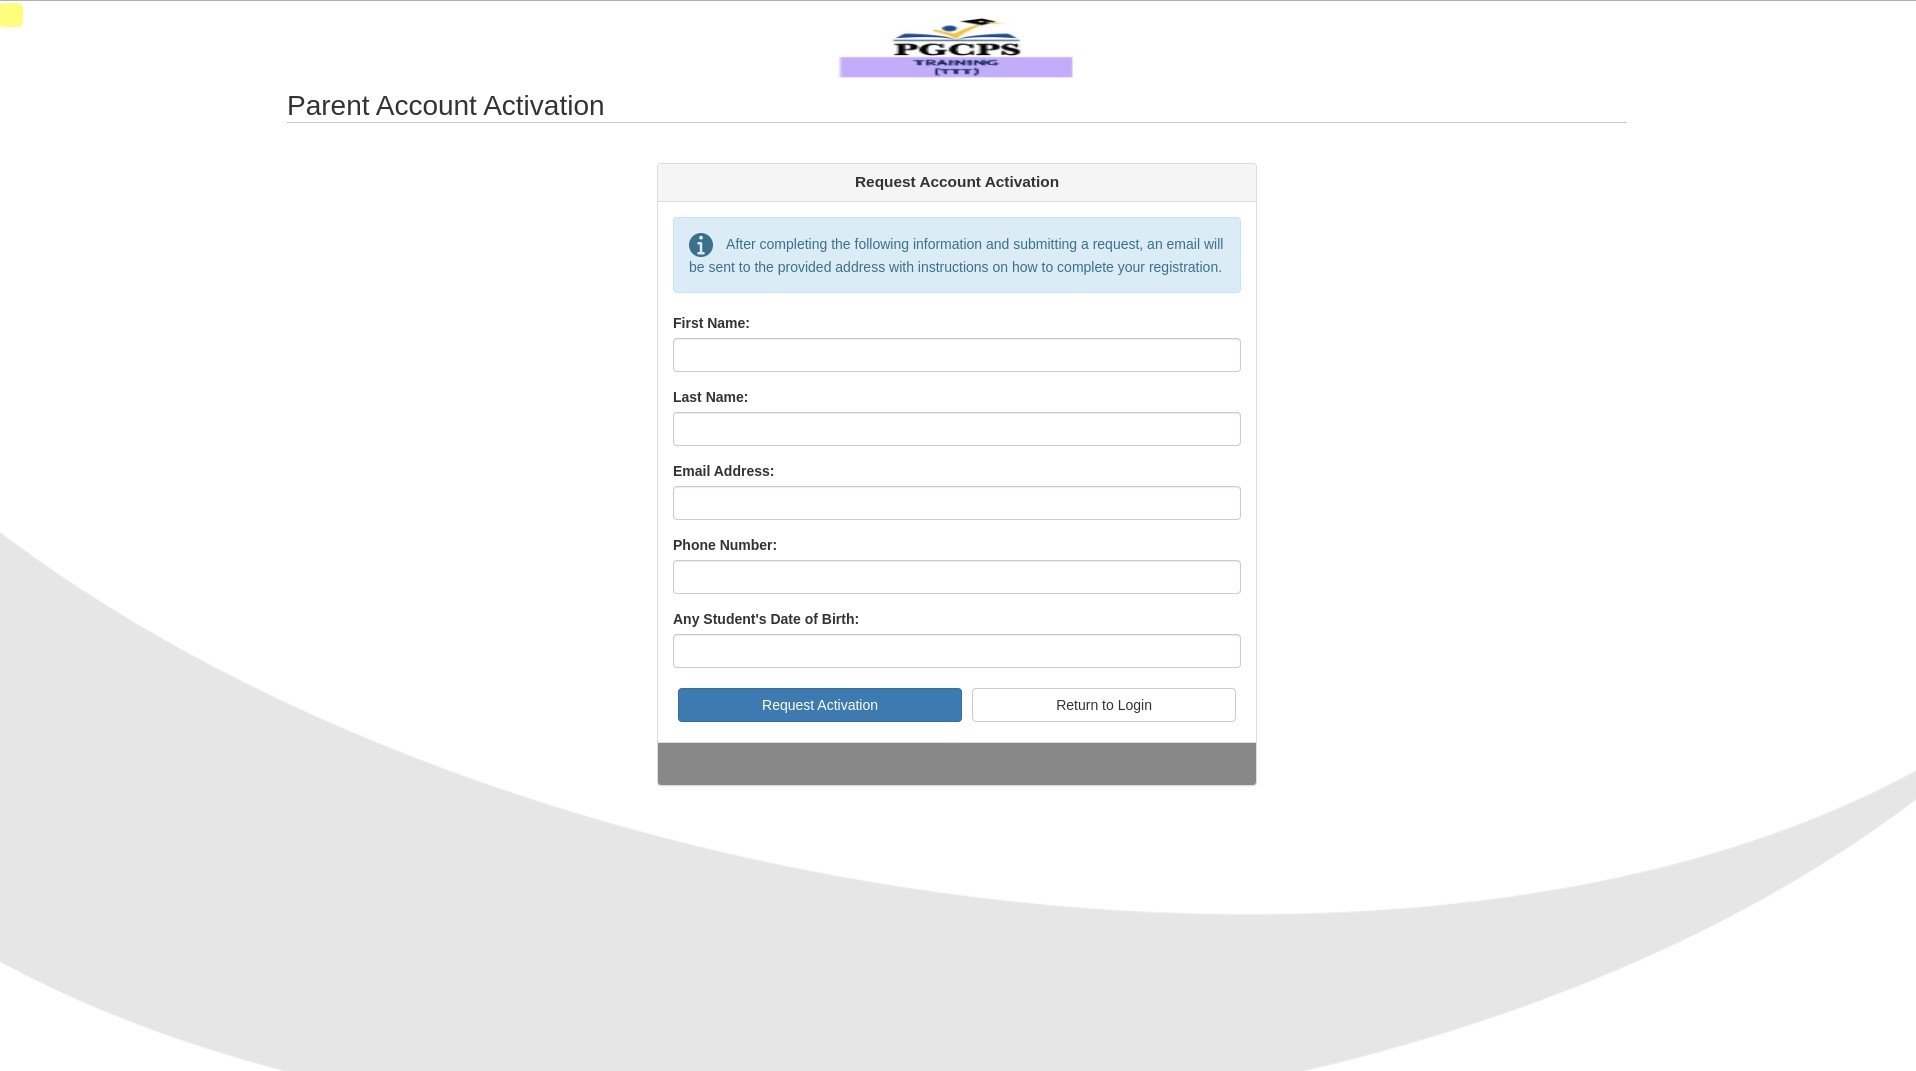
- Enter your First Name and Last Name.
- Enter your Email Address.
- Enter your Phone Number.
- Enter the Date of Birth for a student you have educational rights to that is currently enrolled in a PGCPS school.
NOTE: All information must match existing records. If you cannot provide accurate information, or you do not have access to the email address on record with PGCPS, you must go to the school where your student is enrolled, and present a photo ID to request activation. - Click Request Activation.
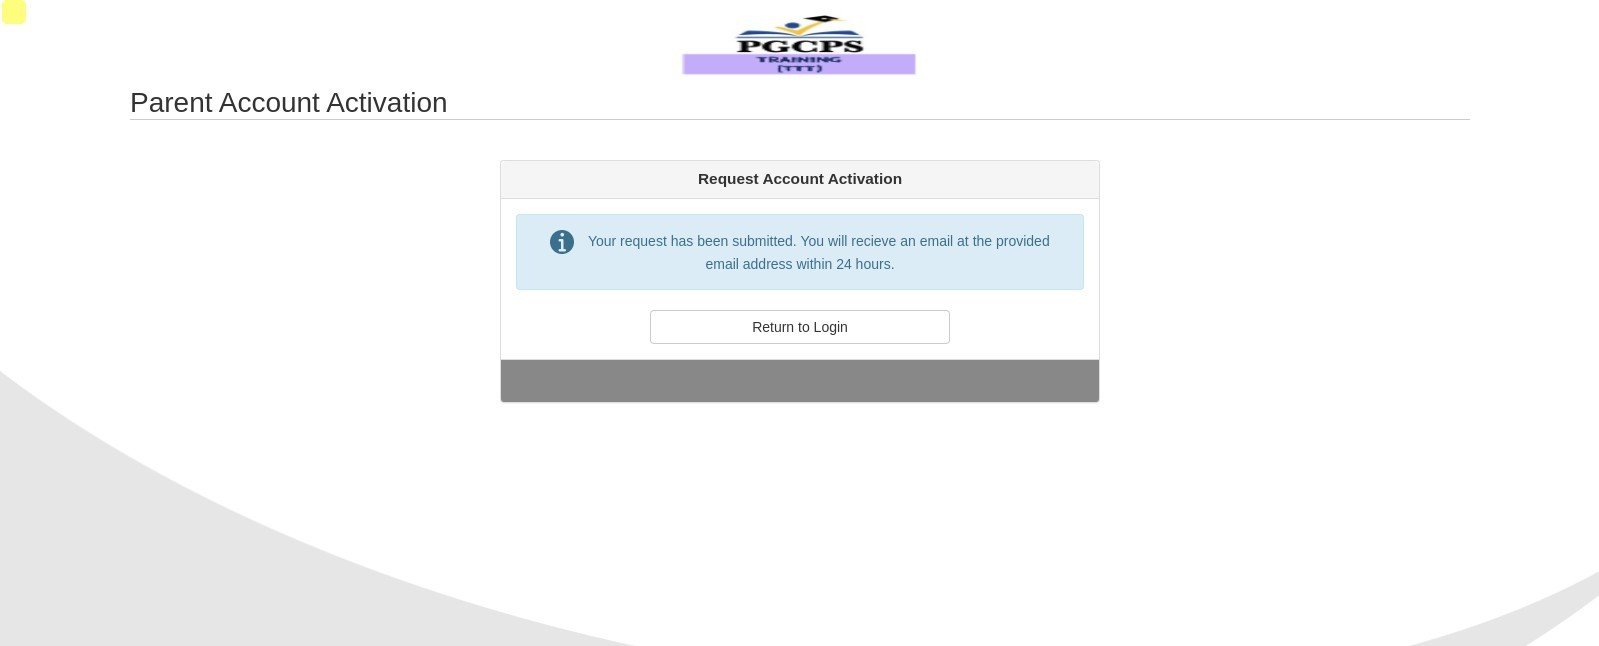
- You should receive an email message to the address provided within 24 hours that contains the activation link you need to activate your new account. Open the email message from synergy.feedback@pgcps.org with the subject “Parent Account Activation”.

- Click the link contained within the email
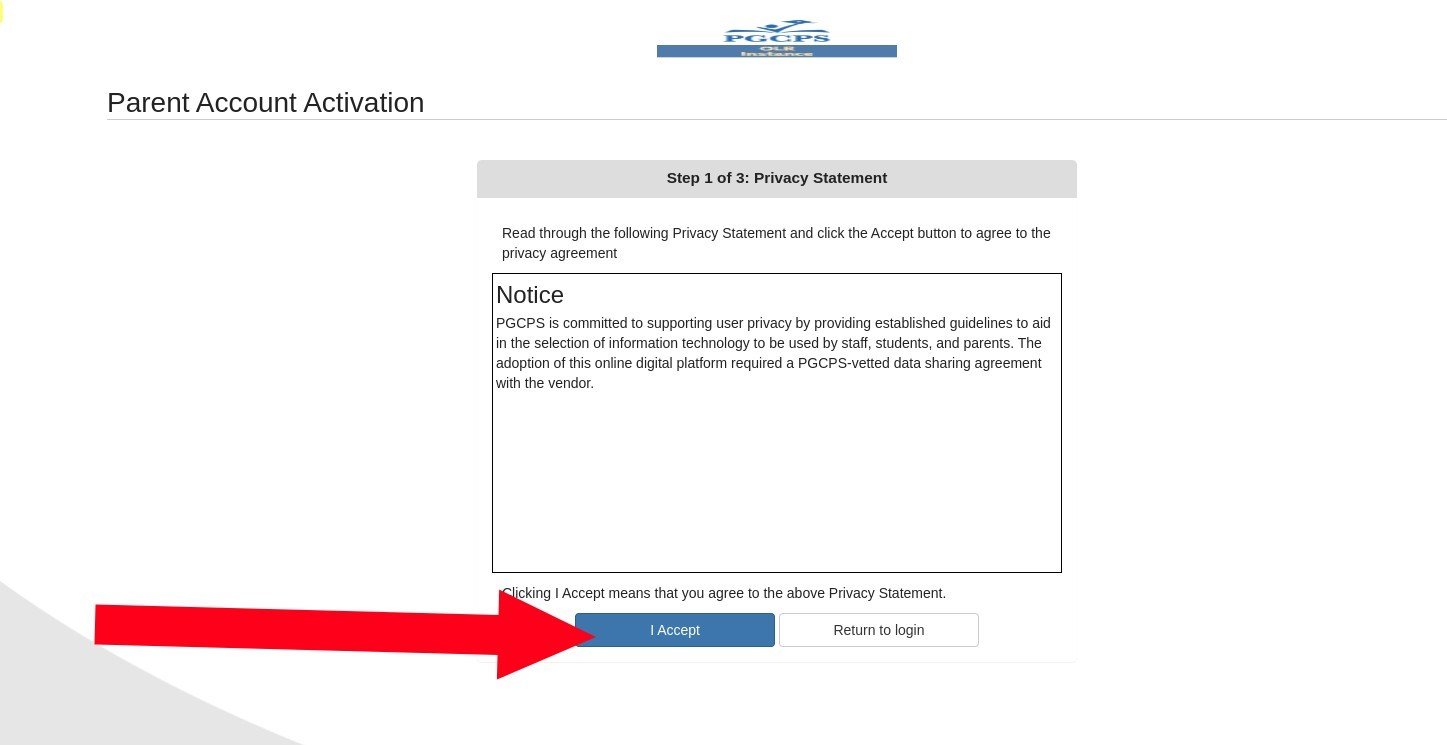
- Read through the Privacy Statement, then click I Accept.
- Your User ID is automatically filled in as your email address.
- Enter a Password, then retype it in the Confirm Password field.
- Click Save and Continue.
Activate Account with Activation Key from Child's Current School
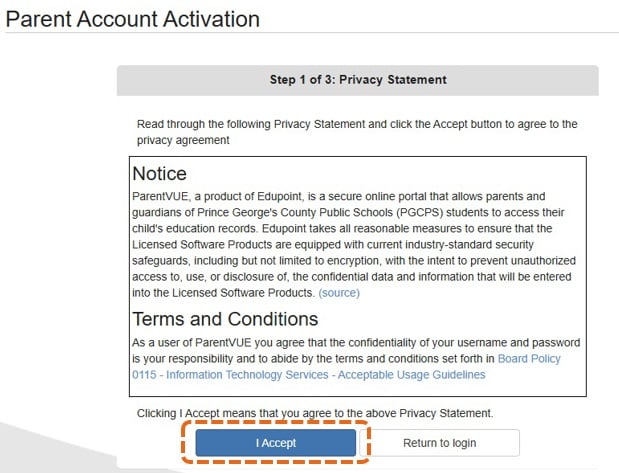
Step 1 - Privacy Statement
- Review the Privacy Statement Notice
- Click the "I Accept" button
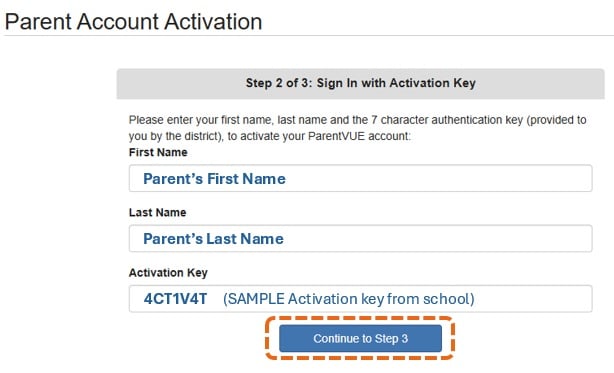
Step 2 - Sign in with Activation Key
- Enter Parent's legal first and last name (not the student's name)
- Enter the activation key provided from the school.
- Click "Continue to Step 3" button.
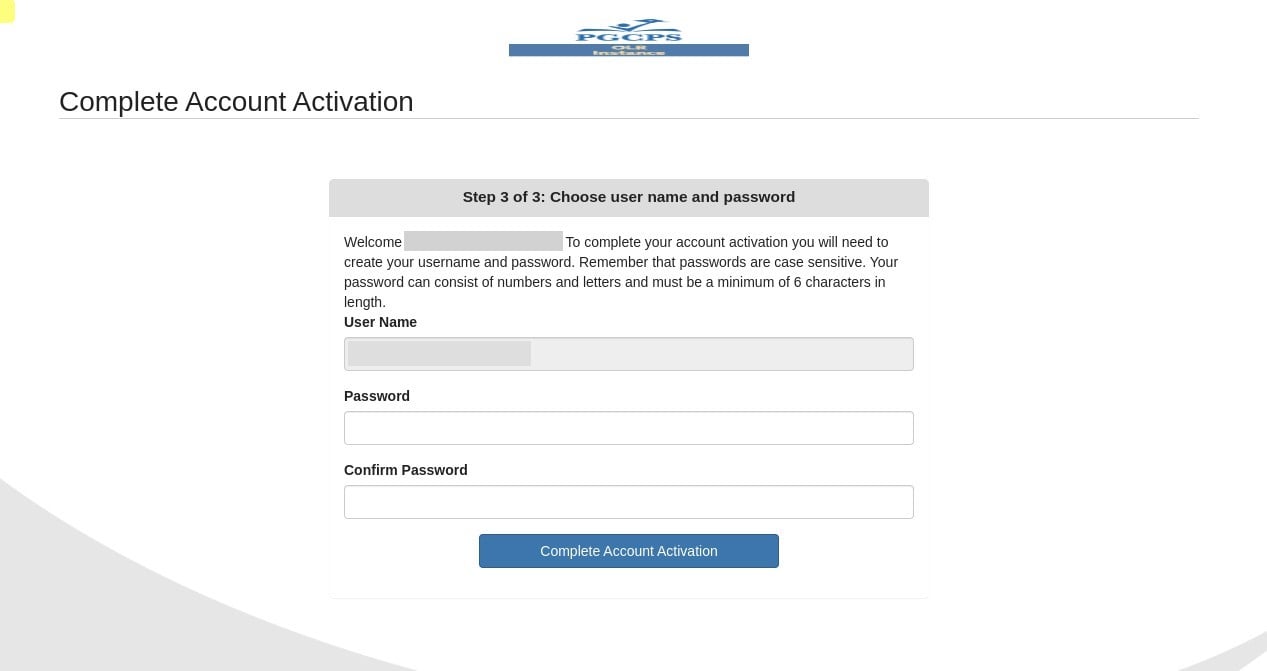
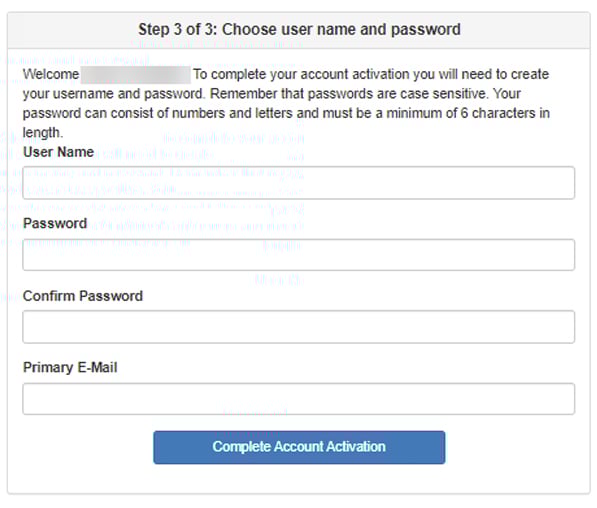
Step 3 - Enter Account User Name, Password and E-Mail Address
To complete your account activation you will need to create your username and password. Remember that passwords are case sensitive.
- Enter a Username for your ParentVUE account
- Enter a password and confirm the password
- Enter your primary email address.
Please use a personal email address and not a work email address. This account will be used if you have forgotten or need to reset your password so if your employment changes over time you could lose access to your ParentVUE account.
(Recommendation- Record this account information somewhere for your records to avoid account access issues.) - Click the "Complete Account Activation" button
Enrolling A Student
Once you have created your ParentVUE account, if you are a parent who has never had a student enrolled in PGCPS, you are taken immediately to the enrollment page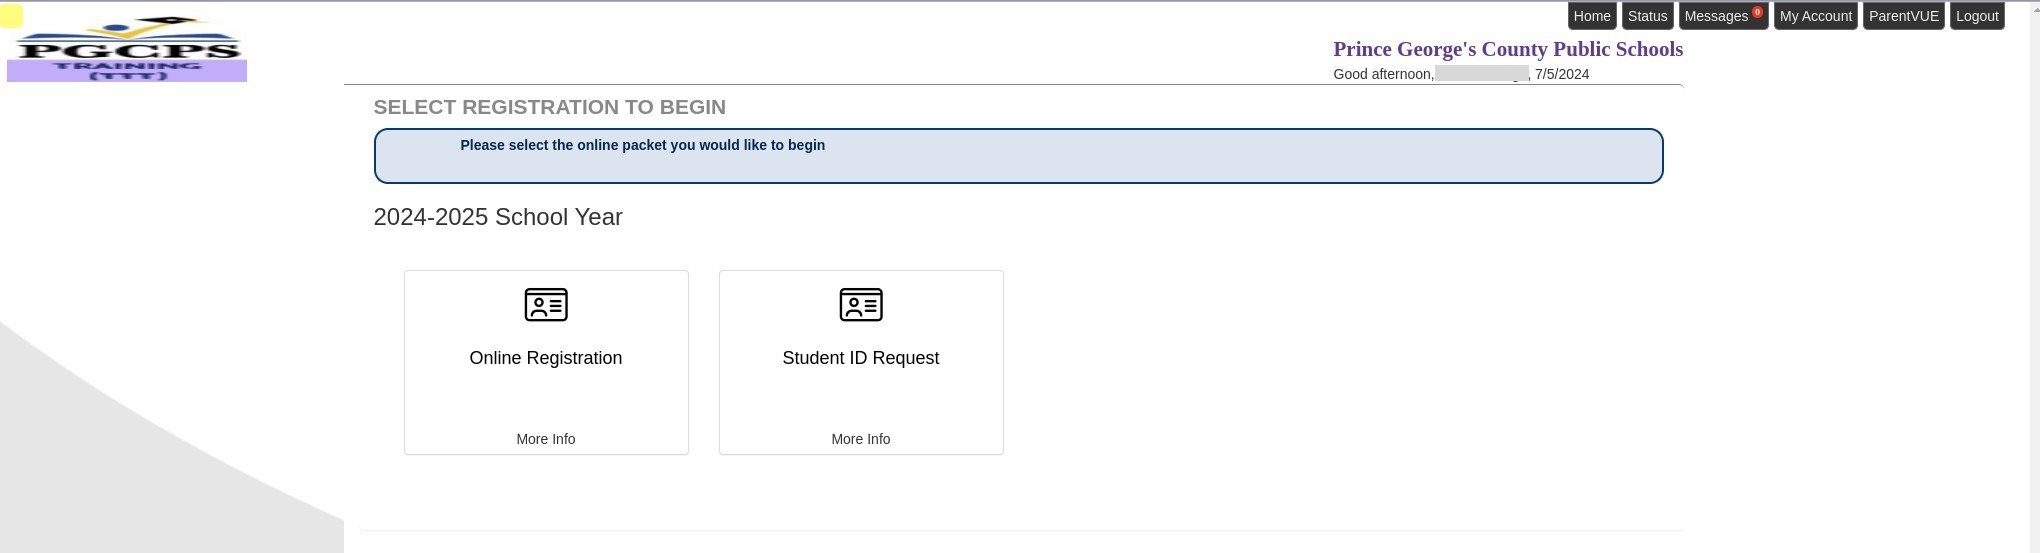
Here you can:
- Enroll a new student
- Request a student ID without enrolling them
If you already have a student in the system, and this is your first time logging in, you are taken to the ParentVUE student list page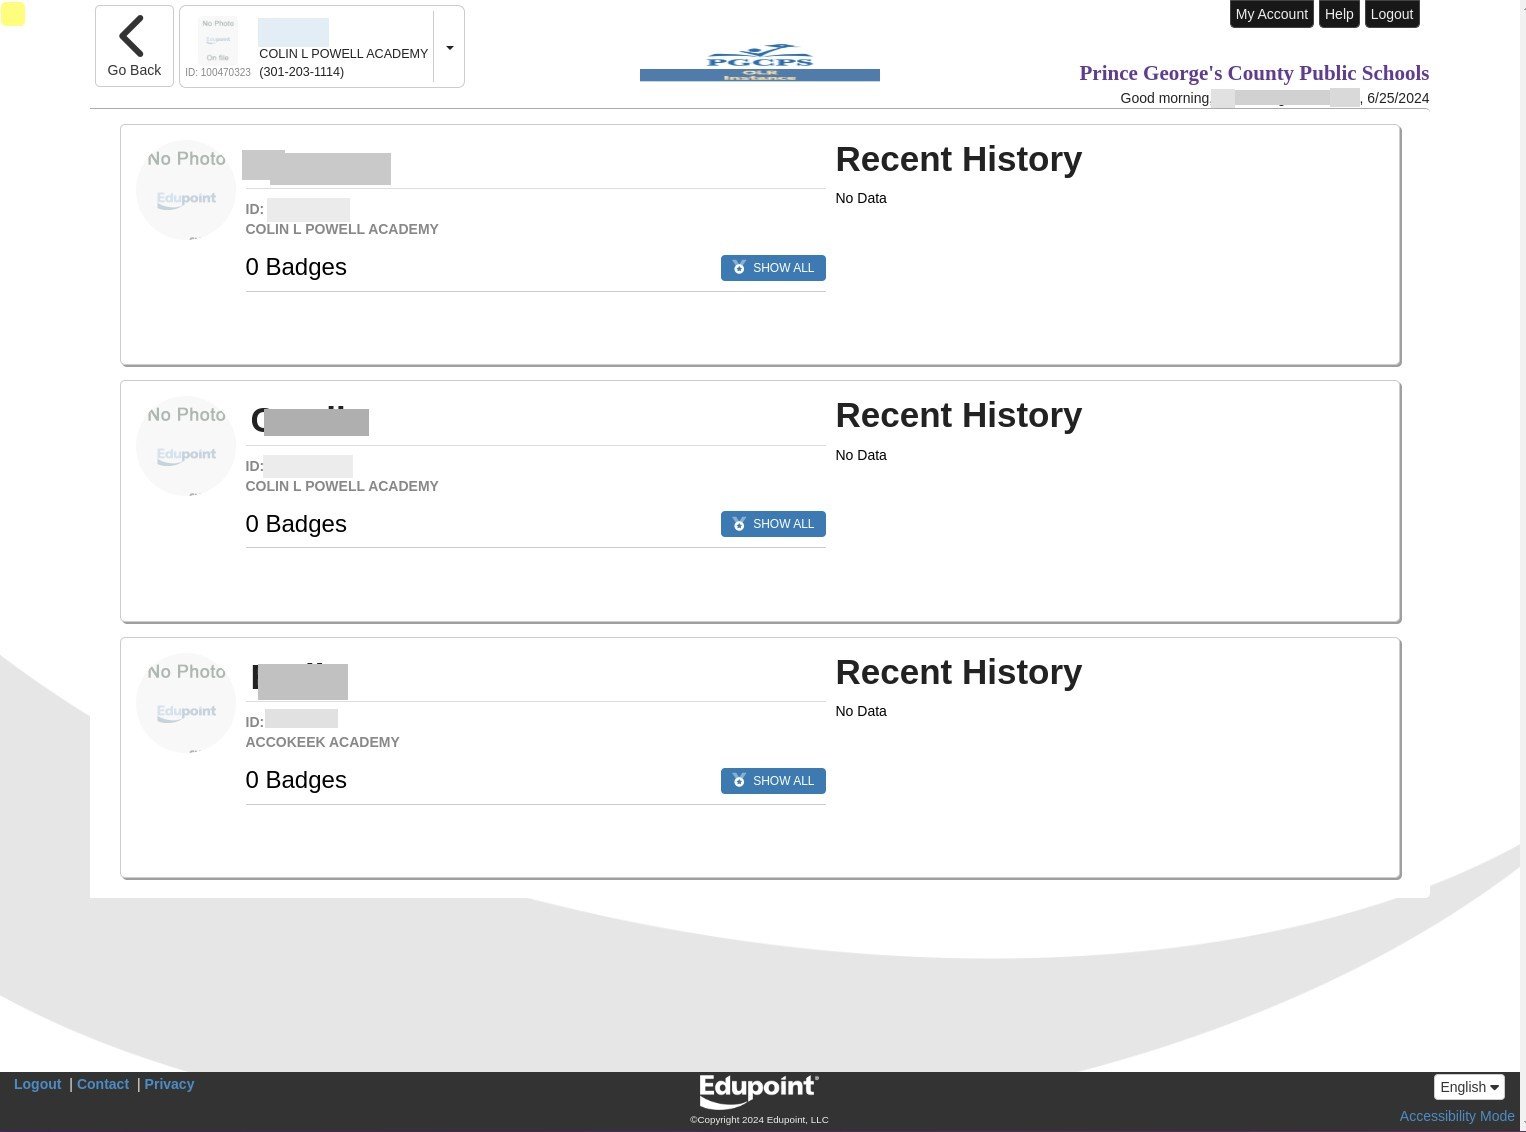
Click Go Back to view the ParentVUE homepage.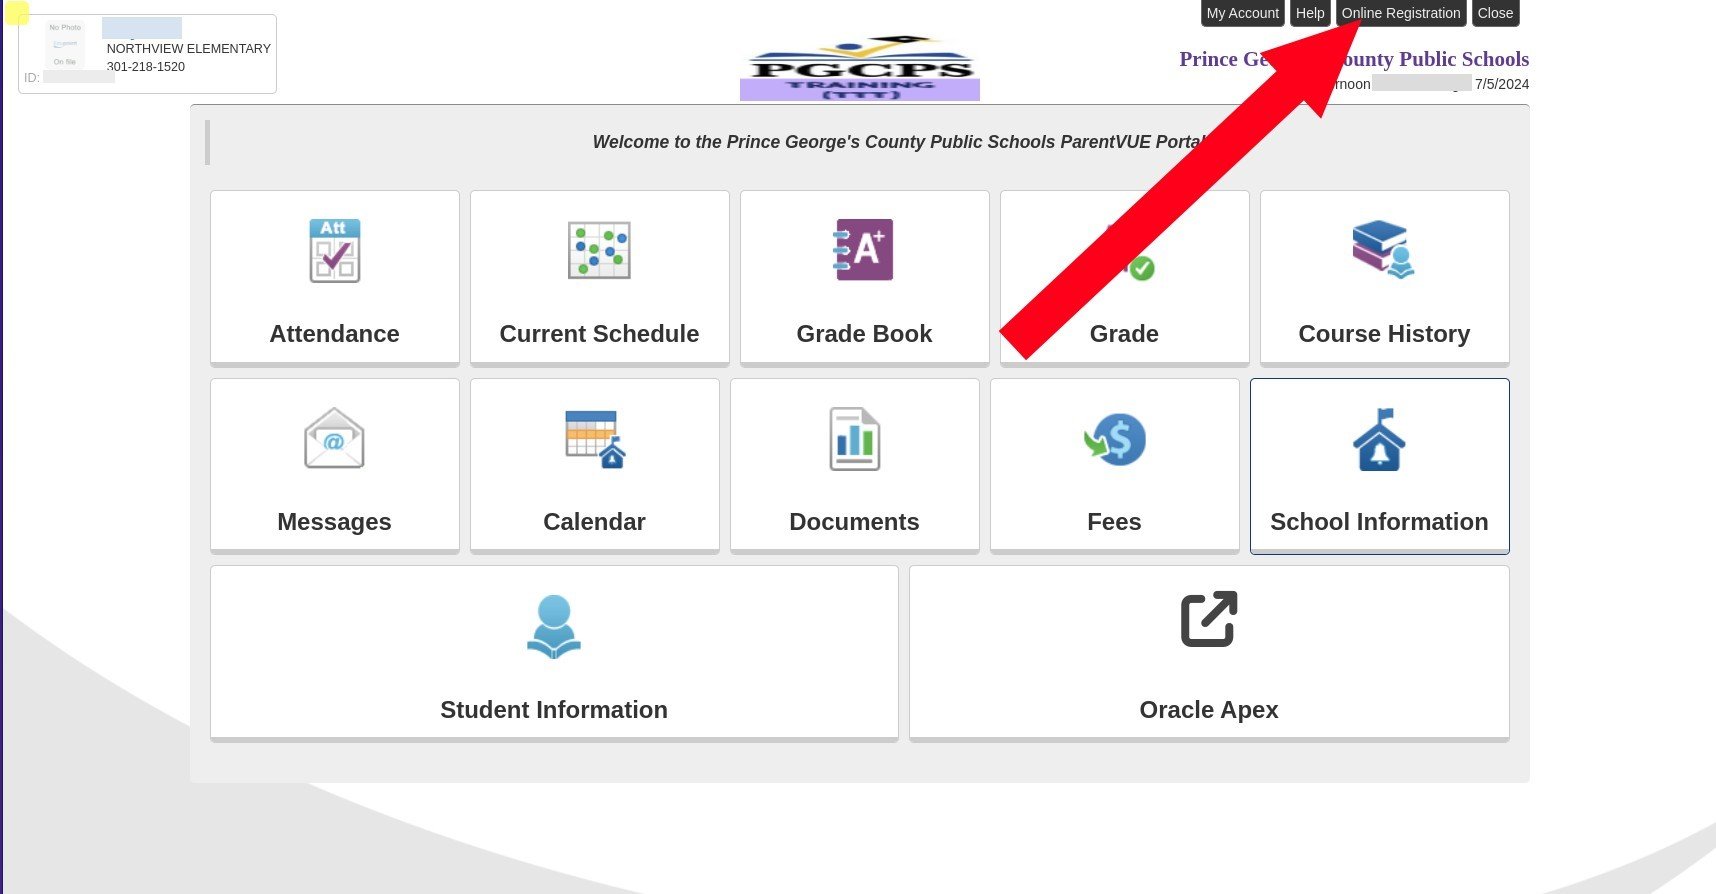
If you have an additional student who needs to be enrolled in the school system, you can
access Online Registration (OLR) directly from the ParentVUE portal. This ensures that you have all your students under the same parent account. For more information about OLR, see the Synergy Online Registration for Parents user guide.
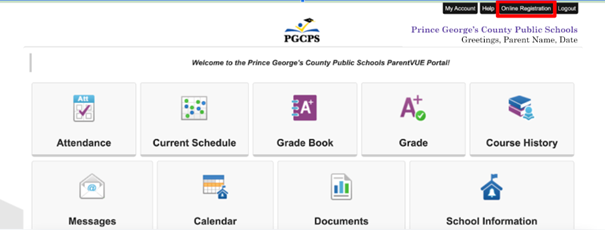
Navigating the ParentVUE Portal
Once you set up your account, you have access to the ParentVUE Portal. If you already have students enrolled in the district, you can immediately view data for them in the system.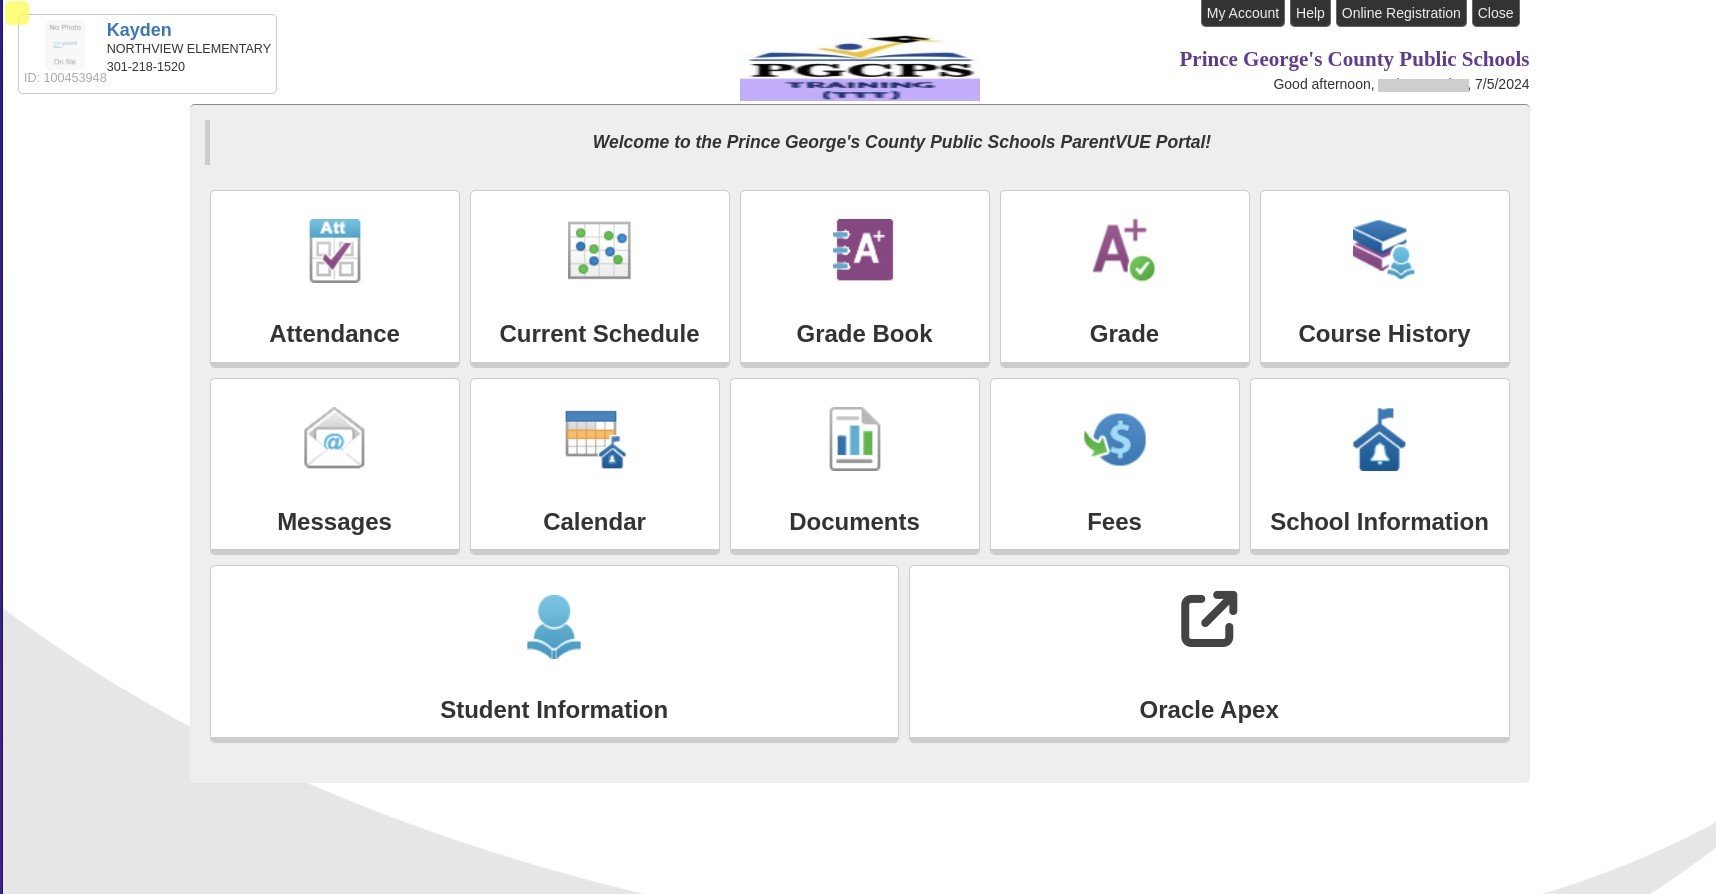
On the student selection screen, click Go Back in the upper left corner to view the home page of the ParentVUE portal.
On the portal, you can view:
- Attendance: This includes any attendance already taken that day, as well as attendance history.
- Current Schedule:The student’s schedule for the current year, including teacher contact information.
- Grade Book: Individual assignments and the scores that have been given to them.
- Grades: Report card grades.
- Course History: Unofficial transcript, past courses, and service learning hours earned.
- Messages: System notifications
- Calendar: School events, holidays, and student’s schedule, all in one calendar.
- Documents: View electronic documents.
- Fees: View paid and outstanding fees for the student.
- School Information: View general contact information for the school.
- Student Information: View general demographic information about the student.
Attendance
Attendance records are updated in real time. As teachers mark student attendance, you can see it updated immediately in the Attendance module.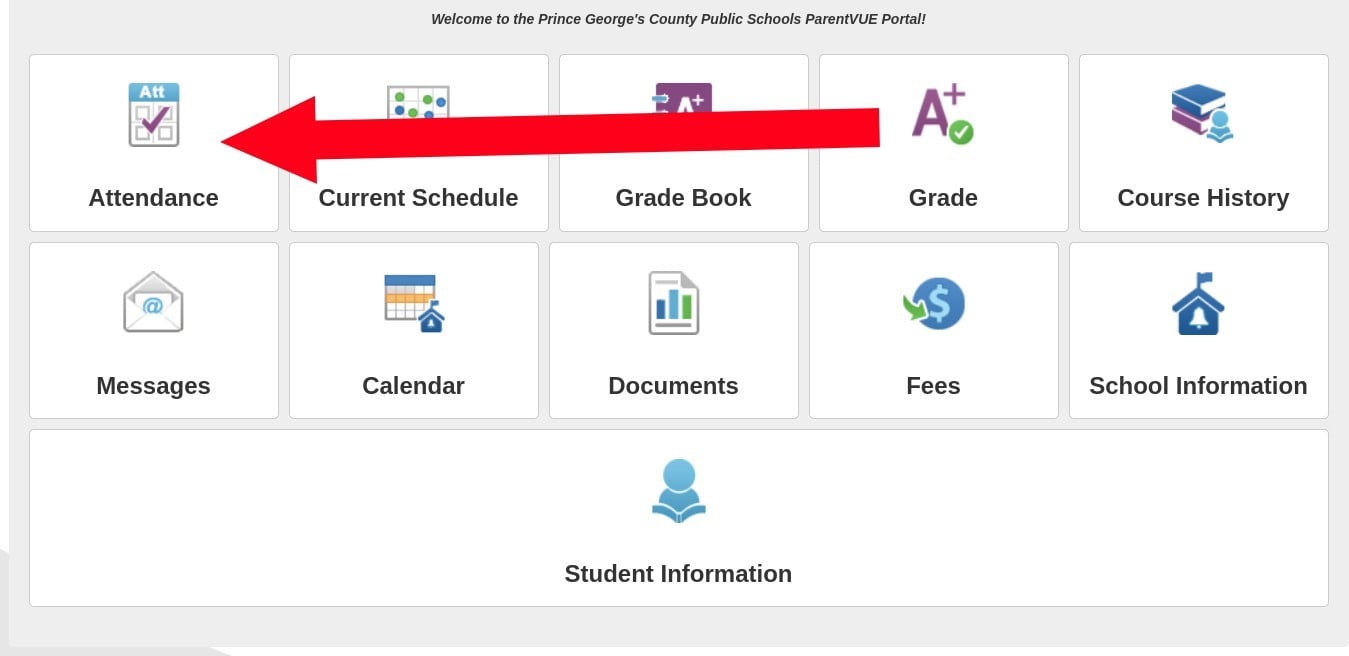
- Click Attendance.
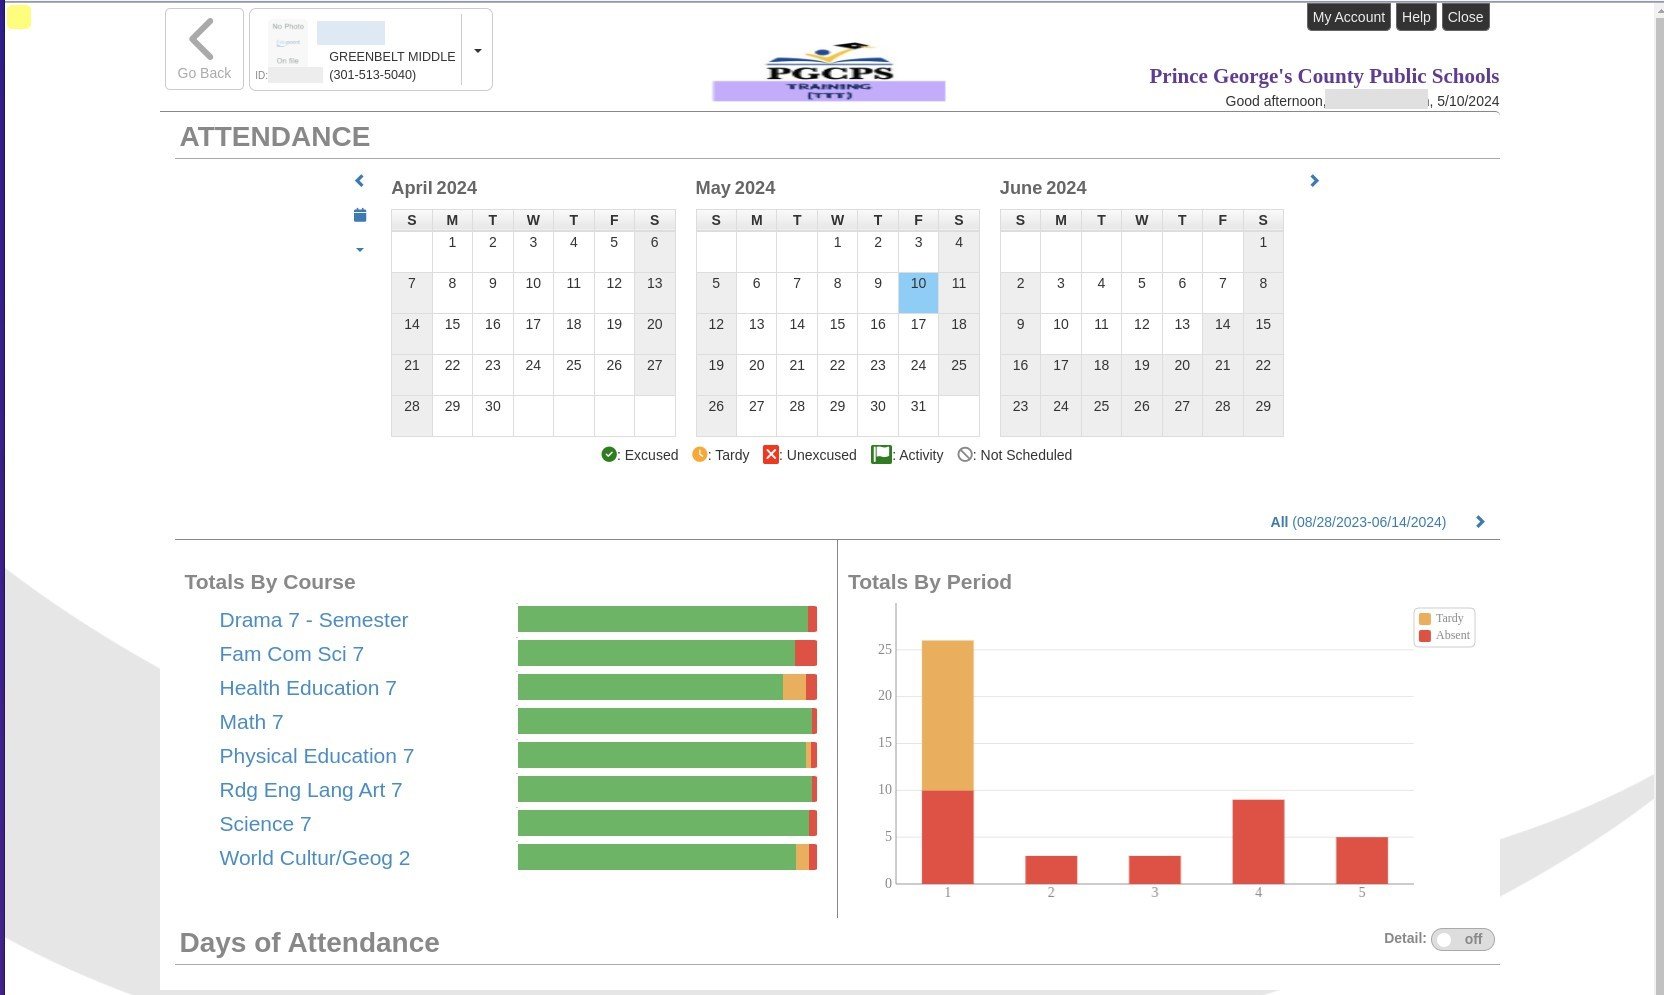
- Scroll through the calendar to see attendance for a specific date.
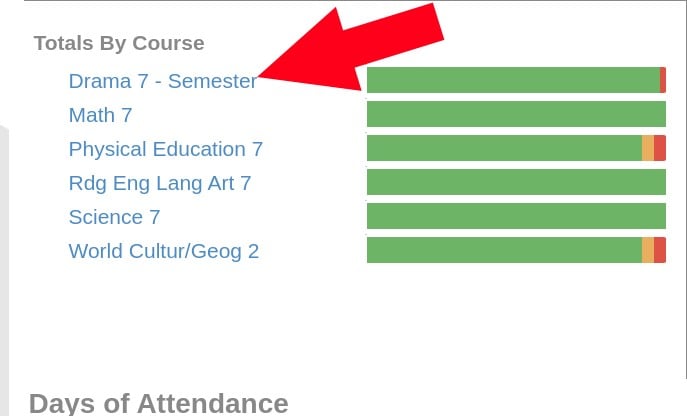
- Under Totals By Course, you can click the course name to see more detailed information, including absences and tardies for specific days, and whether they were excused or unexcused.
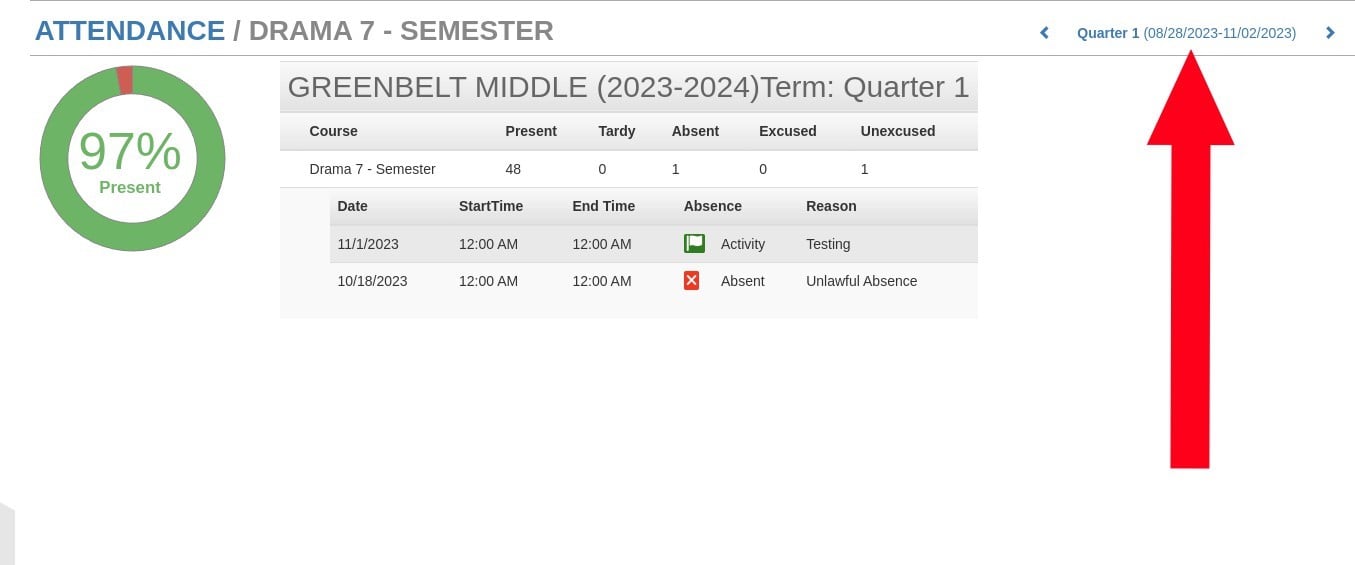
- Click the Quarter link to view a previous quarter for this class.
- Click Attendance to return to the main attendance page.
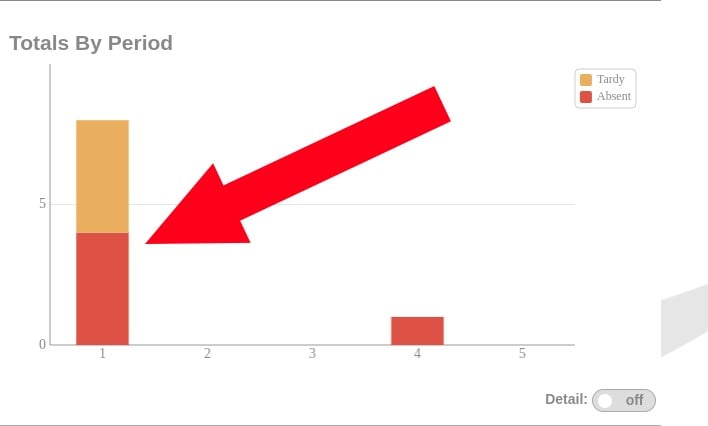
- Back on the main attendance page, Under Totals By Period, you can click a specific period to see more detailed information as well.
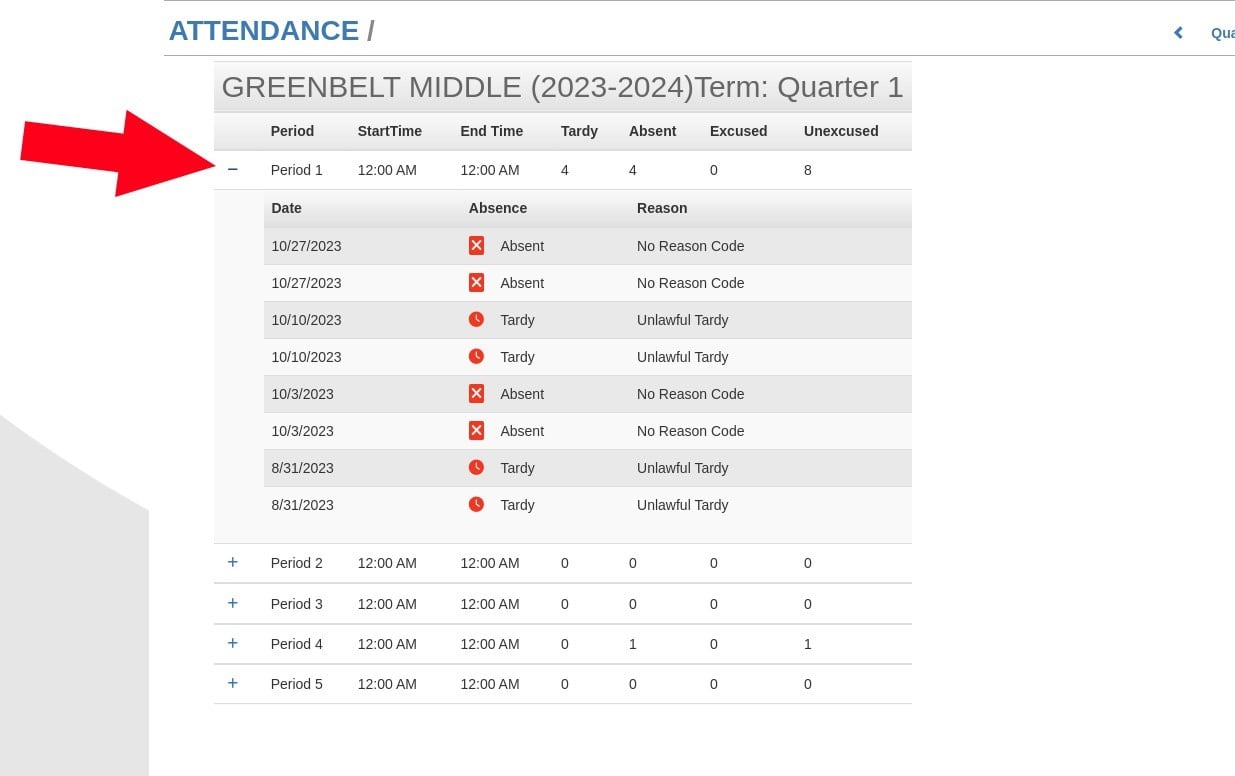
- Click the plus or minus icon beside each period to expand or collapse the record.
- Click Attendance to return to the main attendance page.
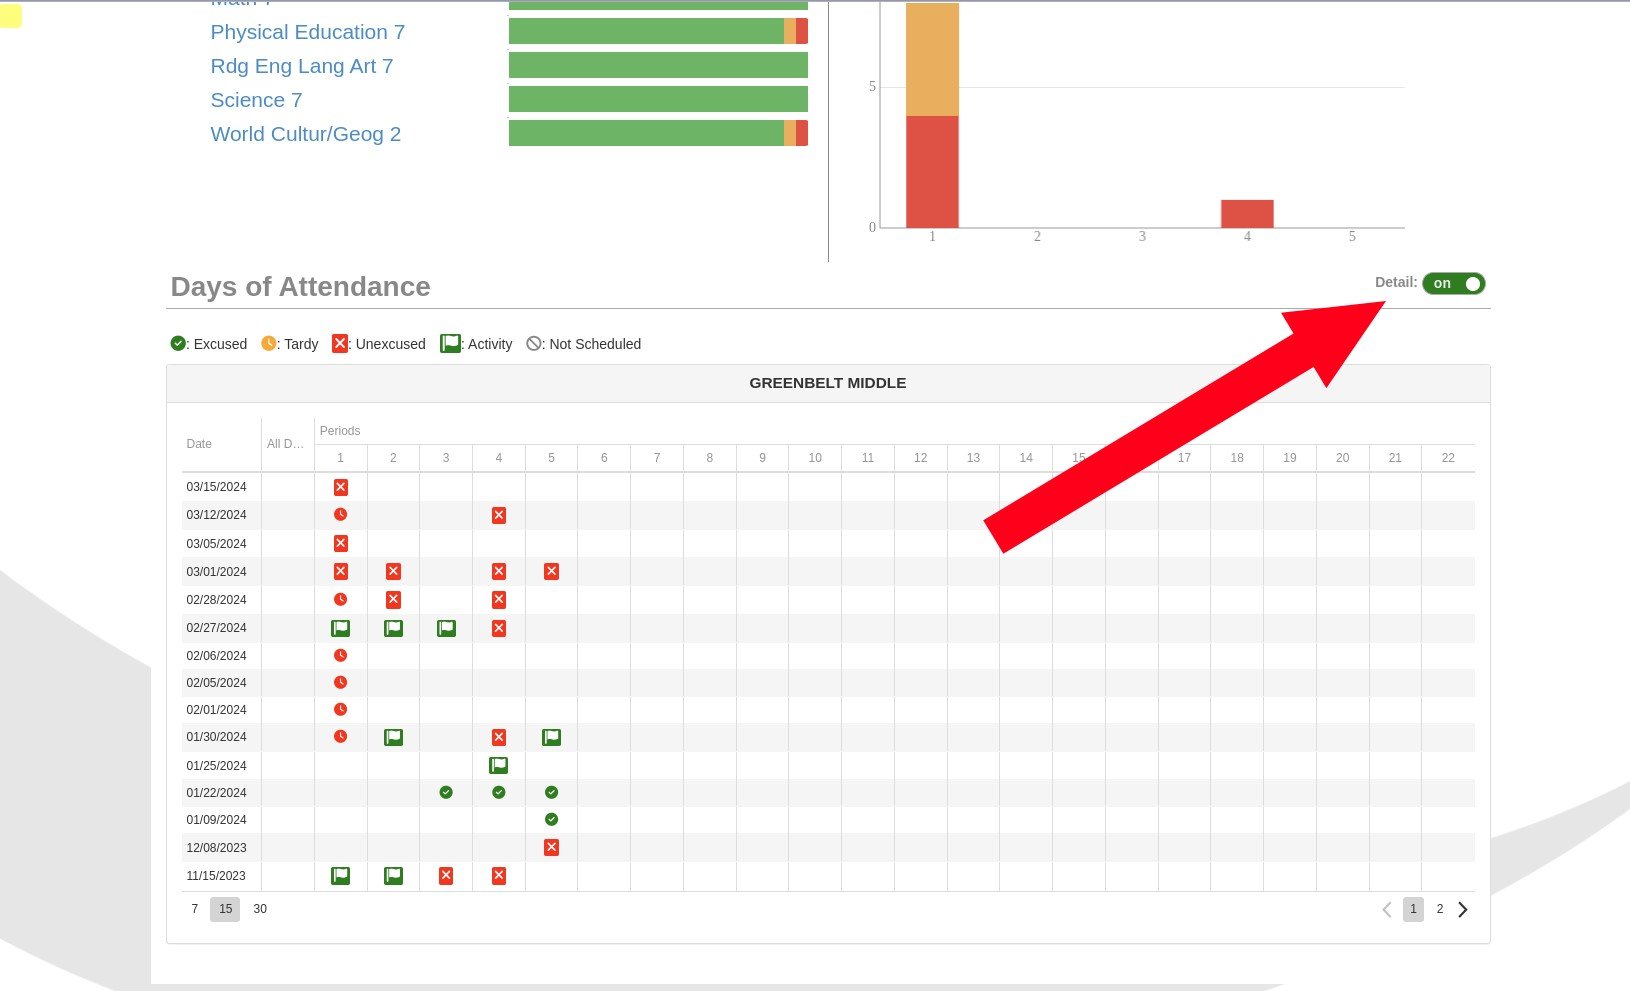
- To view even more detailed information, toggle the Days of Attendance detail switch to On. To hide it, toggle it back to Off.

- To return to the ParentVUE portal, click Go Back in the top left corner of the screen.
Current Schedule
You can view the student’s schedule for the current school year, as well as the teachers and contact information for each course.
- Click Current Schedule.

- To view a different quarter, click that quarter’s link.
- To view a specific day, click the calendar icon and select it.
- To contact a teacher, click the mail icon beside their This will open your default email application.
- To return to the Portal page, click Go Back.
Grade Book
Grade Book allows you to view the current scores for student assignments for each course that quarter. It is important to note that these are not final grades, and are subject to change.
- Click Grade Book.
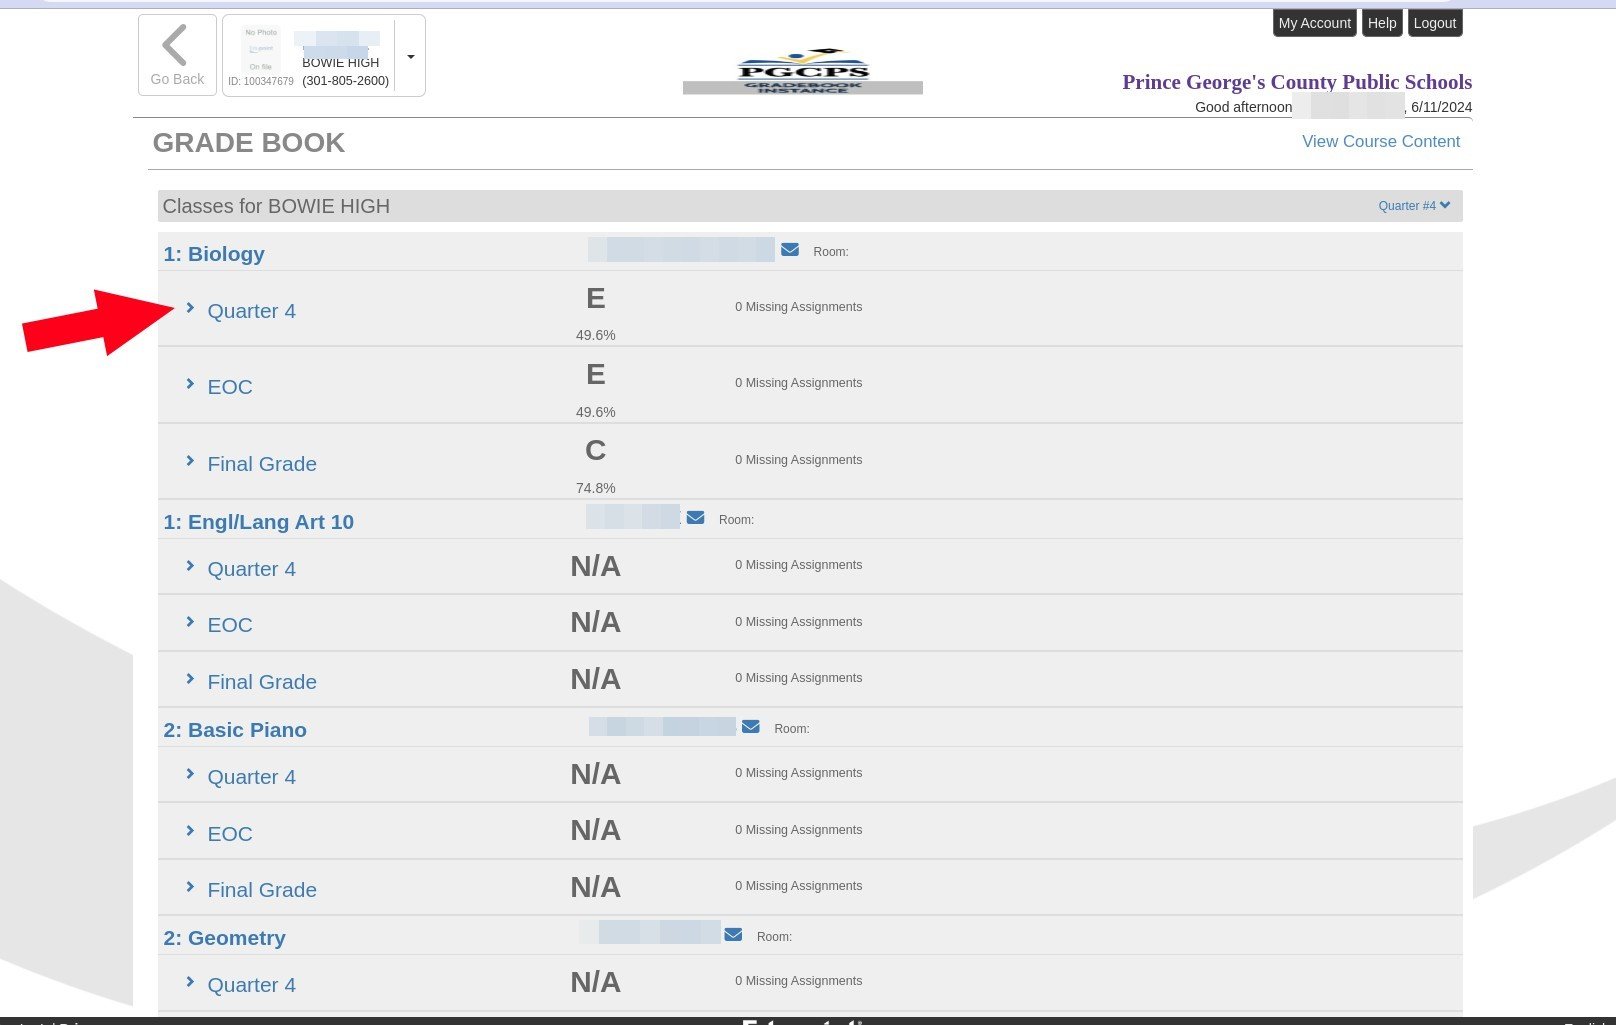
- You can see grades for each subject and grading Click a section link to view details.
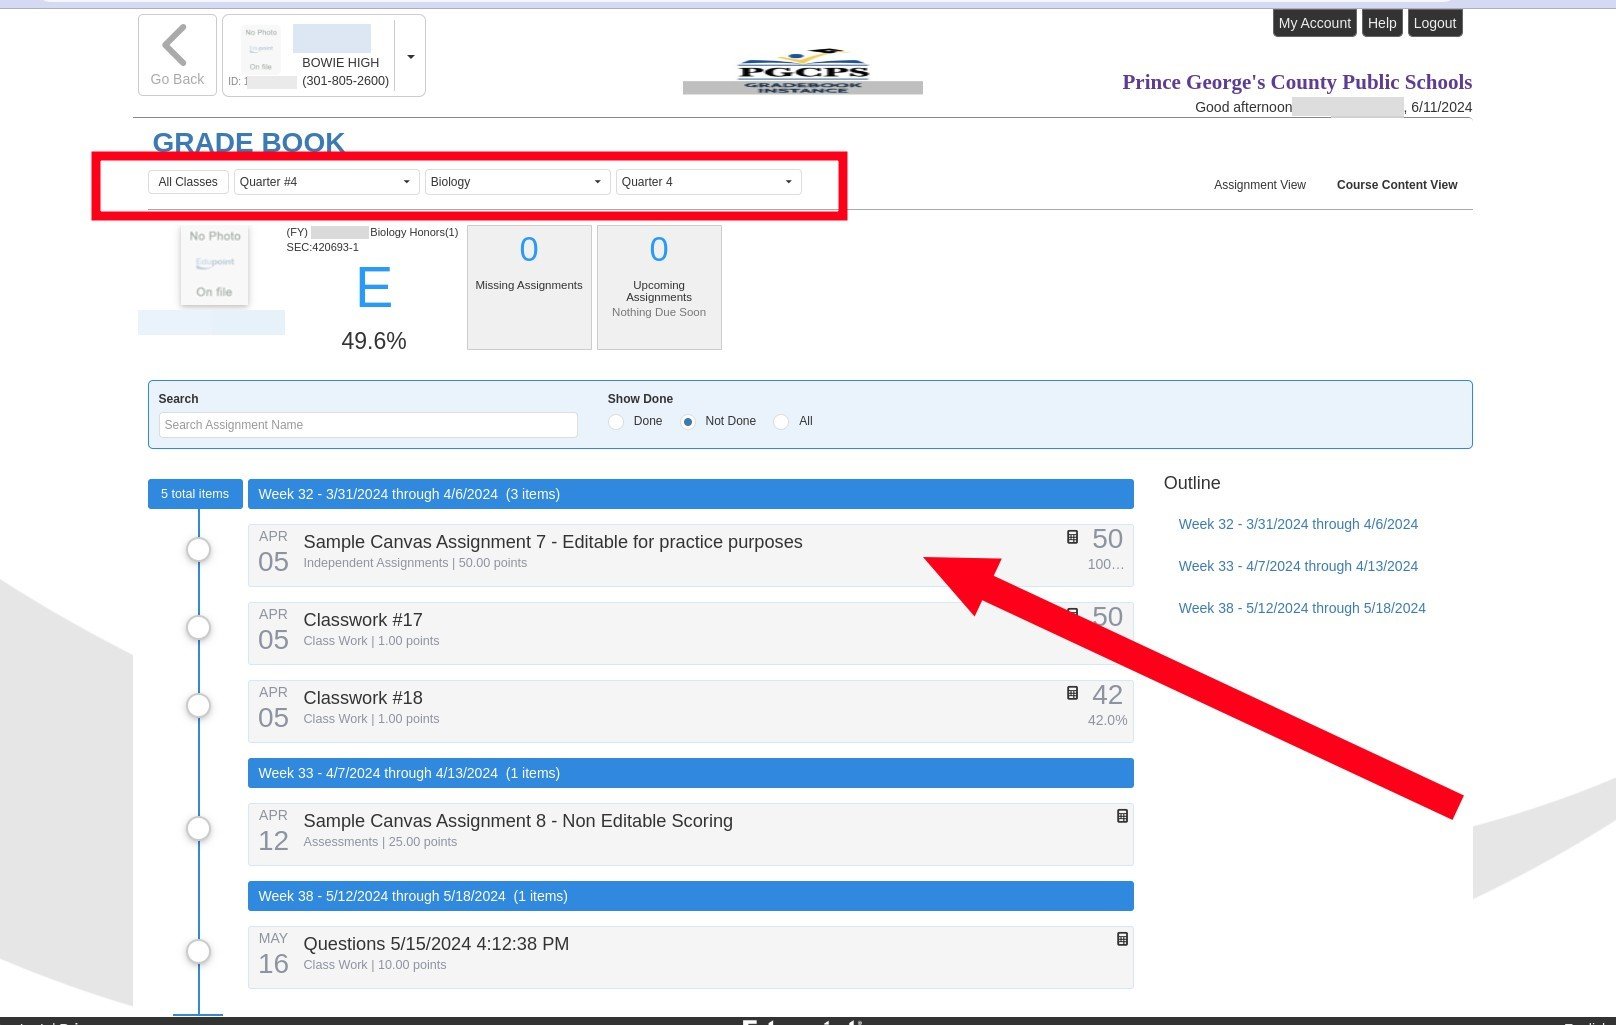
- Click a specific assignment to view details about that assignment.
- Change the subject or grading period from the drop-down, or click All Classes to return to the previous view.
Grade
Grade shows the published final grades for each course during the current school year.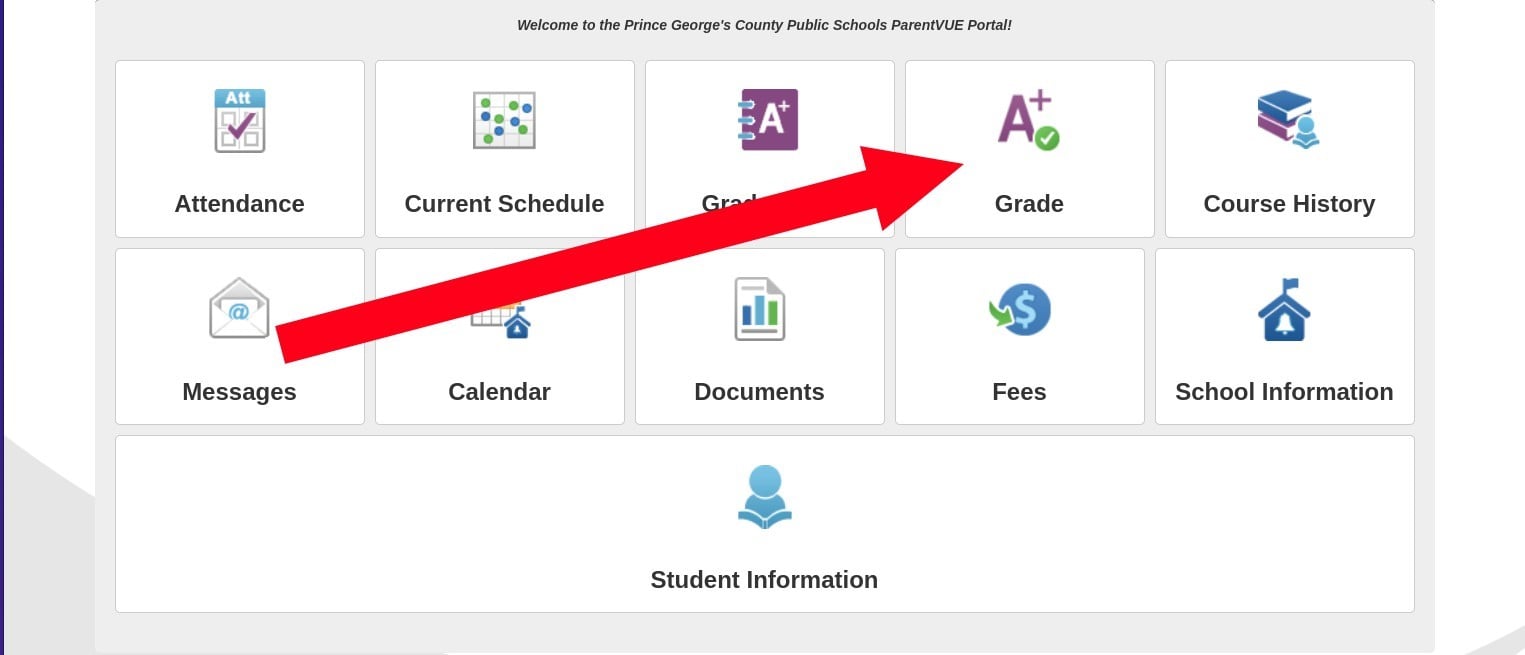
- To view final grades, click Grade.
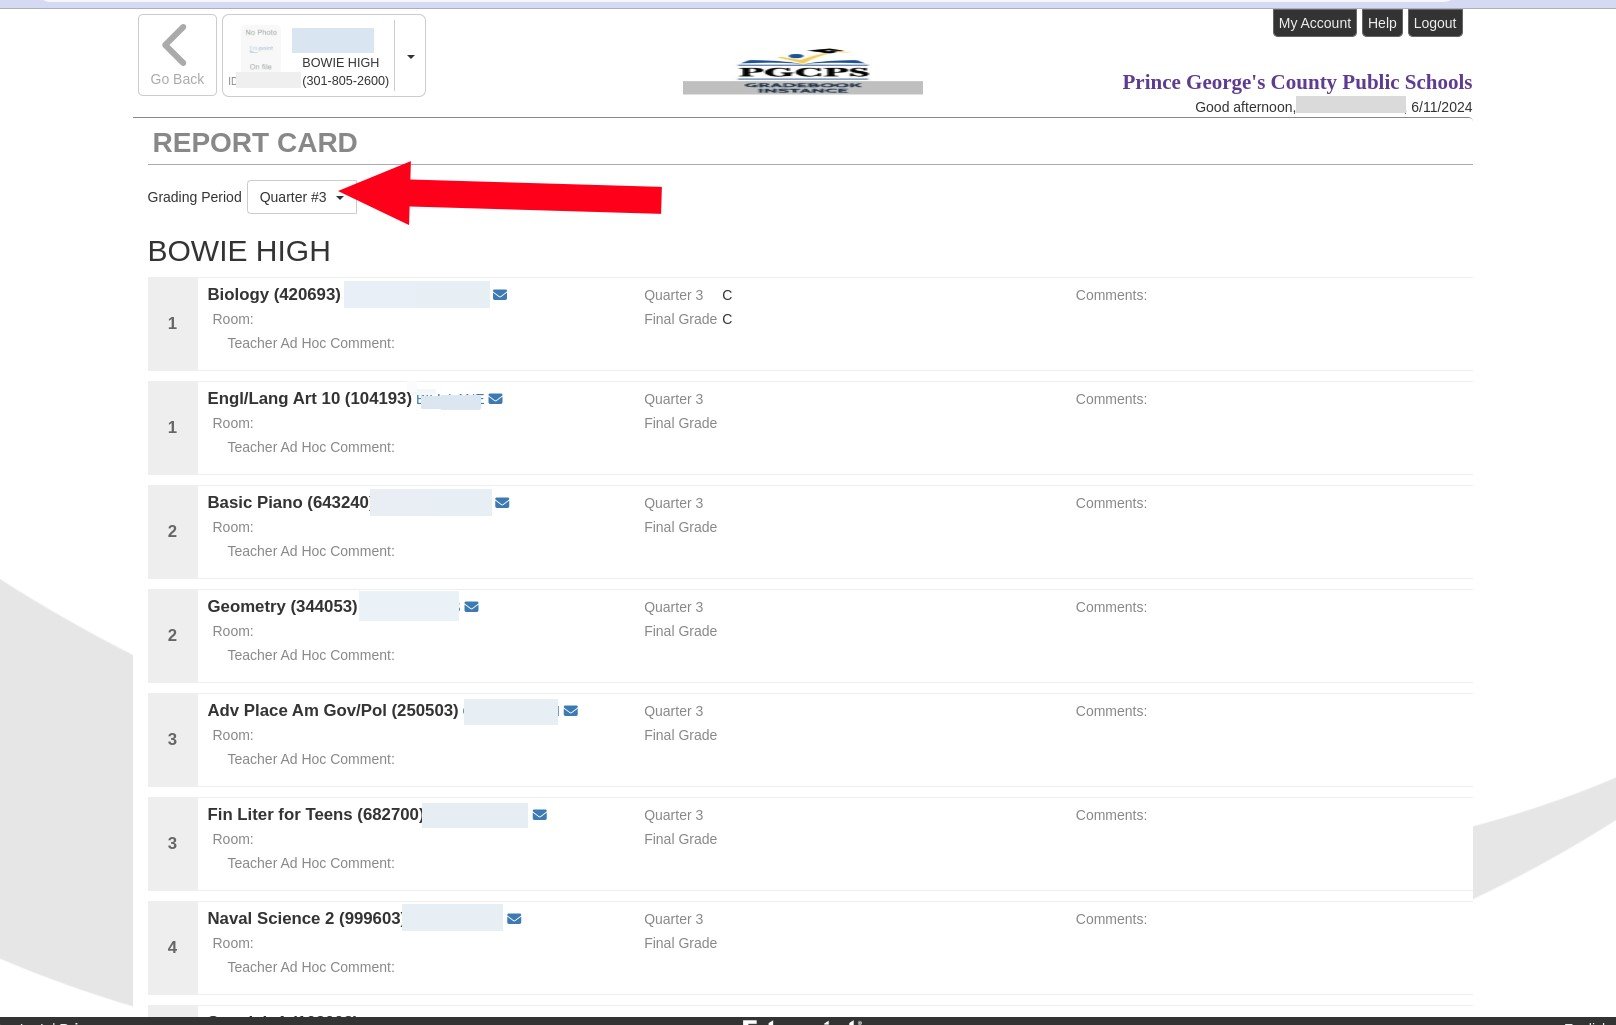
- To switch to a different quarter, select it from the Grading Period drop-down list.
Course History
The Course History page allows you to view an unofficial transcript, course history from past school years, and earned service learning hours.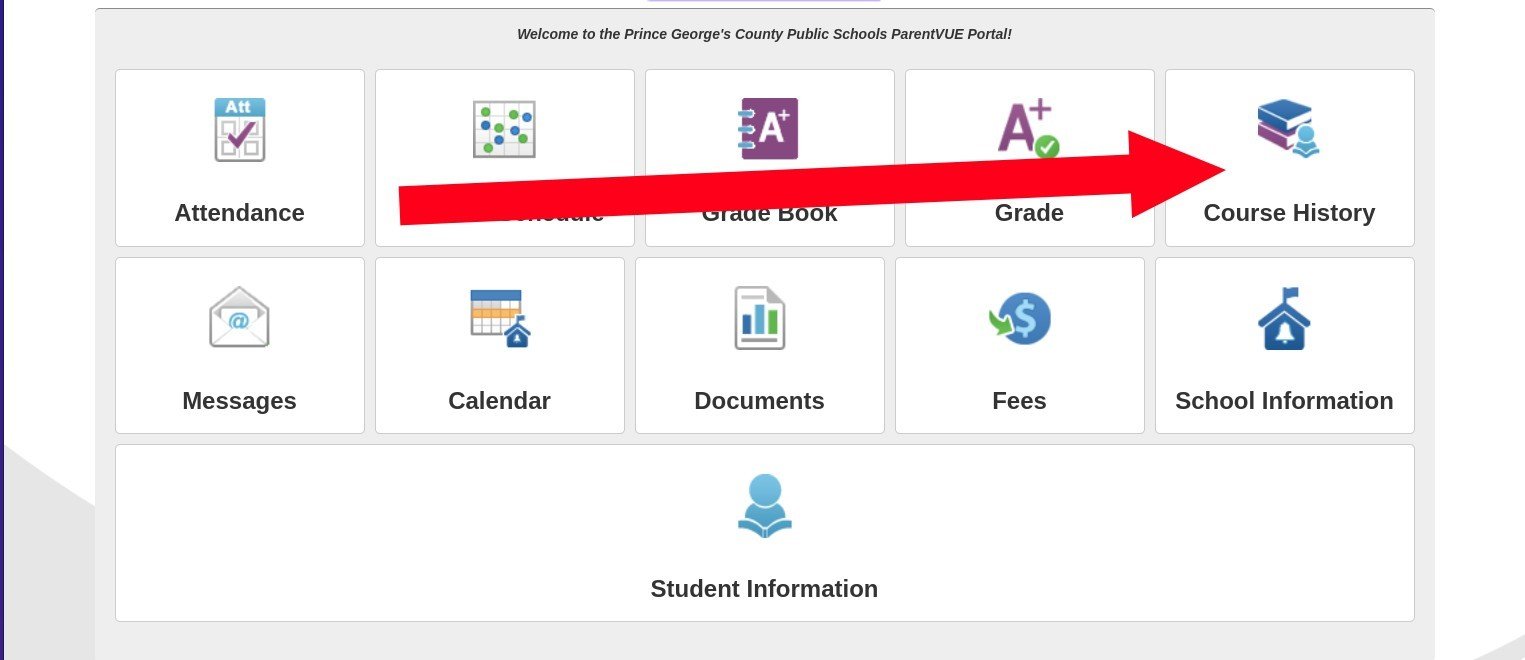
- Click Course History.
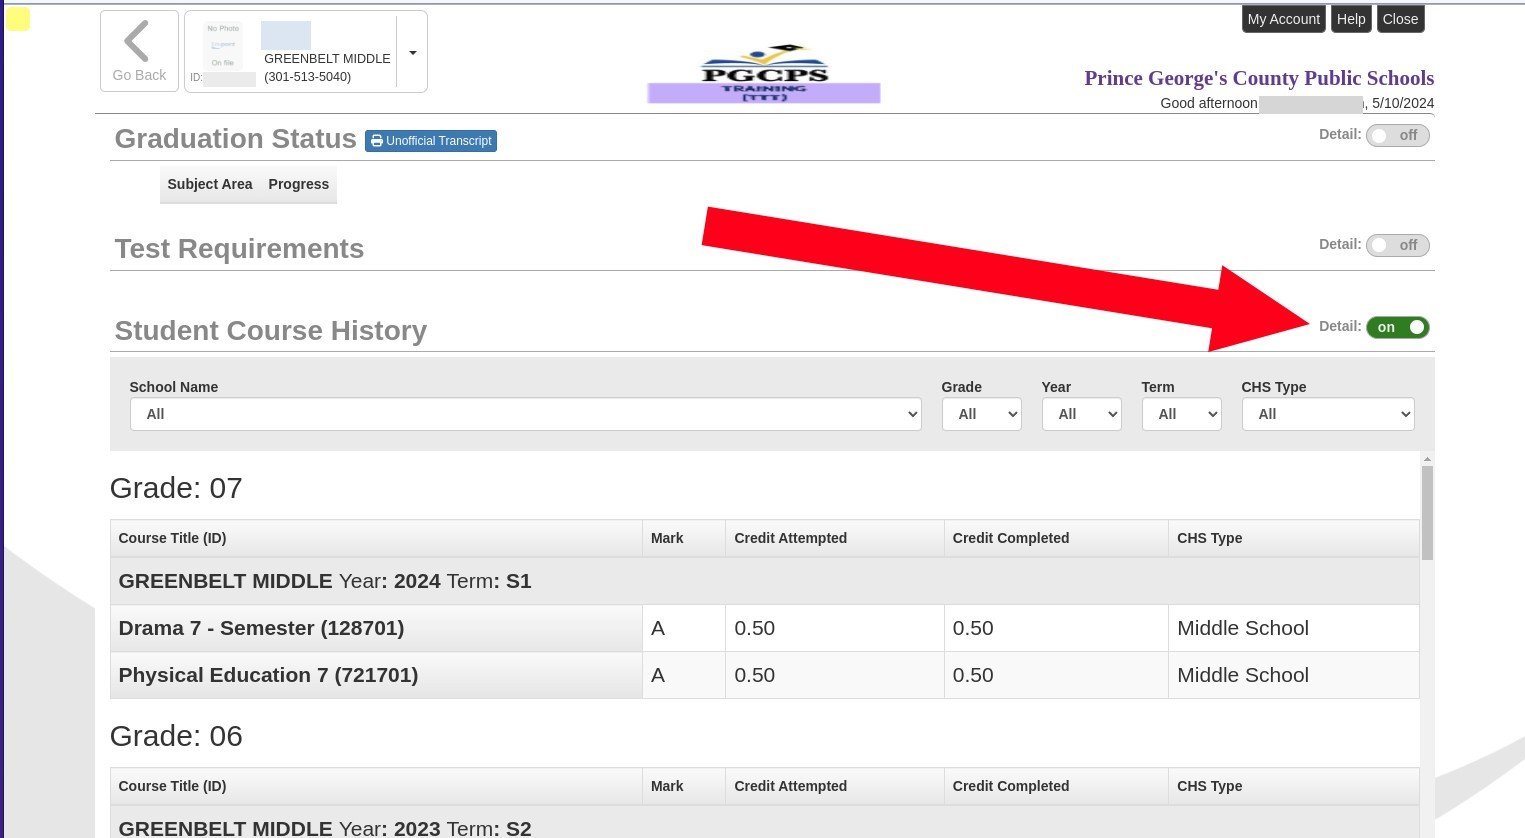
- To view more detailed information for a given topic, toggle the Detail switch to On.
- Click Go Back to return to the Portal page.
Messages
The Messages page displays system announcements from either the school or the district.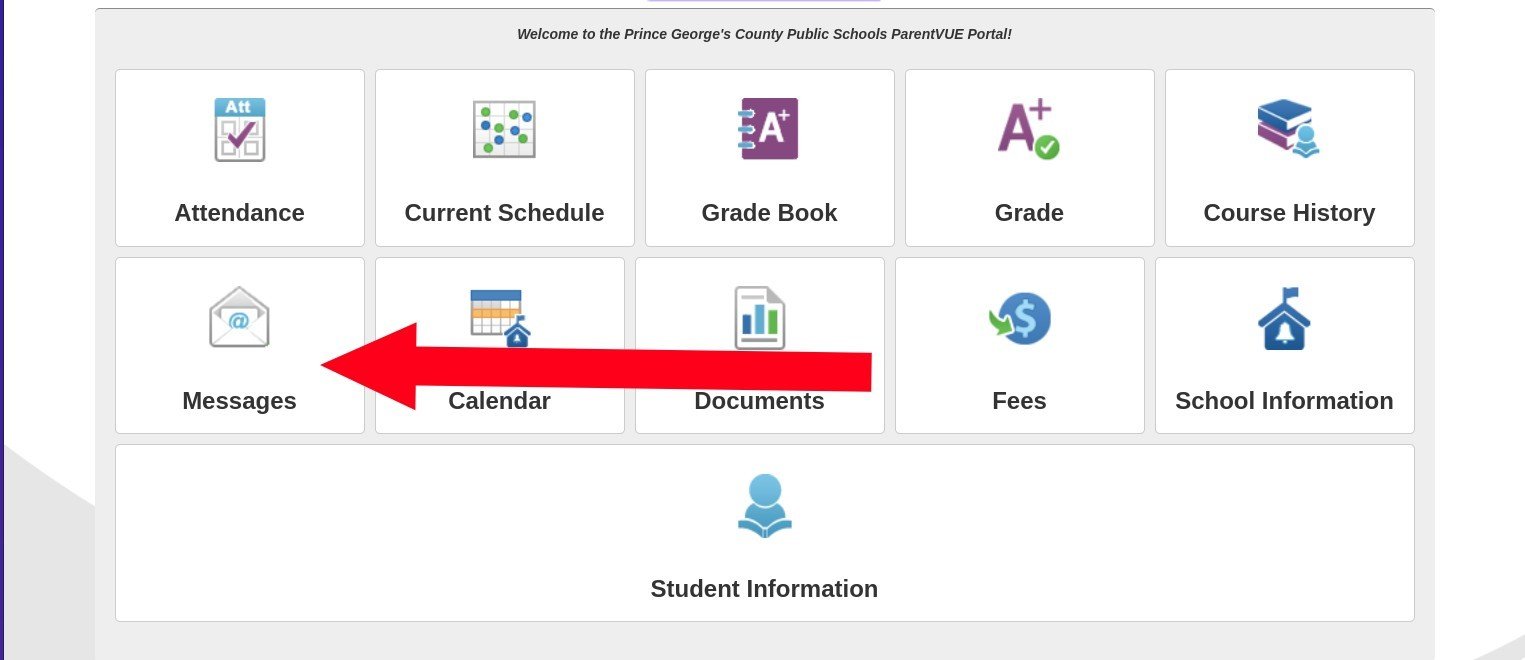
- Click Messages.
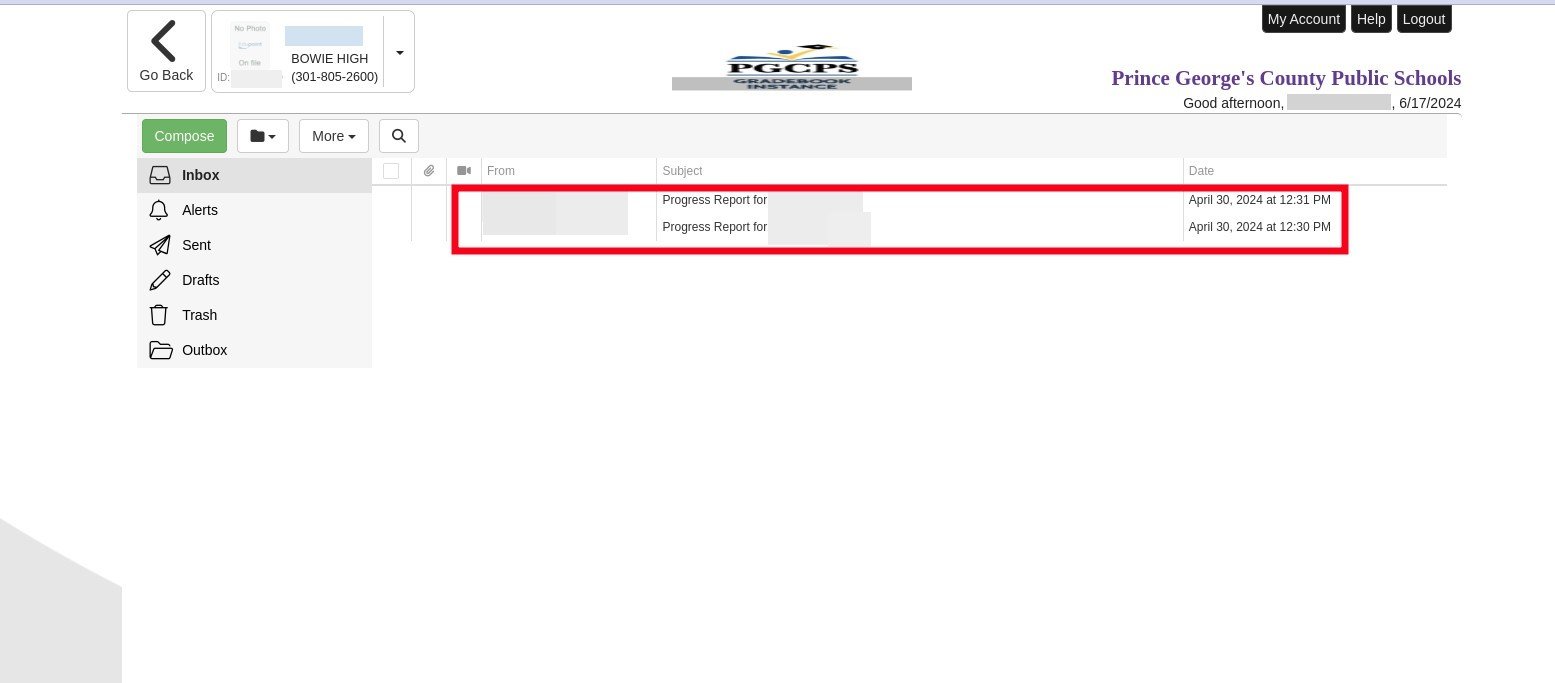
- Click a message to open it.
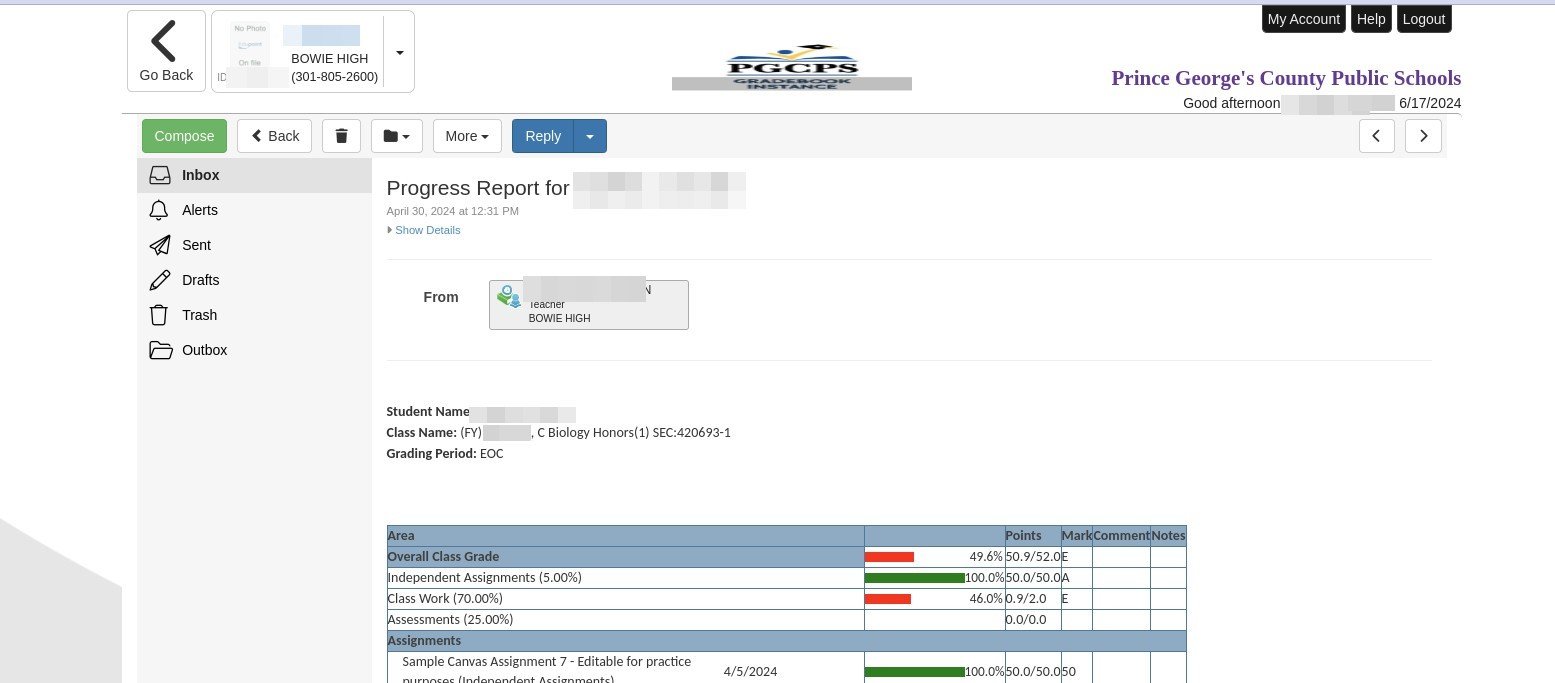
- Click Reply to respond to the message.
- Click the trash icon to delete the message.
- Click Compose to create a new message.
- Click Go Back to return to the main menu.
Calendar
The Calendar page displays the school events and holidays, as well as the student’s current schedule, all in a calendar format that can be viewed by Day, Week, or Month.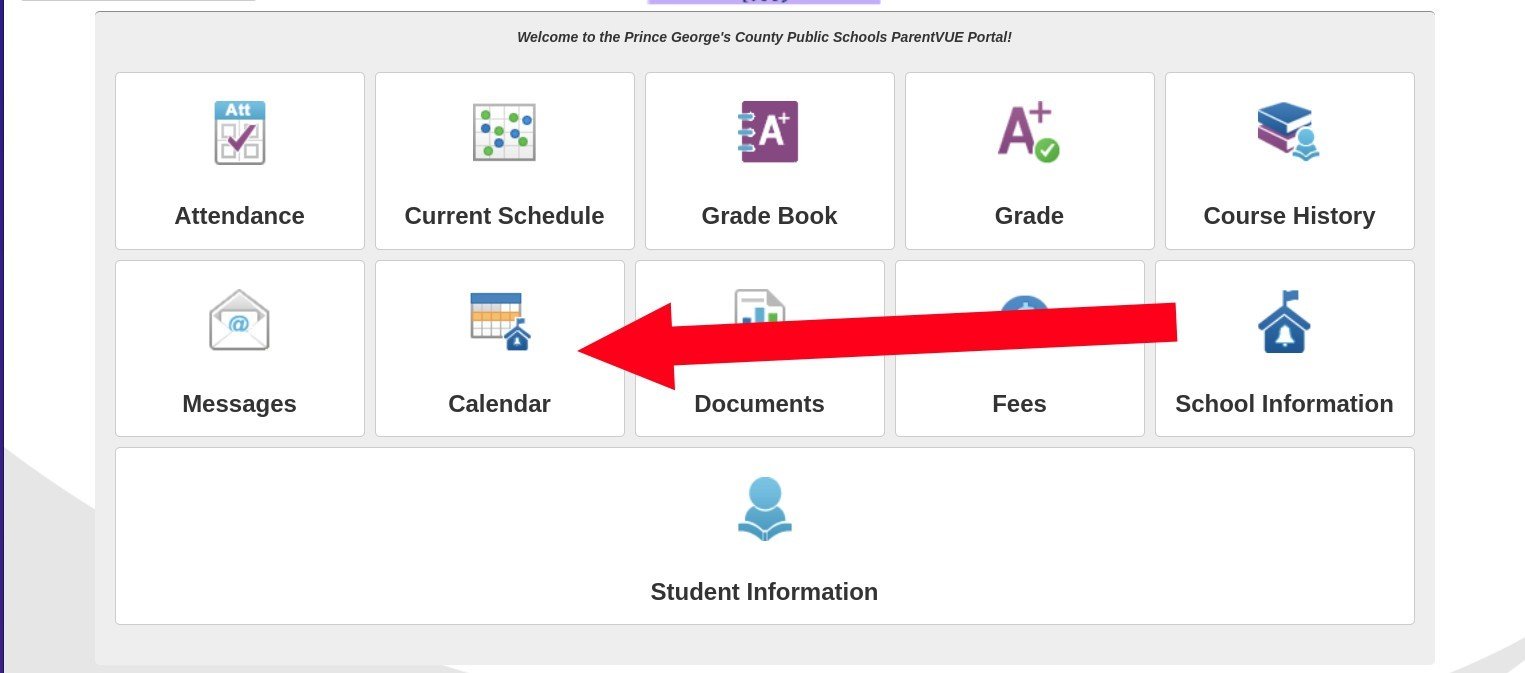
- Click Calendar.
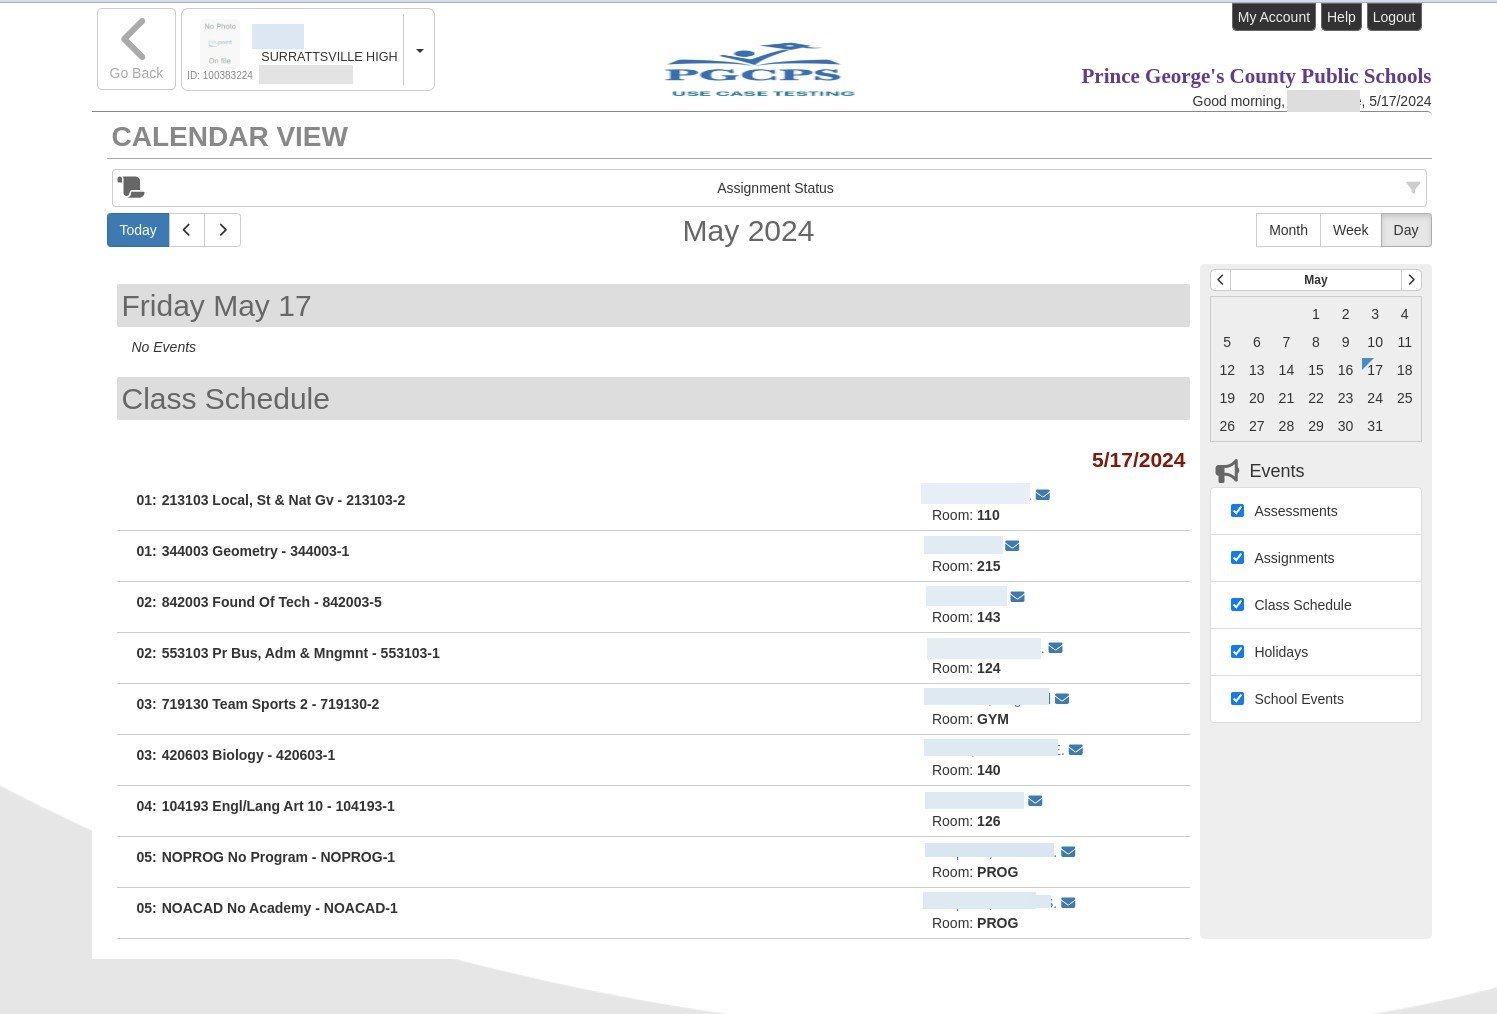
- If there are any school or district-wide events or holidays, they appear beneath today’s date.
- Below that is the same Class Schedule shown on the Current Schedule page.
- You can select another date, or switch to a different view on the calendar.
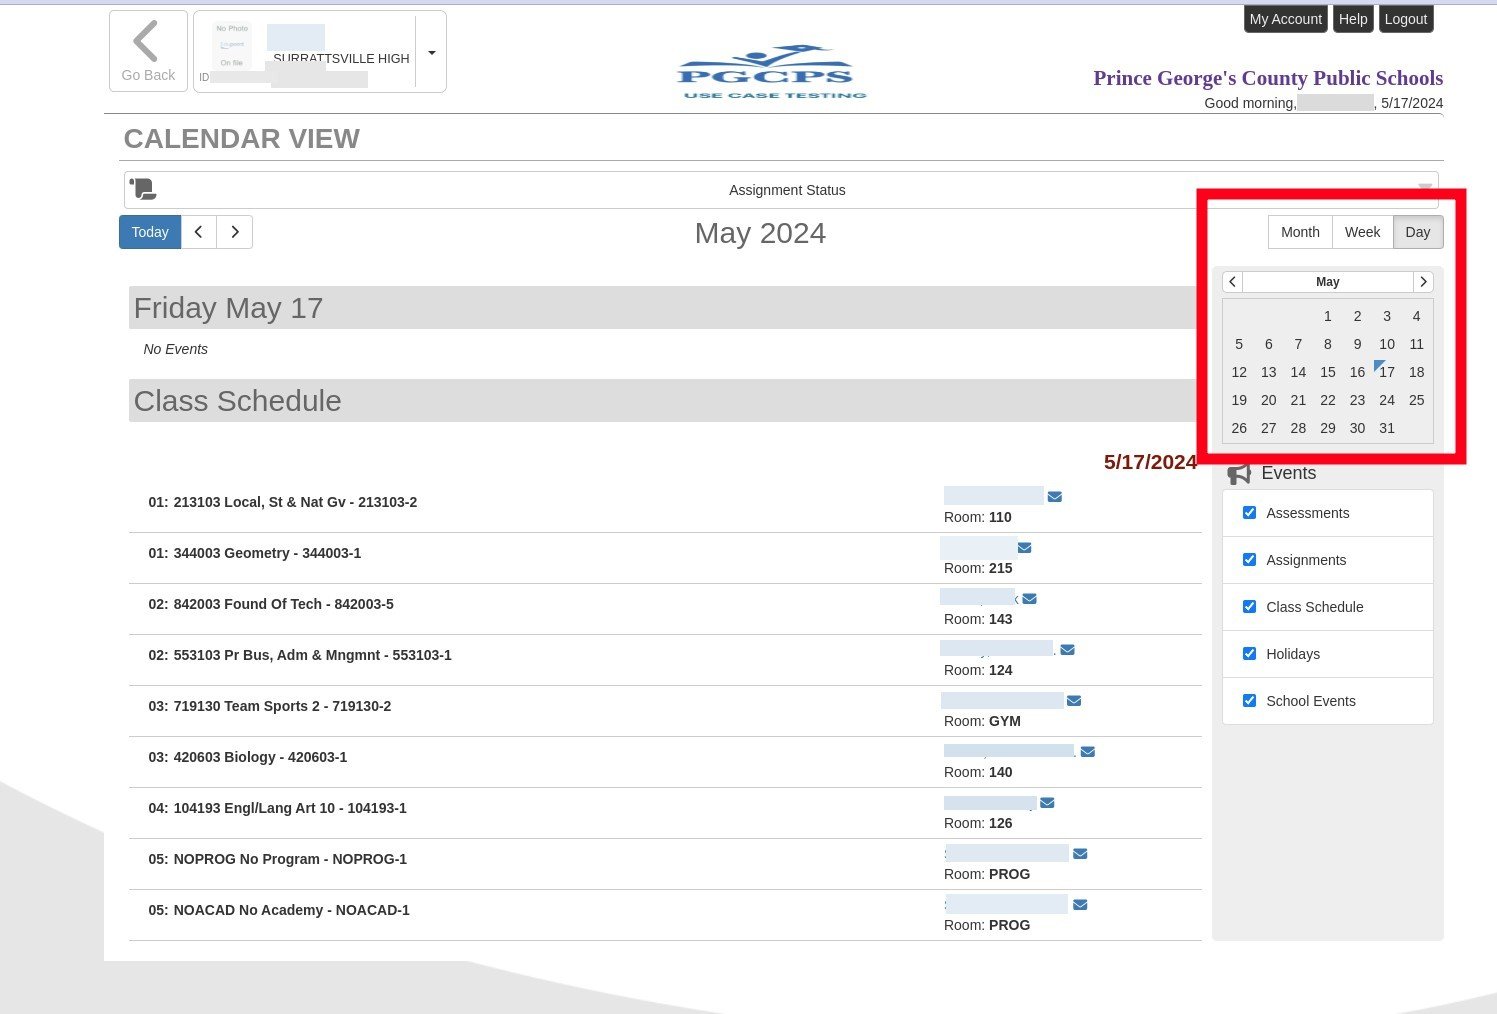
Documents
The Documents pages shows electronic files that have been uploaded to the student record.
- Click Documents.
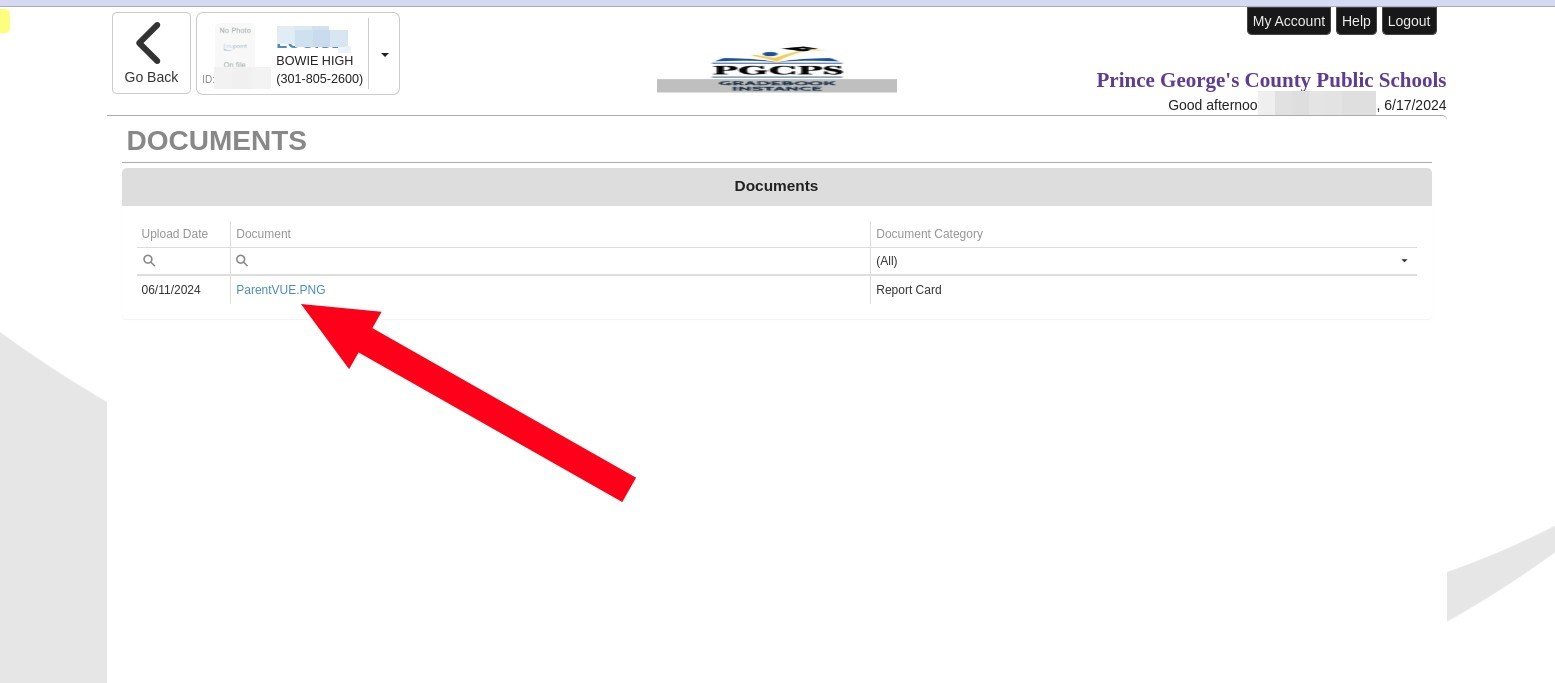
- Click a Document name to open the file.
- Click Go Back to return to the main menu.
Fees
The Fees page shows fees that have been changed to the student account. This includes both outstanding fees and paid fees.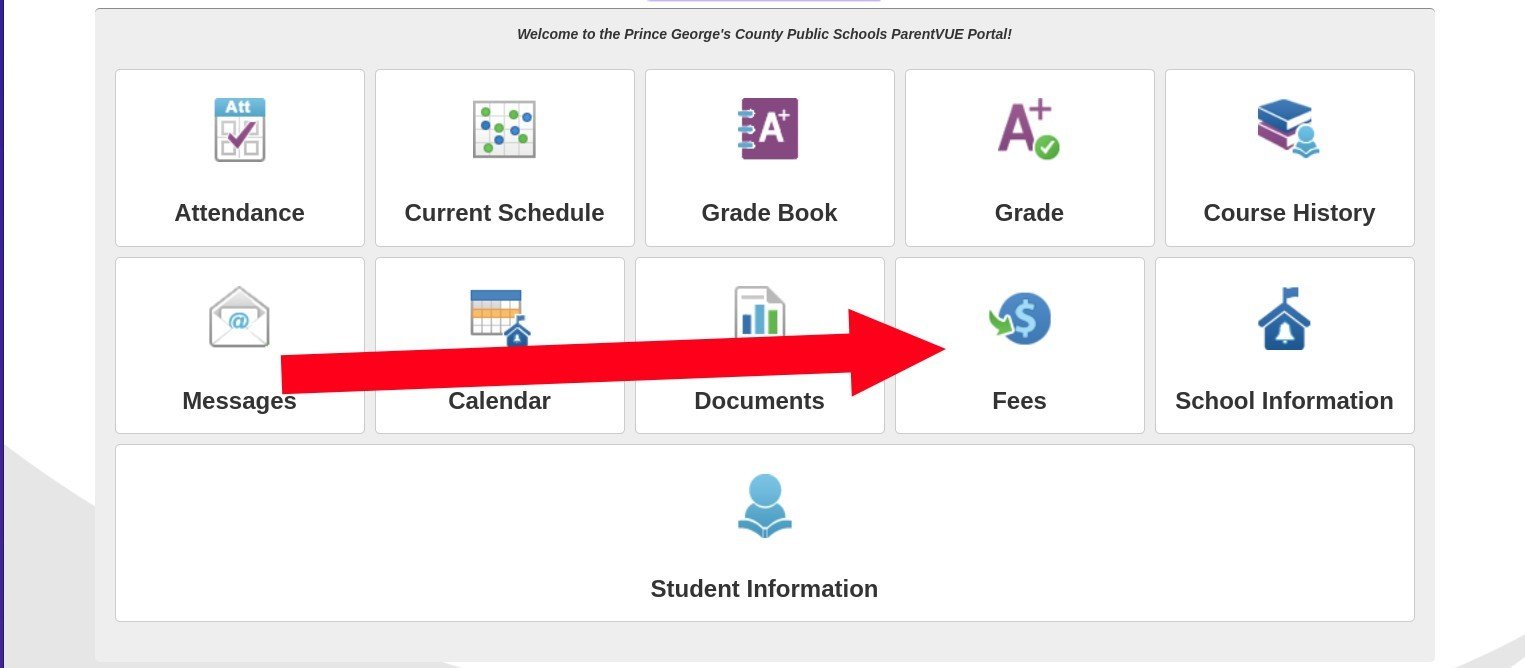
- Click Fees.
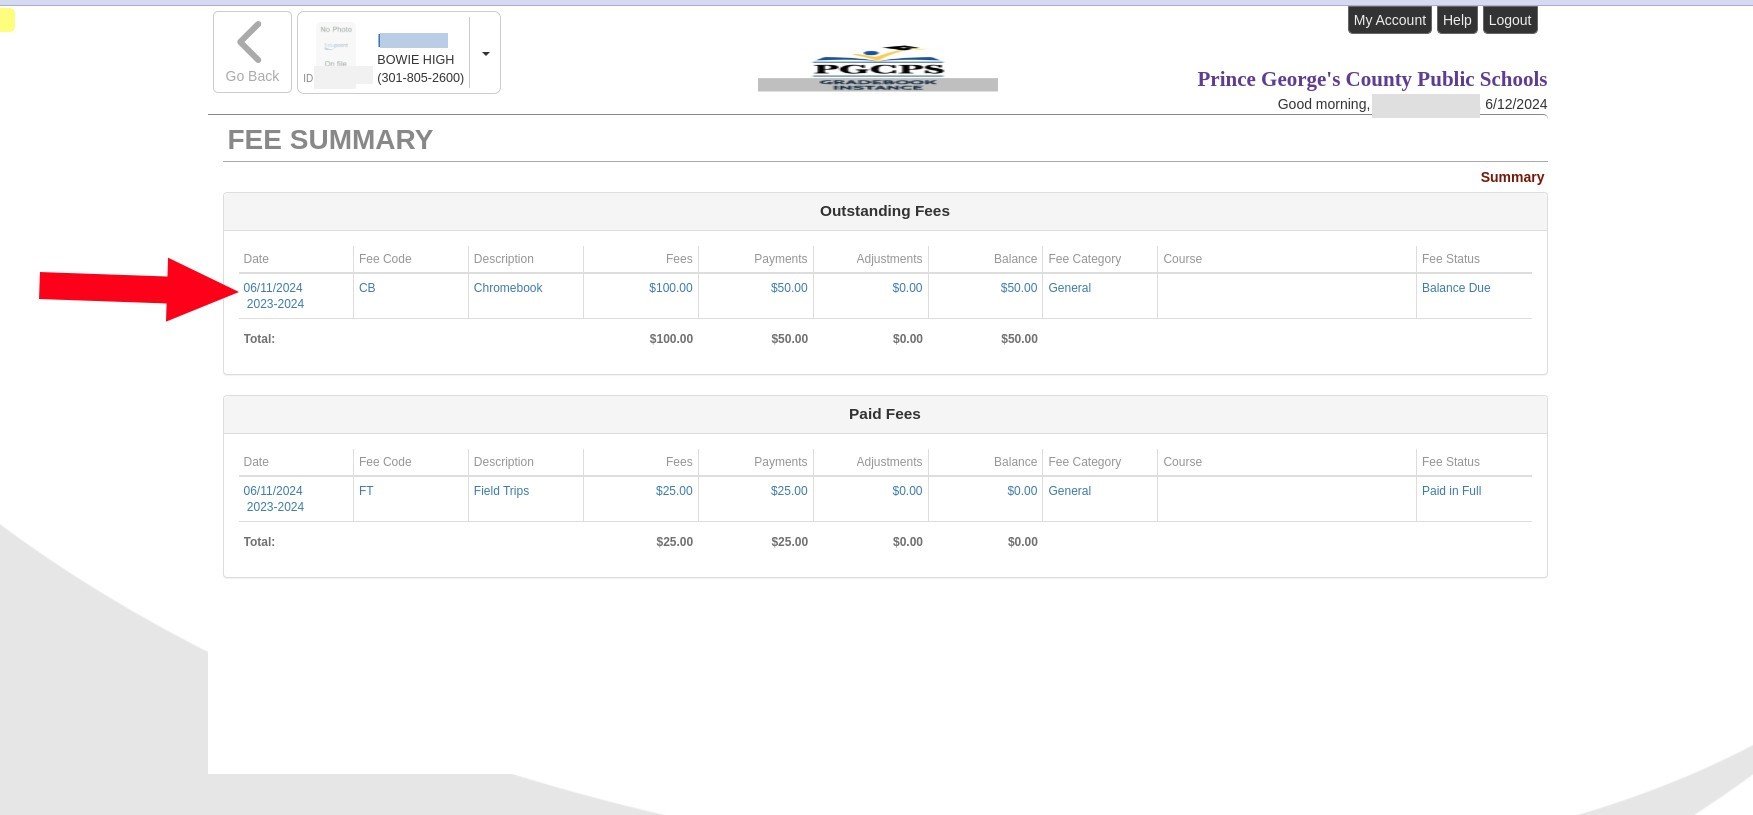
- Click a link to see details for a fee item.
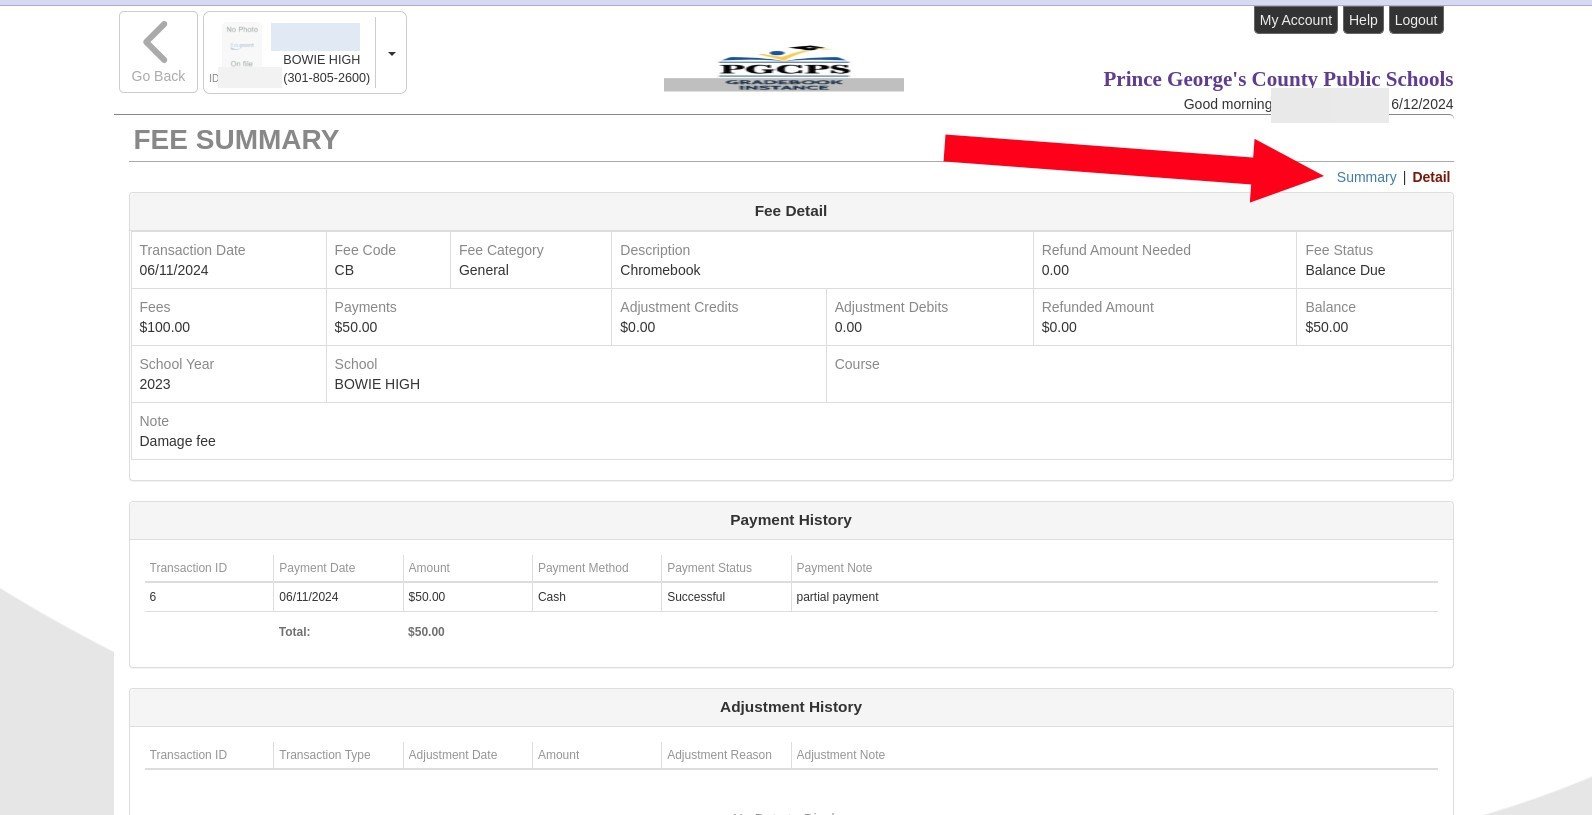
- Click Summary to return to the Fees summary page.
School Information
The School Information page shows the general contact information for the school where your student is currently enrolled.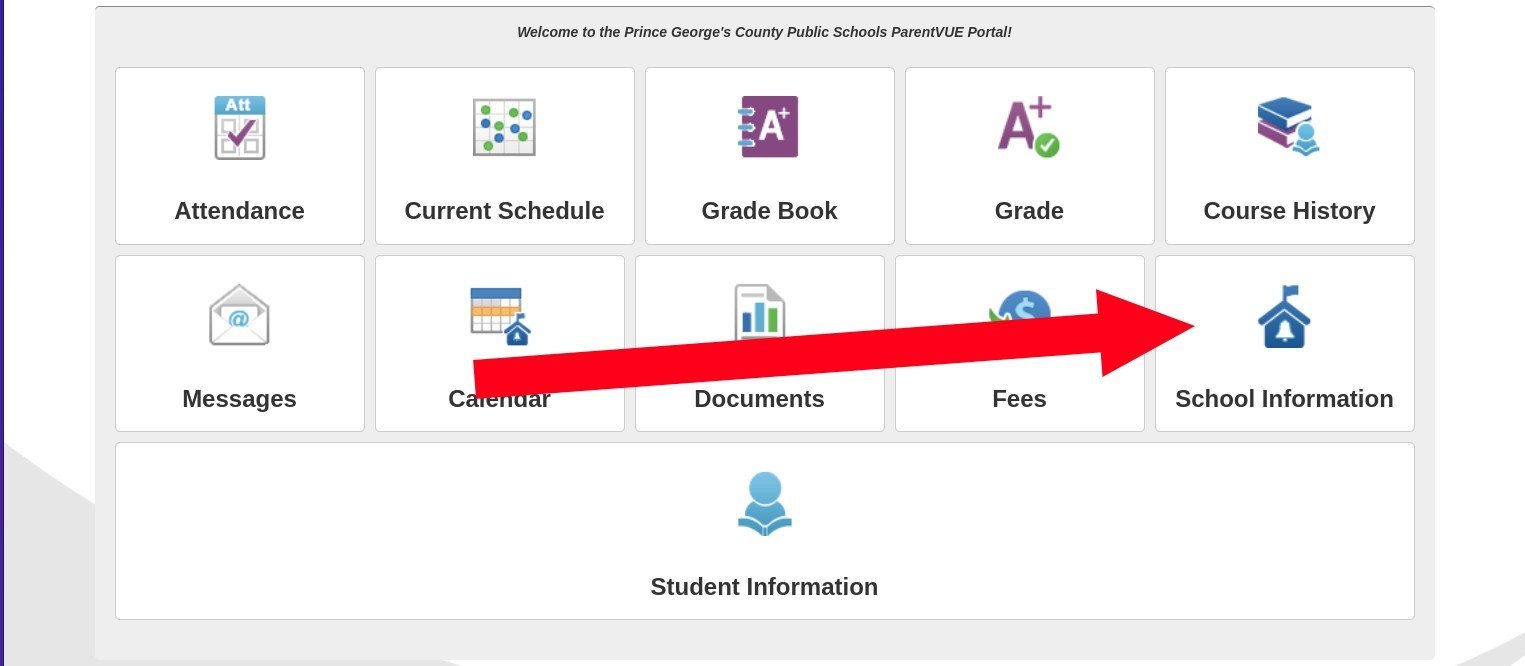
Student Information
The Student Information page displays general information about the student, such as ID number, emergency contact information, locker, and bus information.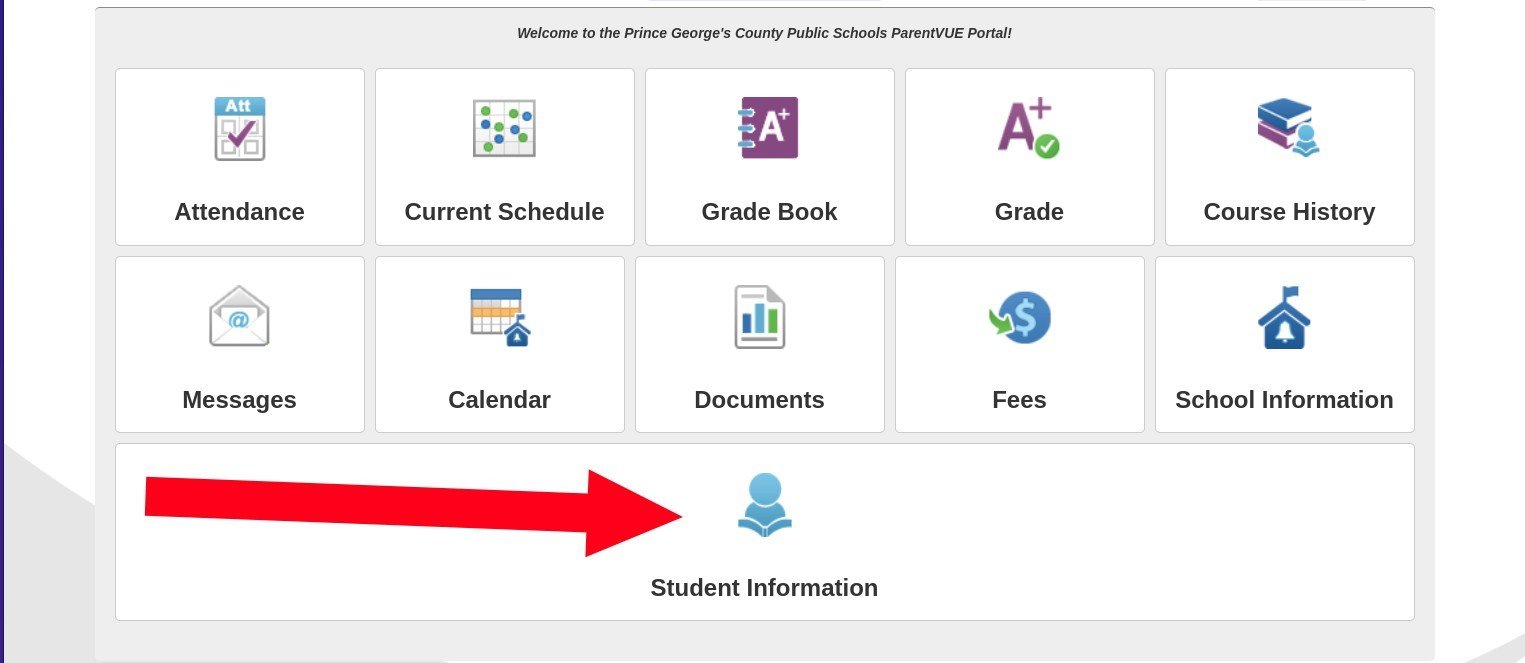
- Click Student Information.
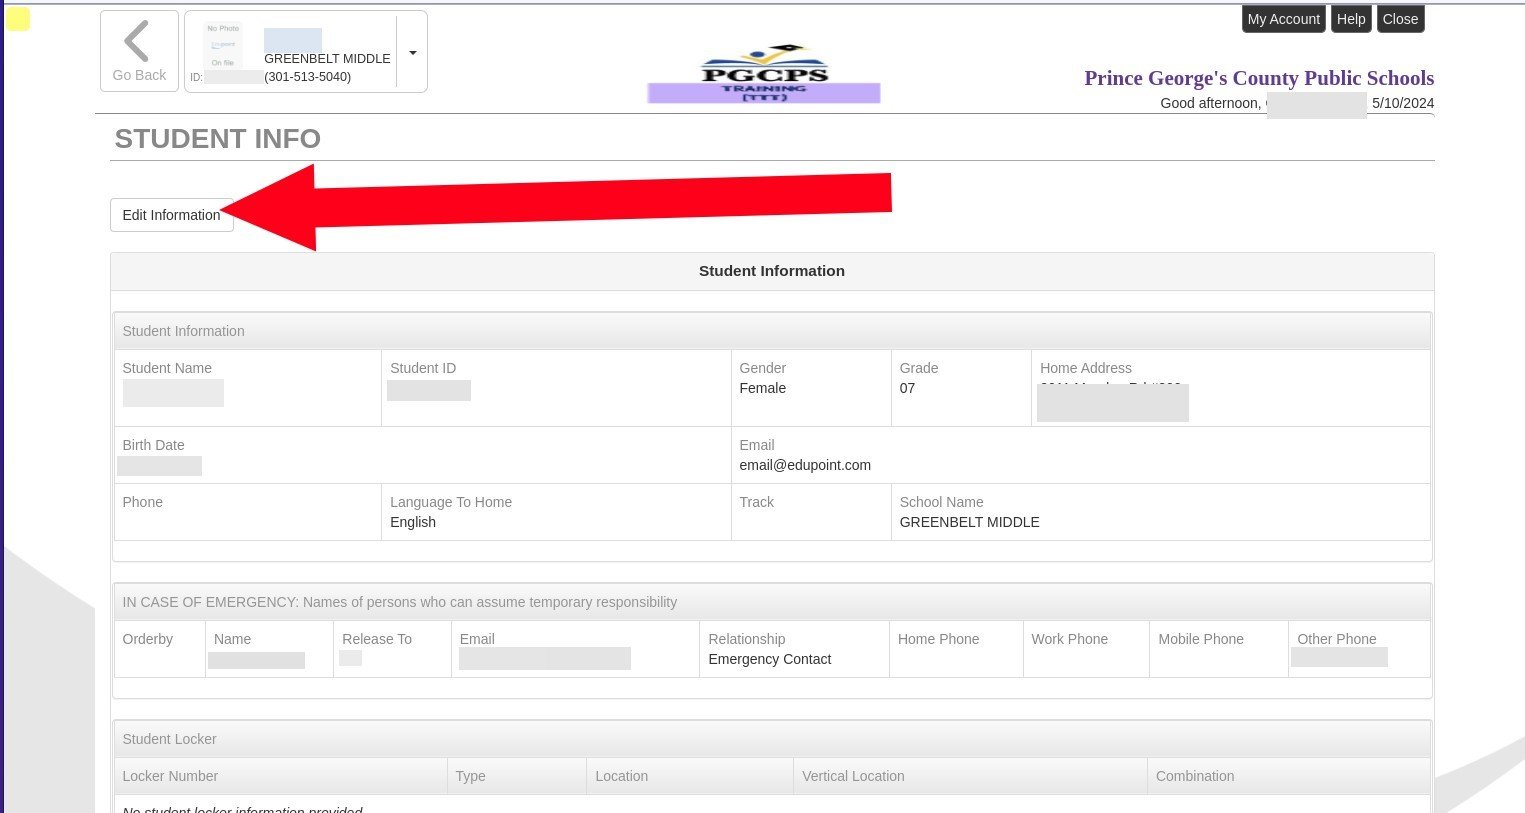
- To change the student’s preferred language or add additional contact information, including emergency contacts, click Edit Information.
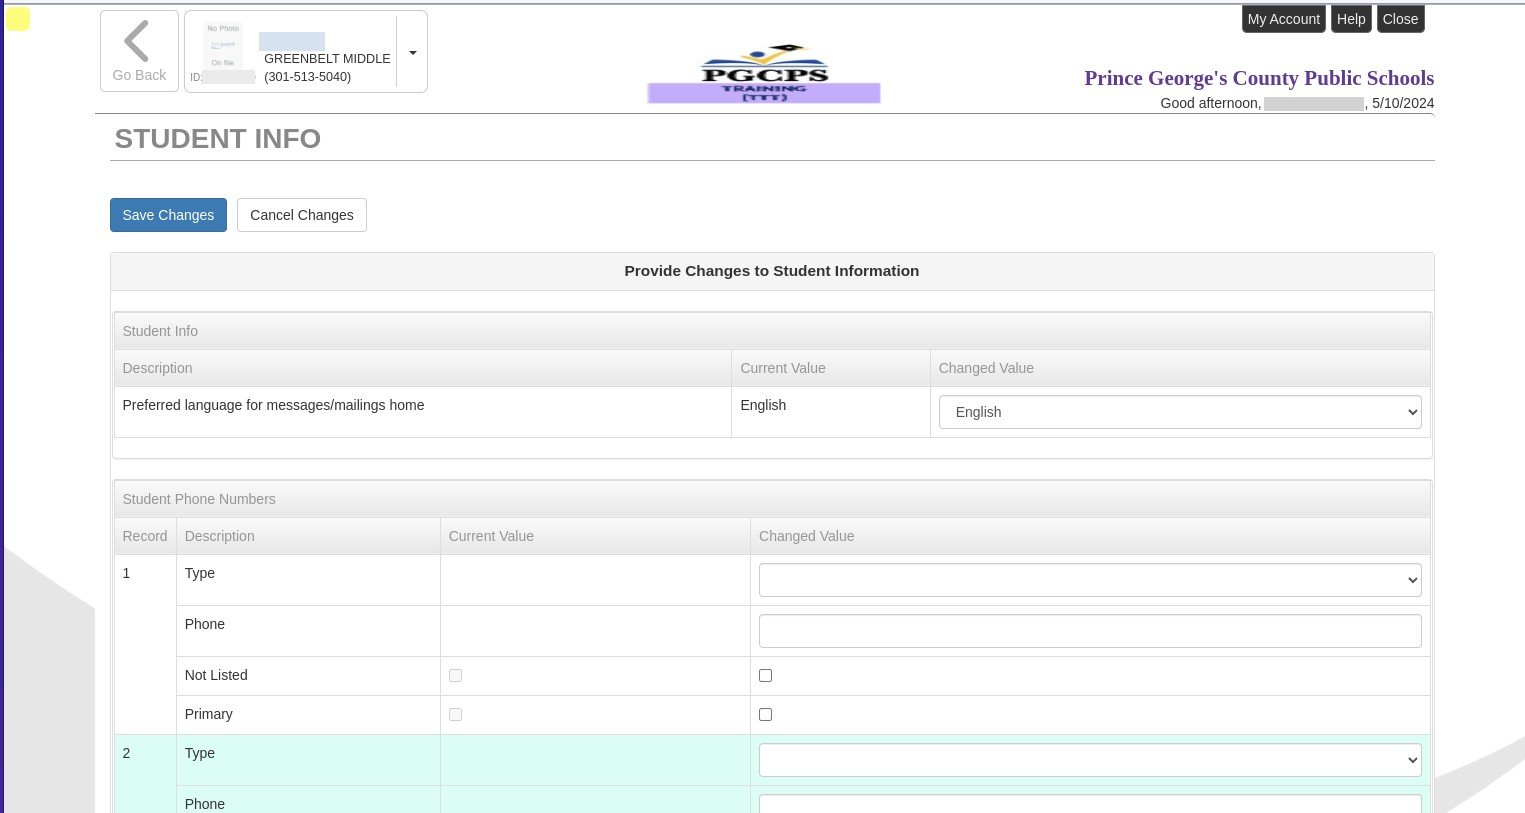
- When finished, click Save Changes.
- Click Go Back to return to the Portal page.
Switching Students
If you have more than one student associated with your parent account, you can switch between them on any page.
- Click the student record in the upper left corner.
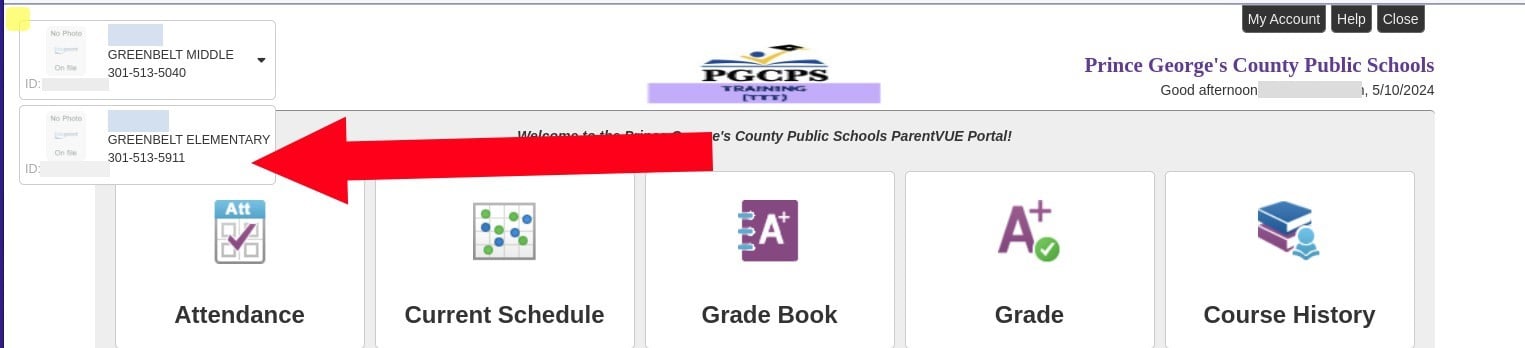
- Select the other student from the drop-down list.
Updating Your Account
You can update most information for your ParentVUE account, including language preferences and contact information.
NOTE: You cannot change your name, User ID, or Home Address in ParentVUE. To change that information, please contact the school where your student is enrolled.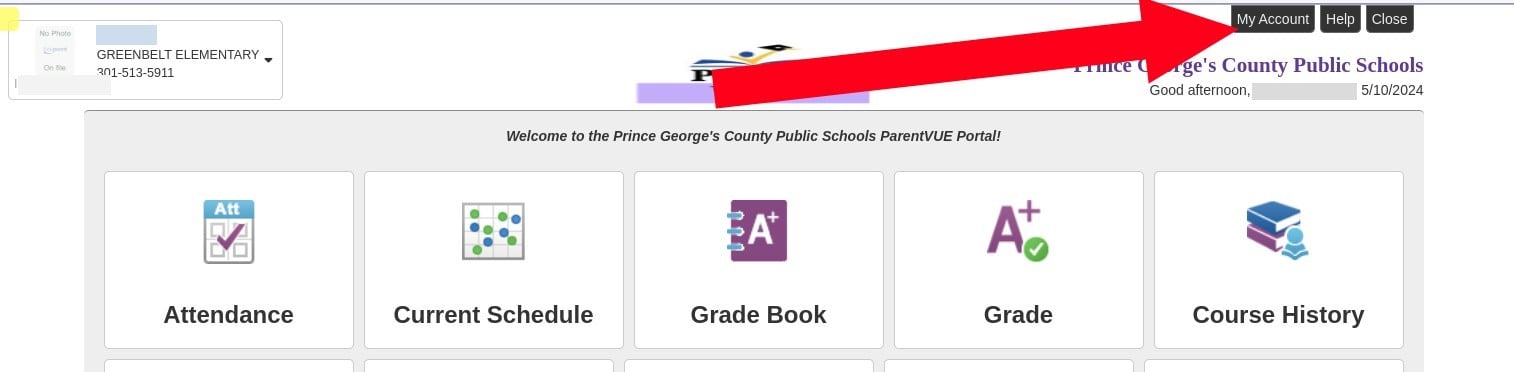
- Click the My Account tab in the upper right corner of the page.
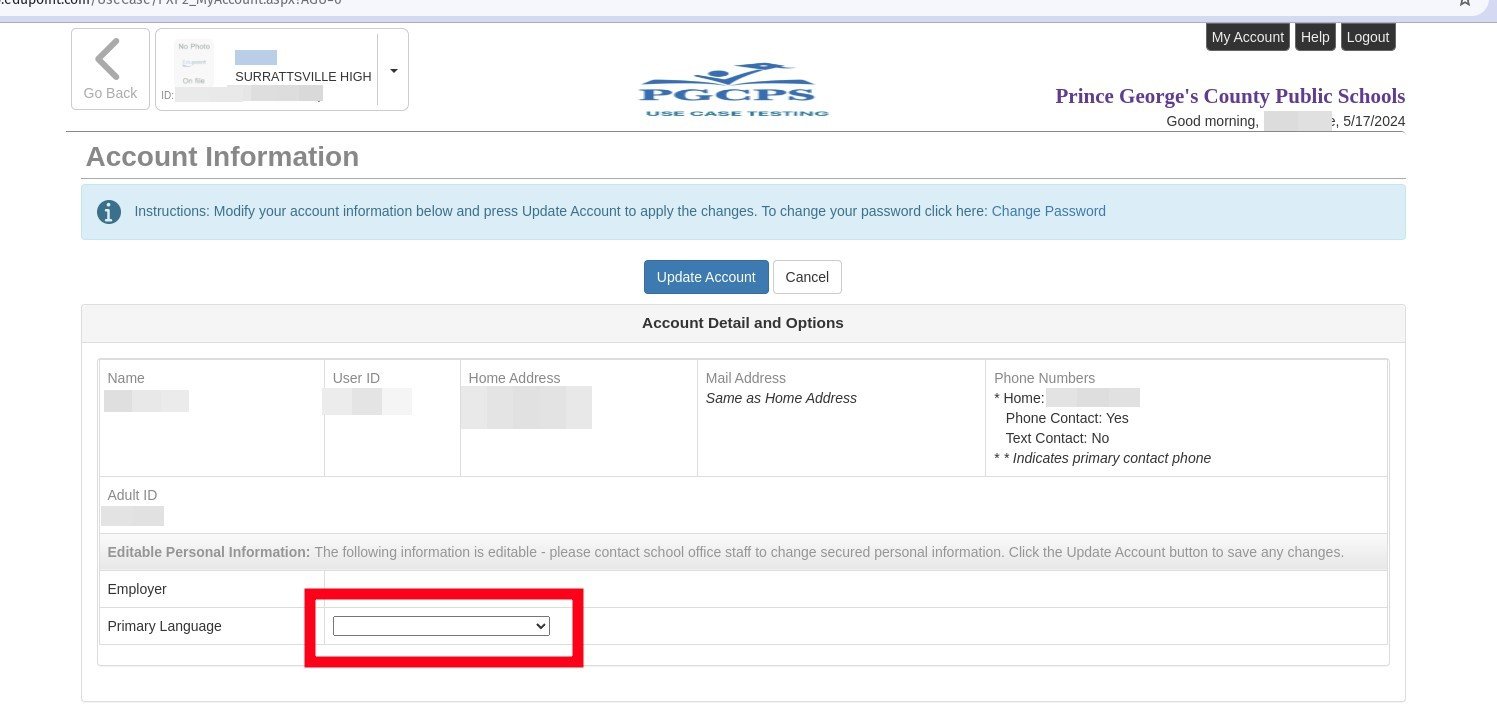
- To change the language you receive communication in, select your preferred language in the Primary Language dropdown list.
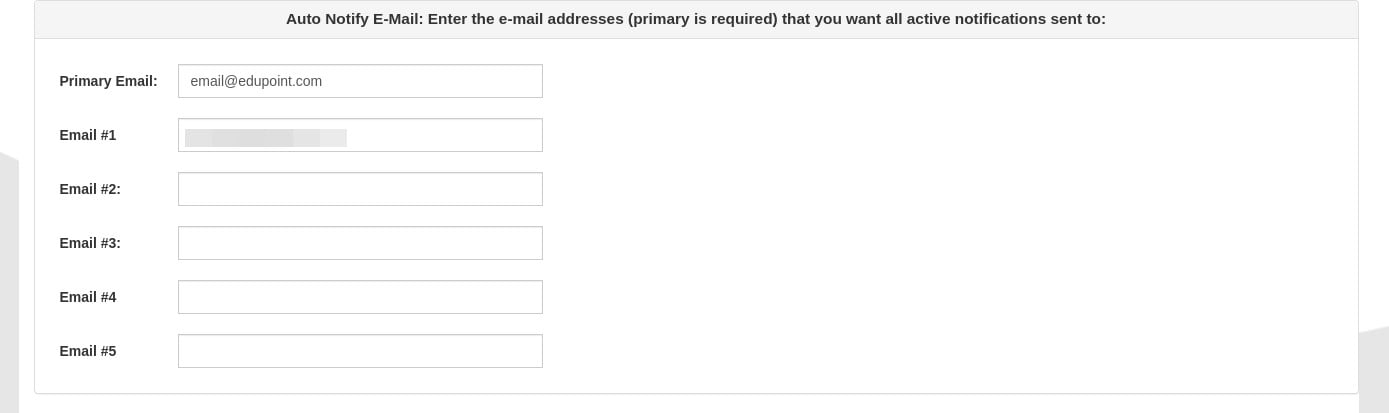
- You must have at least one email address on record, but you can add up to four more.

- To add a new phone number, click the plus (+) icon in the Phone Numbers section.

- The following can be added or changed:
- Delete - Remove an existing number.
- Primary - Indicates this is the number you prefer to be contacted You can only select one primary number.
- Type - Indicates the type of number (Home, Work, Mobile, etc).
- Phone - This is where you add the number.
- Extension - If your number requires an extension to be entered.
- Contact - Check this box if you want to be contacted at this number.
- Listed - Check this box if this number is publicly listed.
- Phone - Indicate whether you want to receive voice calls at this number.
- Text - Indicate whether you want to receive text messages at this number.
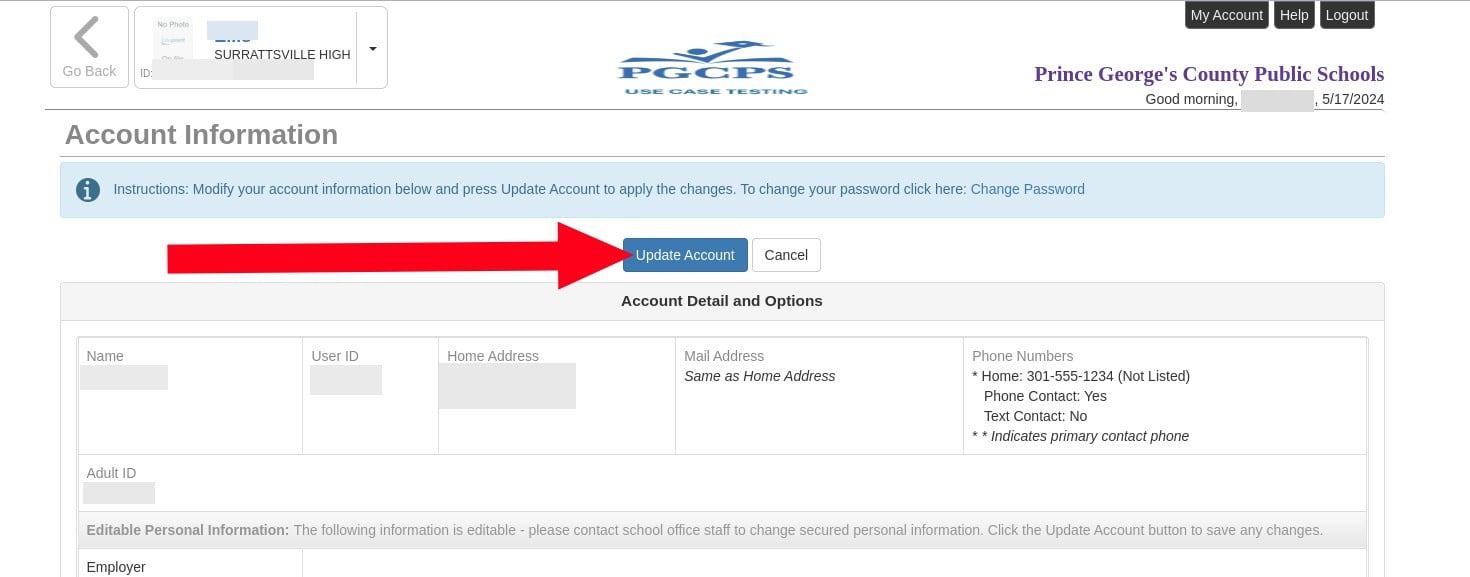
- Once you have finished entering or changing all the information for your parent account, click Update Account to save.
Troubleshooting
Duplicate Student Record
If your student has ever been enrolled in any school or program at PGCPS, they were issued a unique student ID. If you attempt to enroll them as a student who is new to the system, this results in duplicate student records. To maintain the integrity of student data, such duplicate enrollments must be deny. In most cases, the school system will locate and assign the original record to your account, if necessary, and send instructions on how to proceed.
The parent will receive the following message:
The application for @STUDENT has been denied because the student has already been issued a student identification number by Prince George's County Public Schools. Your parent account has been adjusted to resolve this issue. Please return to your ParentVUE account and resubmit a registration application for the student.
- Login to your ParentVUE account, as shown earlier in this guide.
- Click Online Registration.
- If the system prompts you to continue an existing enrollment, choose to start over instead.
Resetting Your Password
If you forget your password, you can reset it yourself as long as you still have access to the email account you used to create the account.
NOTE: If you enter the wrong password too many times in a row, your account is automatically disabled, and you will need to contact the ParentVUE administrator at your student’s school to re-enable it.
- Go to the PGCPS ParentVUE webpage.
- Click “I am an Existing Parent.”
- Click “I am a Parent.”

- Click Forgot Password.
- Enter your email address. It must be the same email address you used to set up your account.
- Click Send Email.

- You should receive an email message with information to reset your password. Check your SPAM or Junk folder if the email is not in your Inbox. Open the email message from noreply@pgcps.org with the subject “PGCPS ParentVUE Password Reset”.
- Click the link Click here to change password.
Disabled Account
Your account may become automatically disabled if:
- You attempt to login with the incorrect password too many times in a row.
- All students associated with your account are unenrolled.
If your account becomes disabled, you must contact the ParentVUE administrator at your student’s school.
Missing Students
If you do not see all your students listed in the student selection drop-down list, as shown earlier in the Switching Students section, you must contact the registrar at the missing student’s school to have this corrected.